Posted by Agent Kith on 08 Dec 2017 in Home Automation
How To Control Your Yeelight With Google Home And Home Assistant
Home Assistant Configuration
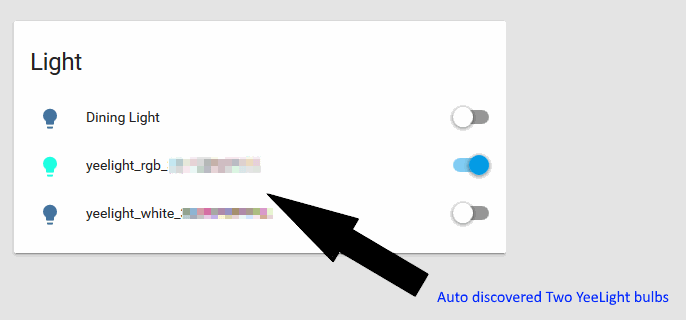
Once LAN Control is set to ‘ON’ the YeeLights will be auto-discovered by Home Assistant once they are joined to your WiFi network.

It may be wiser to rename these generic names to easier to remember names. You can change the names via ‘Customization’ in the ‘Configuration’ menu item to your left. However I find this approach tedious as you still have to use the generic names for your IFTTT applets. A better long term solution is to modify your configuration.yaml file instead.
- Go to your DHCP server (usually your modem router)
- Assign your YeeLights with a static IP address
- SSH to your Home Assistant machine, and modify the ‘configuration.yaml’ file
- Add the following entry.
light:
- platform: yeelight
devices:
192.168.0.15: # Change this to your bulb’s IP address
name: Music Light
transition: 1000
use_music_mode: False #(defaults to False)
save_on_change: False #(defaults to True) - Save the file and restart Home Assistant
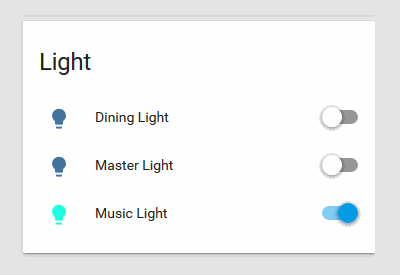
- Now go to your Home Assistant Overview. The old generic names will now be replaced by the names you’ve just assigned above.

- Try and turn off your lights from HomeAssistant. The lights should turn ON/OFF accordingly.
- Voice activation anybody? Let’s get your Google Home Assistant to control your YeeLights via HomeAssistant!
Advertising
About The Author
Founder and lead architect of Snakeoil OS - the ultimate audiophile operating system for music playback. My primary focus is in applying technology without losing the human touch.


