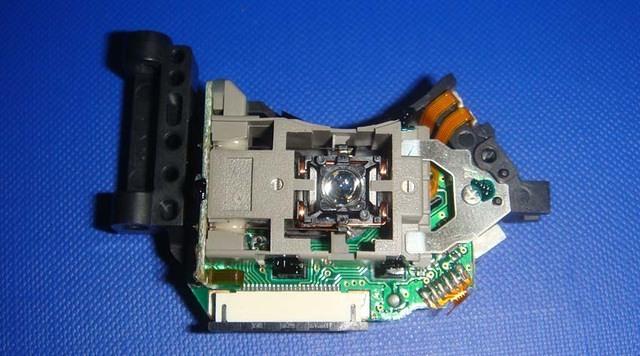
Success! Replacing laser on my Denon DVD-2930

I have a Denon DVD-2930. Used it primary for CD/SACD playback in my HT setup. And it works fine. The only drawback is that it couldn’t play DVD-Rs. After a few minutes the player will just freeze. The player is also very noisy in general. Updating the firmware improves stability but I’ve never got DVD-Rs to play. It’s not an issue for me because I don’t use it to play movies. But since I have too many DVD/SACD players. Why not chance it and try replacing the laser?
So in the end I’ve ordered two lasers from e-bay. Purchased a soldering station and a earth wrist strap from Jaycar. And went on replacing the laser.
With a new laser. I’m surprised that everything still works. Not only that, DVD-R discs seem to work now. And the unit is a lot quieter. So the minor hassle I had with DVD-R turns out to be an aging laser, a laser that’s in use for only 183hrs.![]() .
.
Follow the steps below to replace the laser.

Unscrewing the player and removing the optical unit is easy. Here are the steps I did (from memory) *:
- Eject CD tray.
- Power off and disconnect. Work on a clean table with a clean floor
- Remove top cover
- Remove RFI/EMI shield
- Remove DVD drive unit shield
- At the top of the DVD drive unit, there’s a plate with 2 screws. Remove them. This gives you room to remove the two rails/rods.
- The lower end of the left rail has a screw preventing you from lifting it up . Loosen that then move it out of the way.
- Lift the two metal rails up gently, and remove it carefully.
- There’s a small spring on the white lever gear. Make sure you don’t drop it while taking it out. This is very important!
- Earth yourself with the anti-static strip
- Remove old laser, and replace with new one
- Follow the above steps in reverse to refit the laser assembly. Ensure the spring in the white level wind gear is still in place.
- Manually slide the laser head up and down the rails to check that everything is moving smoothly.
- Start your soldering iron and remove the shorting solder on the optical laser head.
- Refit the DVD cover, the EMI/RFI shield, and the top cover.
- Turn on the unit, go to test mode, and save the the lasor units (refer to the service manual).
- Save the new values. (This will give you a reference as to when the optical unit requires replacing again.)
- Reset the laser hours. (Keeps track of how many hours before the laser dies again)
- Reinitialise the player (it wouldn’t play CD properly without this step)
- Enjoy!
I’ve no idea if it’s correct to go into Test Mode and reset the laser numbers. But I did that anyway and everything seemed to work. You must reinitialise the player after resetting the values. Else it will not play anything at all. Refer to the service manual on how to get into test mode, how to read the laser values and how to save them.
The new laser’s value is 3025 for me, but I assume every laser unit is different. Time will tell how long this second. For a $10 AUD part, not that bad..
* Disclaimer: Of course you are doing this totally at your own risk! I am not responsible for any damage to yourself or your property.
[This article is lifted from my old blog]
Hi Ak, you where really brave…….
i have several laser replacements for my Wadia’s cdp, but i do not think i am able to replace one of them…..finger-cross until something happens
and using snakeoil cdp are no longer in use!!!!!