Using Audyssey MultEQ Editor On The Marantz AV8805

For better or worse, it seems D+M have moved away from the Audyssey Pro Kit and is moving towards a more generic solution to Audyssey tweaking. This is their latest creation, the Audyssey MultEQ Editor. Available on Android and iOS.
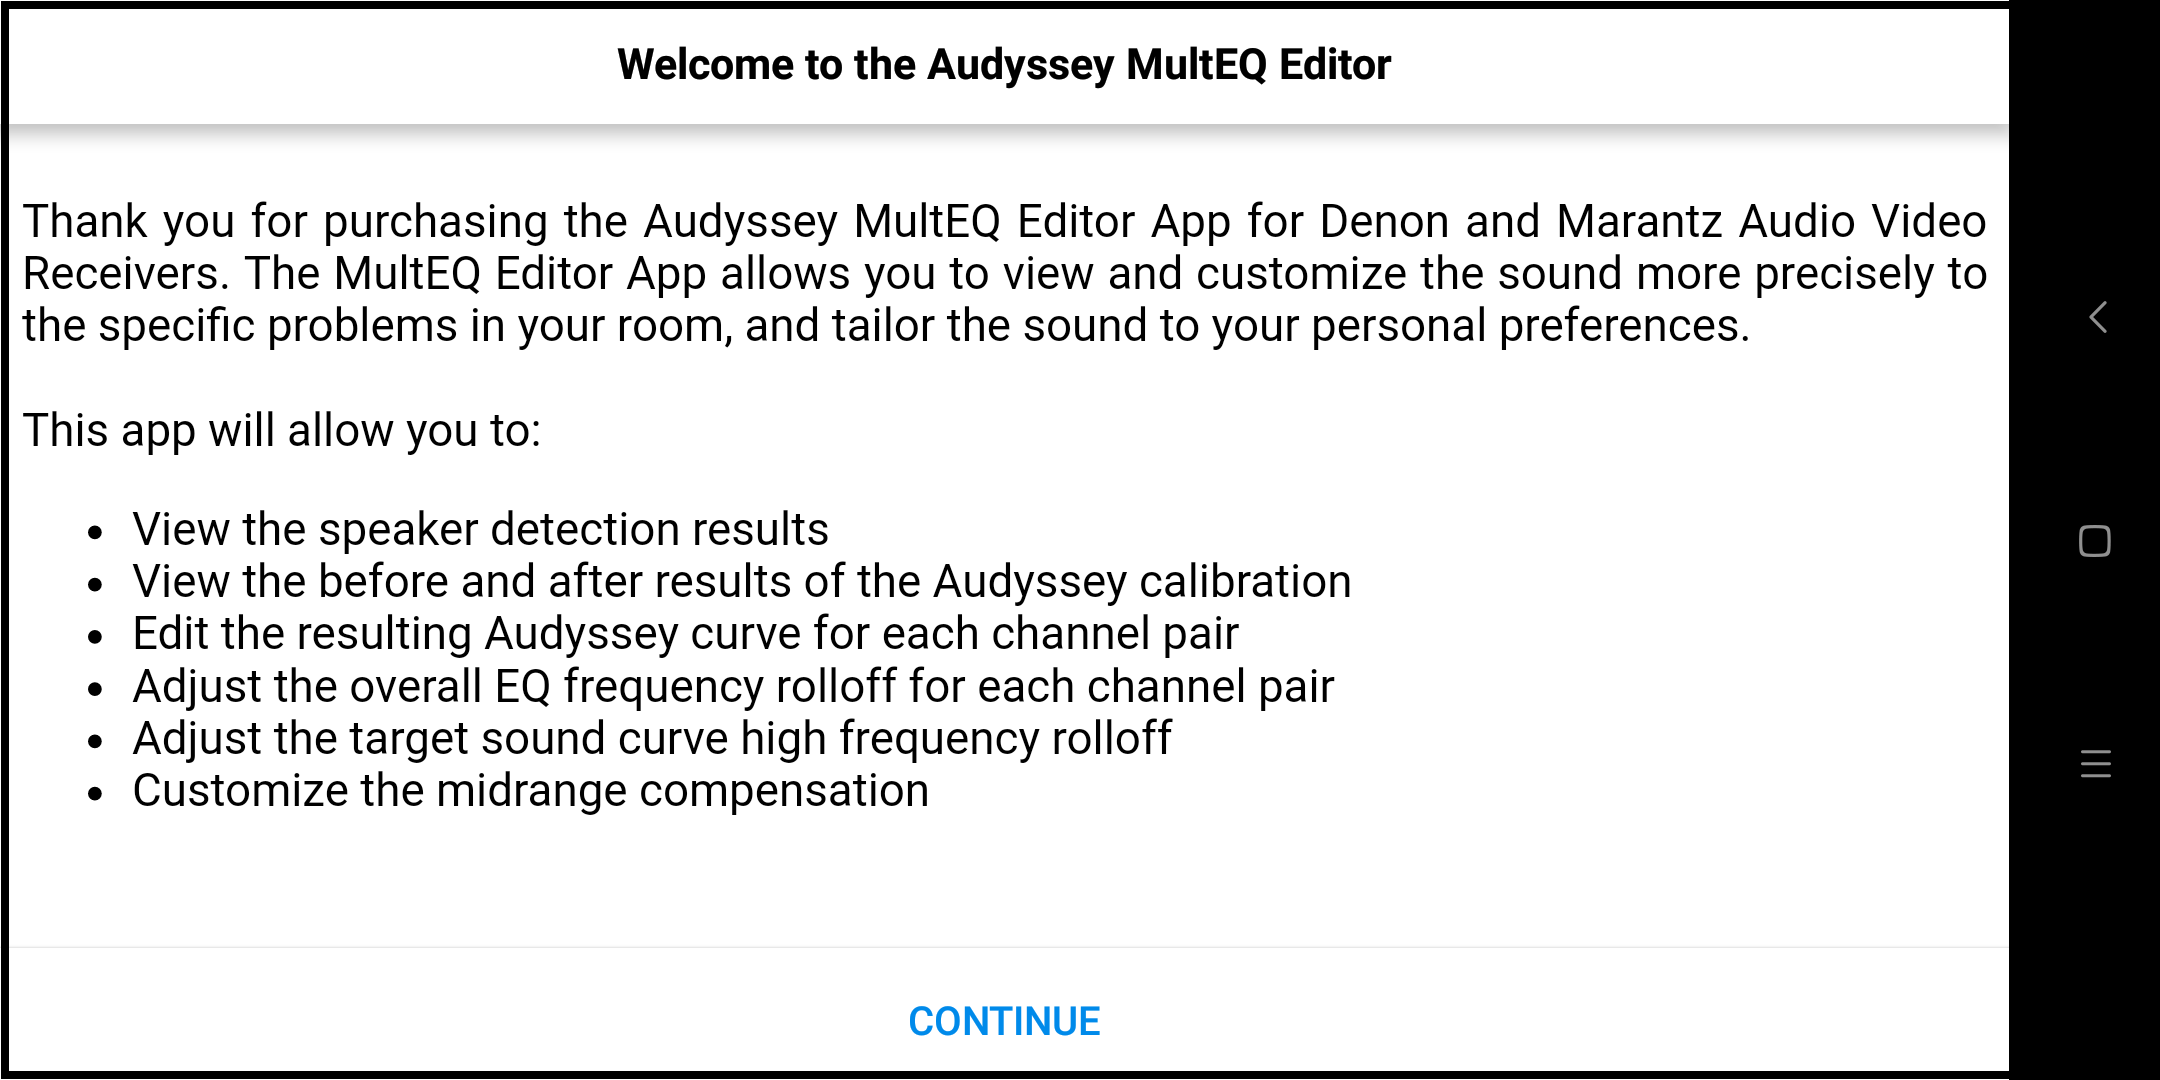
At AUD$30.99 it's one of the more expensive Android Apps out there. This app allows you to:
- View the speaker detection results, to check correct installation
- View before and after results of the Audyssey calibration, making it easy to identify room problems.
- Edit the Audyssey target curve for each channel pair to suit your tastes
- Adjust the overall EQ frequency roll off for each channel pair
- Switch between 2 high frequency roll off target curves
- Enable/Disable midrange compensation to make the sound brighter or smoother
- Save and load calibration results
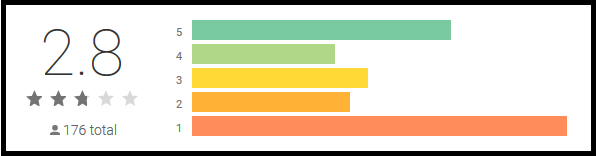
At time of writing, this app has a rating of 2.8 on Google Play (Based on 175 reviews). There are 59 1 star reviews. Should you get this APP given the price and the reviews? Read on to find my take.
Receivers Supported By The Audyssey MultEQ Editor
The MutliEQ app only works on the following receivers for now:
| Denon | AVR-X6300H, AVR-X4300H, AVR-X3300W, AVR-X2300W, AVR-X1300W, AVR-S920W, AVR-S720W, AVR-S930H, AVR-S730H, AVR-X1400H, AVR-X2400H, AVR-X3400H, AVR-X4400H, AVR-X6400H, AVR-X8500H, AVR-S740H, AVR-S940H, AVR-X1500H, AVR-X2500H |
|---|---|
| Marantz | AV7703, SR7011, SR6011, SR5011, NR1607, NR1608, SR5012, SR6012, SR7012, SR8012, AV7704, AV8805, NR1609 |
I am running the MultEQ editor with my XiaoMi MiMix 2. This device has plenty of CPU grunt, free space and RAM and I am happy to say this app works beautifully. No problems at all when it comes to finding my 8805, analysing or uploading the profiles.
This app is where you will be doing all your Audyssey calibrations from henceforth. If you are taking 8 measures from the same position, you can do it all now via this app. Gone are the days where you will have to stay in room to press that 'OK' button to move to the next phrase.
While this app works for me, note that it is not a guarantee you will not experience problems or difficulties. To give you a better chance of success:
- Update your receiver to the latest firmware before purchasing this app.
- Make sure you have enough free space on your android device
- Ensure you have good WIFI reception
- Reboot the phone before starting MultEQ Editor
Should there be a problem, you can uninstall the app within 15 (or 30 minutes?) to get a full refund.
As always comment below when you have difficulties and I will try and help where I can.
Installing Audyssey MultEQ Editor
Installing the app requires a purchase from the store (Play store on Android or iTunes on iOS). Click on the 'Buy' button, and proceed with payment. Install this app on your tablet if you have one.
Once installed. Run the app and and you'd get a brief introduction.
Click 'ACCEPT' to get past the end user license agreement (EULA).

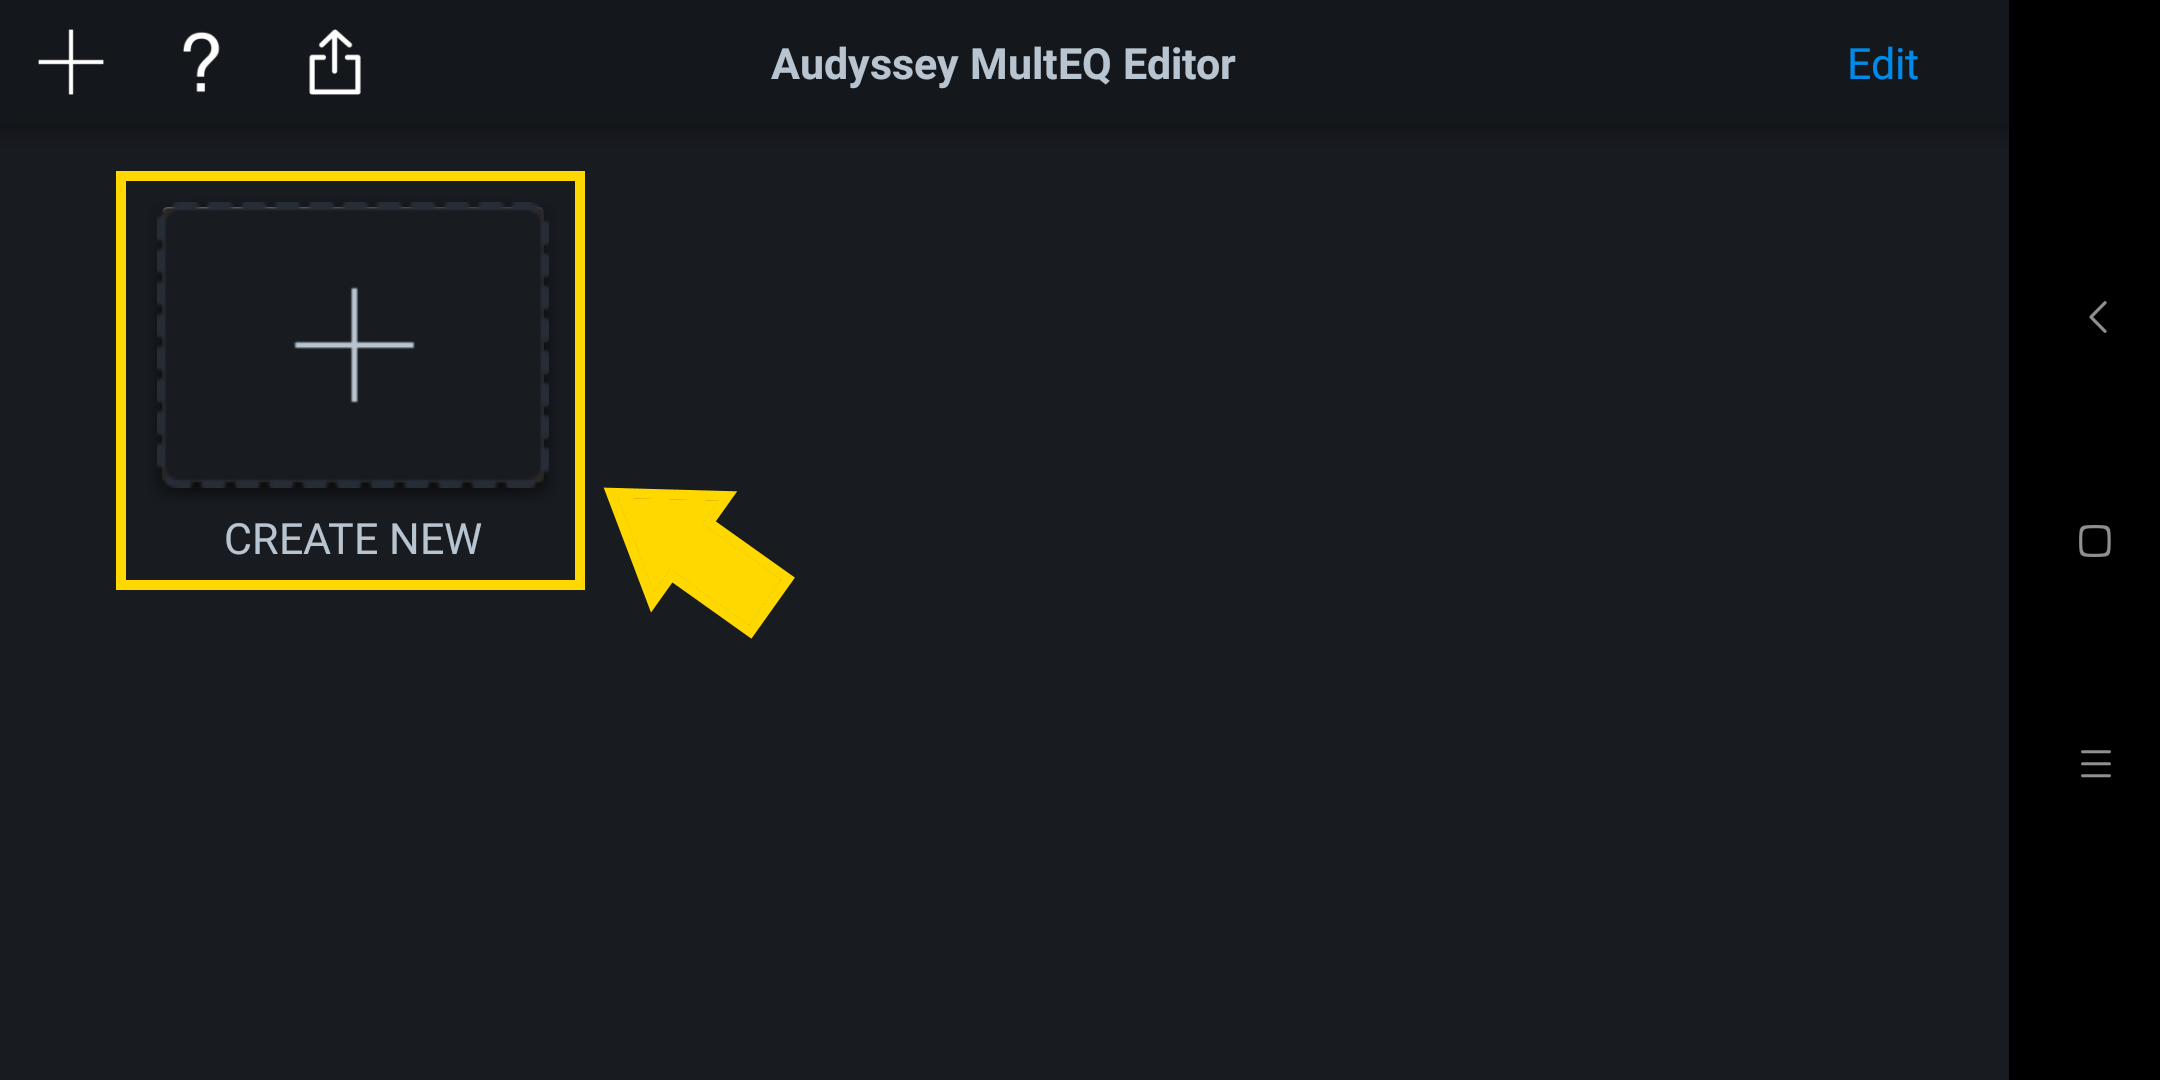
And you're in business. Check your AV8805 is already connected to your network and powered up. Connect the measurement mic to the AV8805 and put it at the first listening position.
Click the 'Create New' icon when ready.
Calibration
Auto-discovery should work and you will see your AV8805 in the list. If nothing shows up tap the grey bar below and enter the IP of your receiver manually (you can get this from the AV8805 GUI). Tap on the receiver to begin.

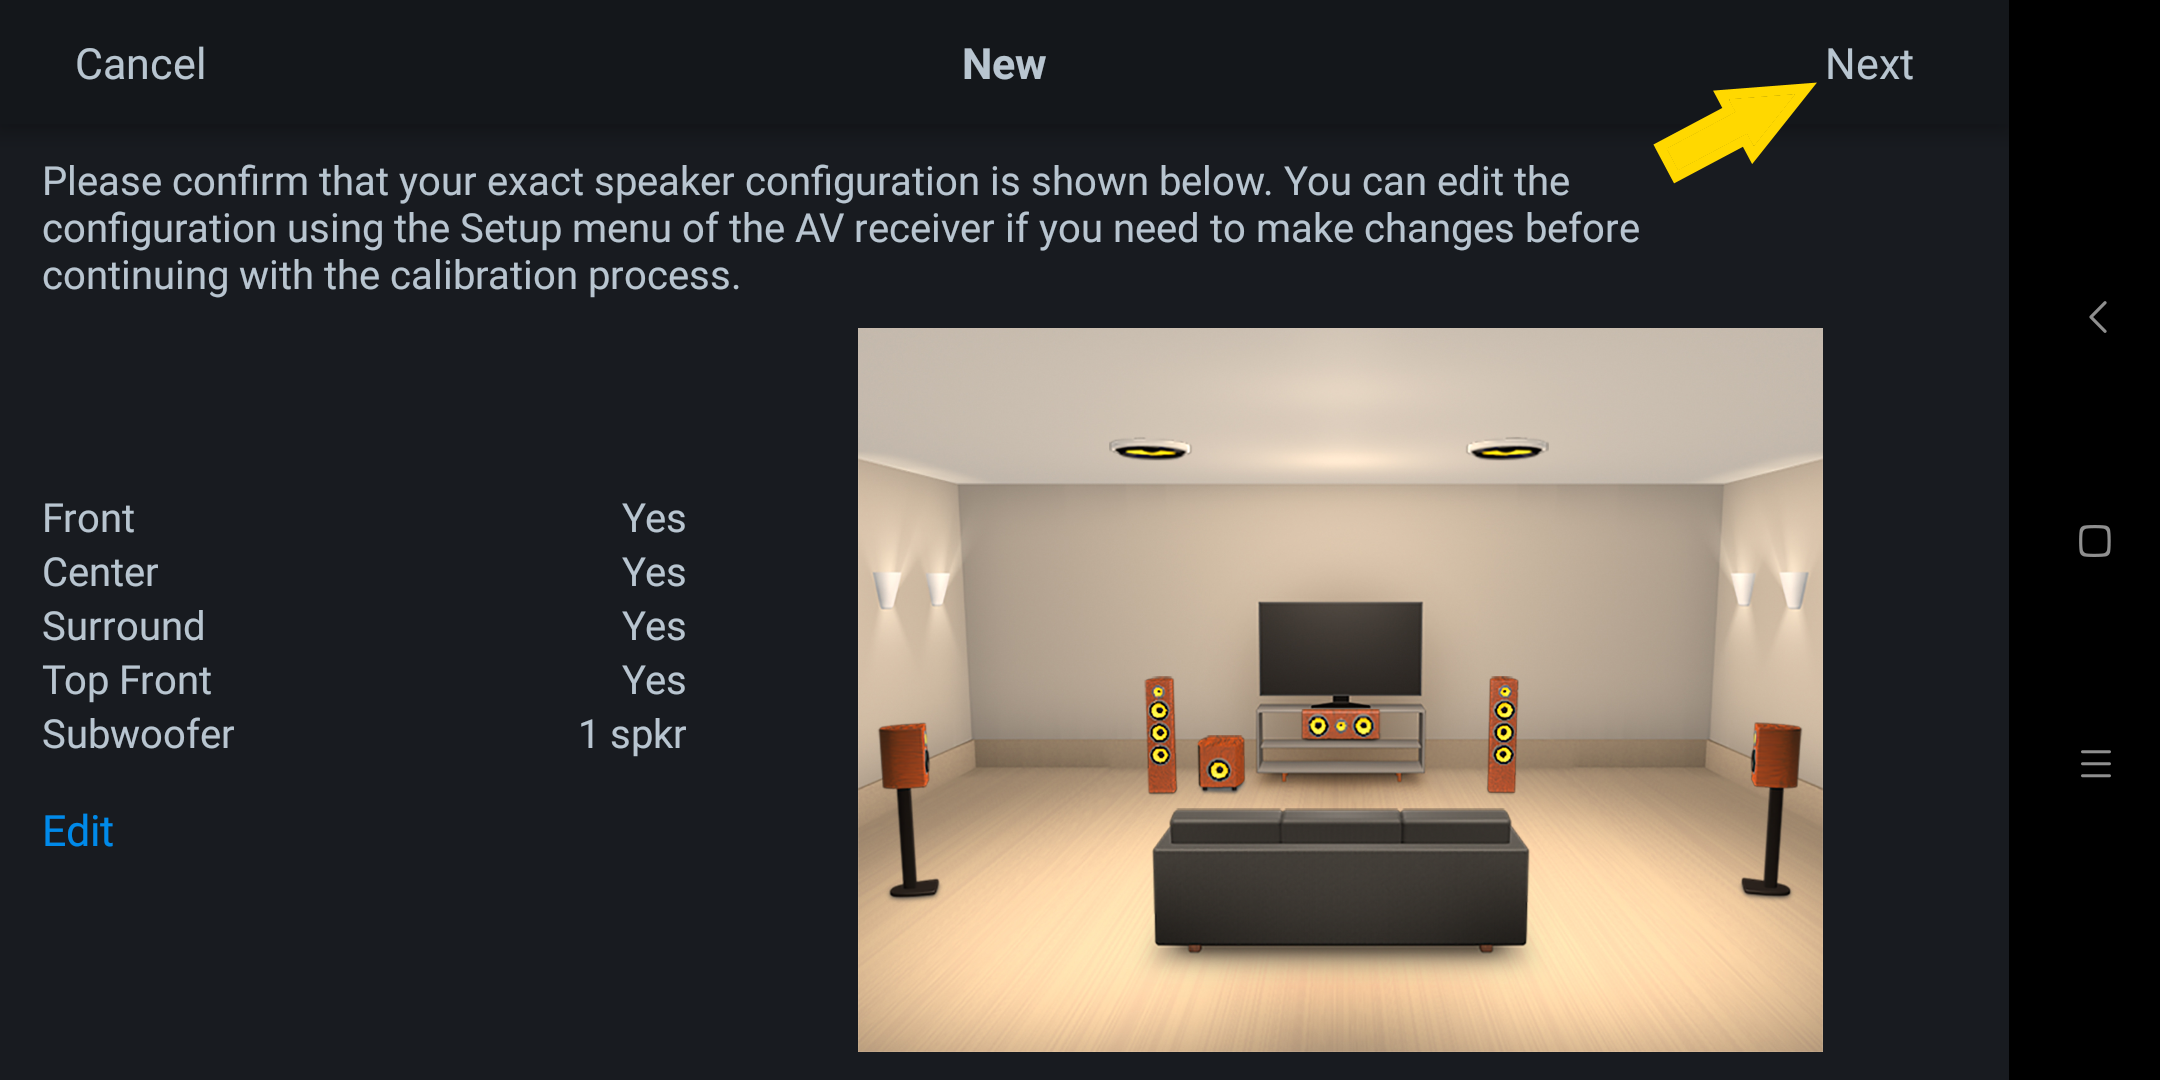
MultEQ now shows you the speaker setup as configured on the receiver. Click 'Next' to begin.
Calibration
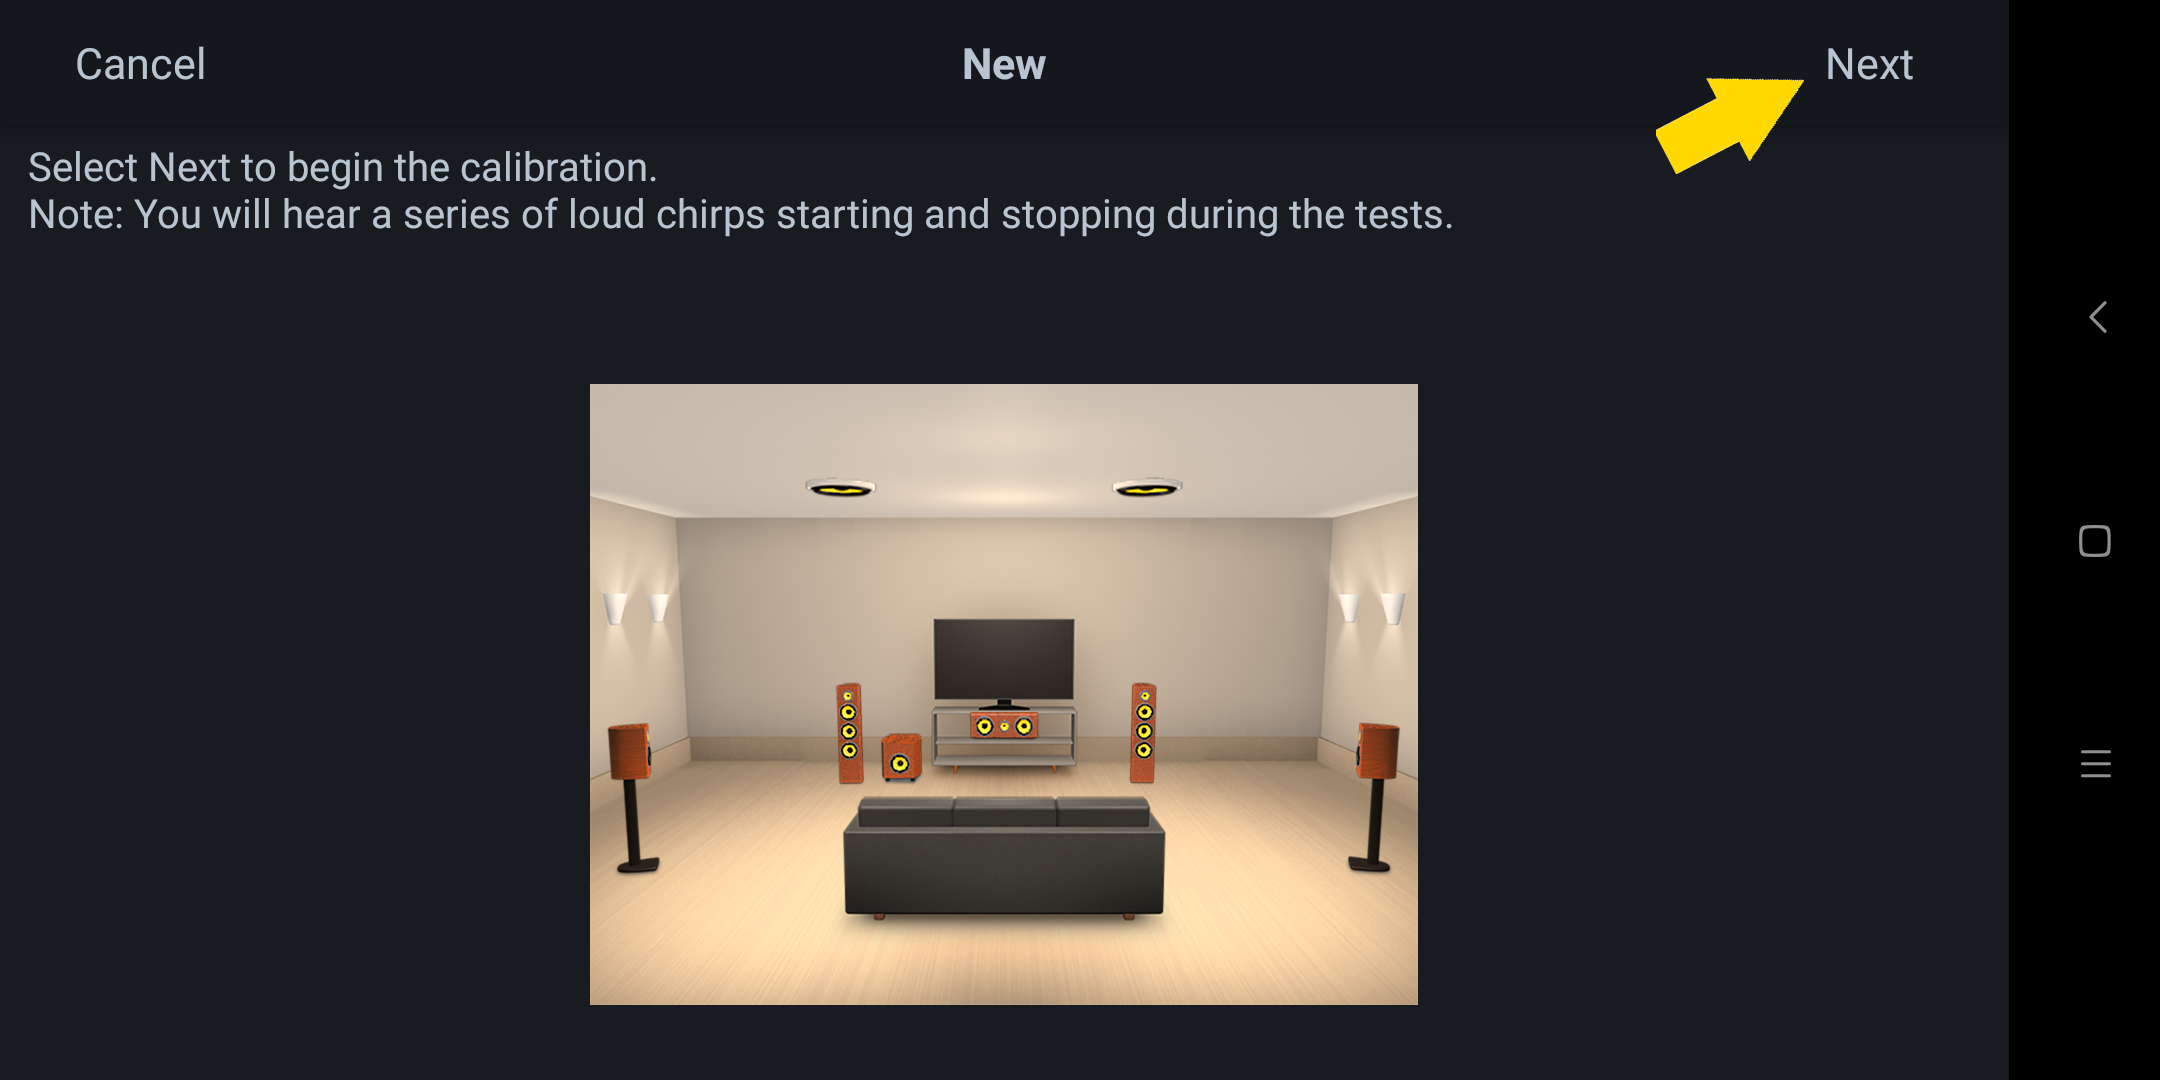
Continue to click next to skip past these panels until you see this. Click next here to initiate calibration.
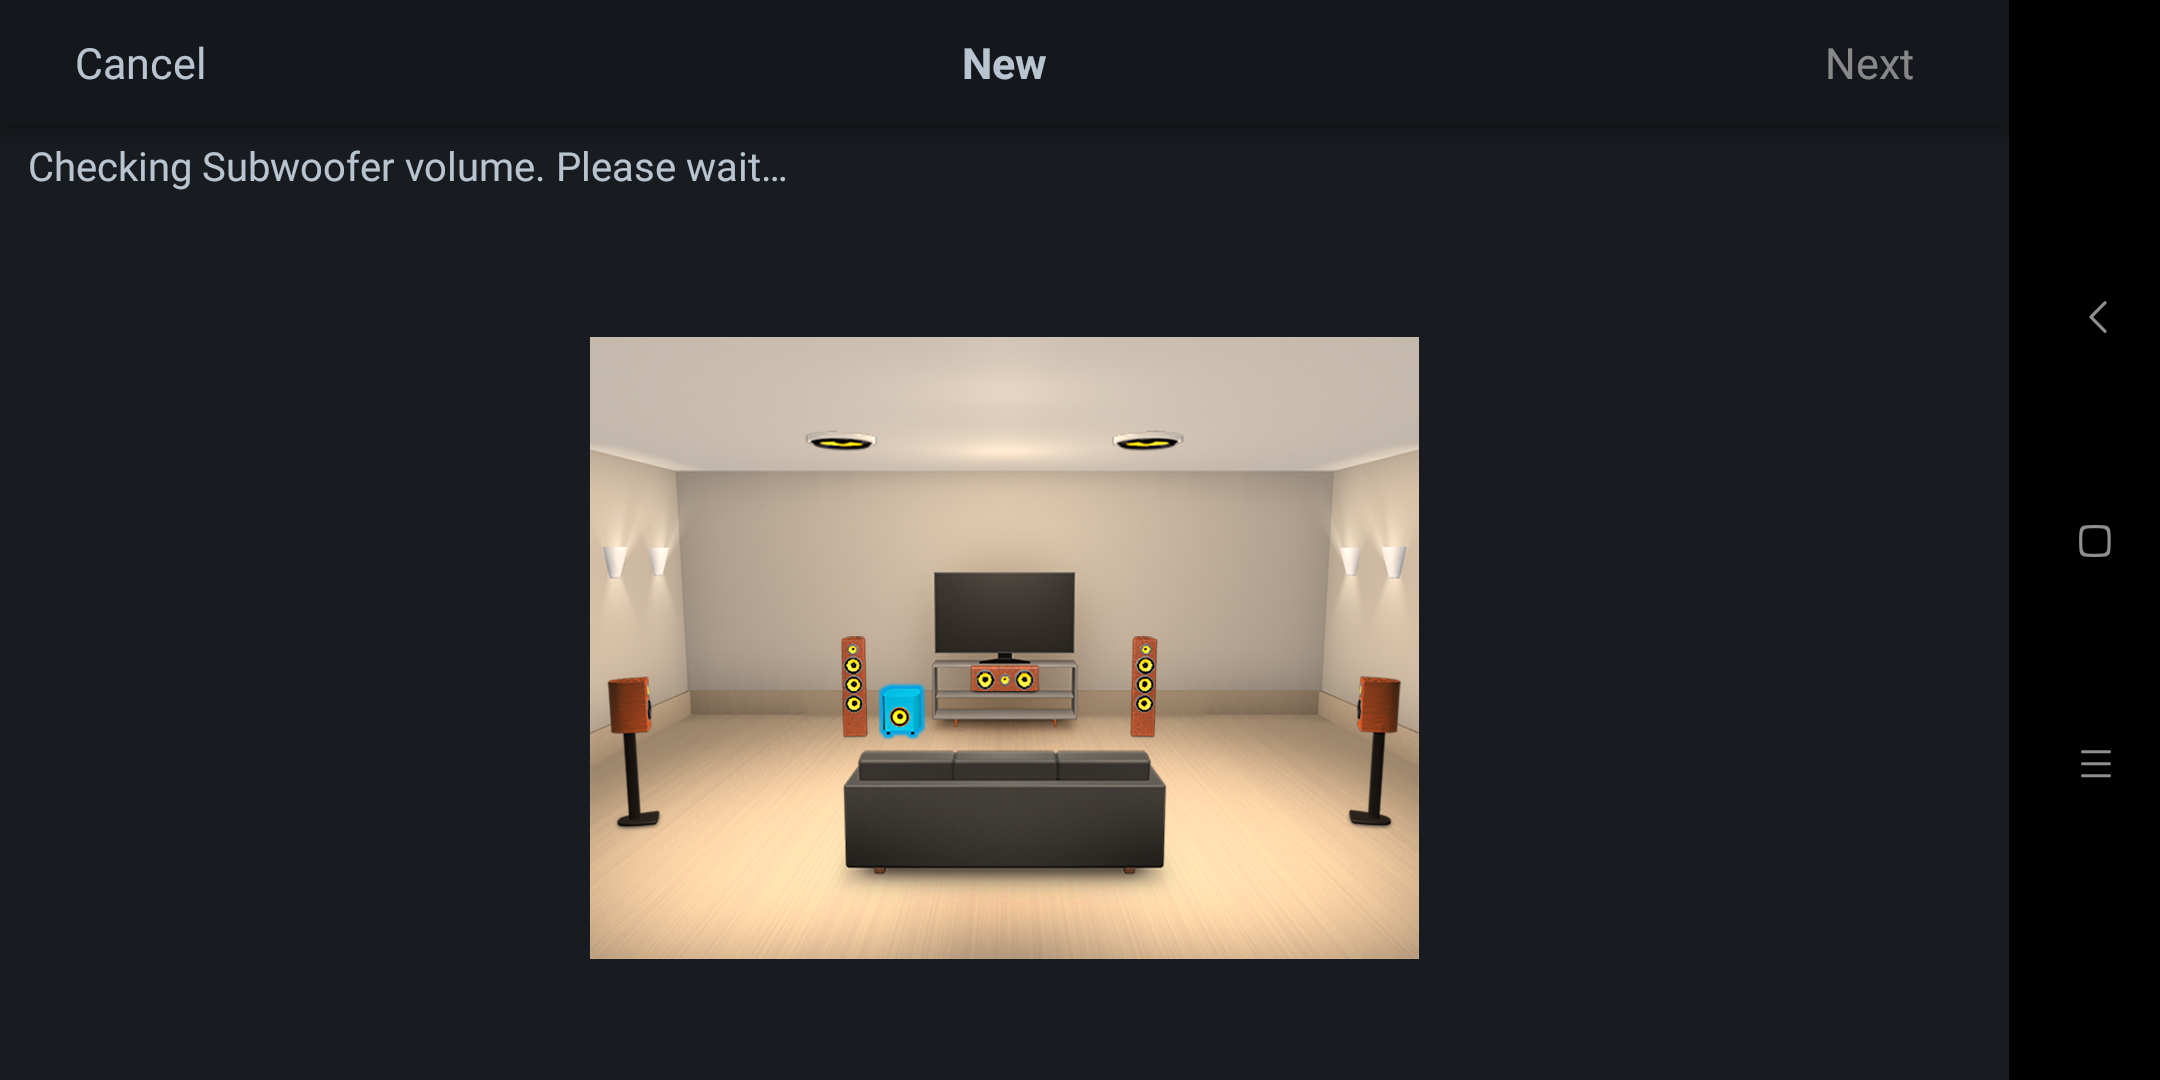
The first step is to make sure the sub-woofer volume is set to around 75 dB.
Adjust the sub-woofer volume dial until the speaker icon falls into the green zone.
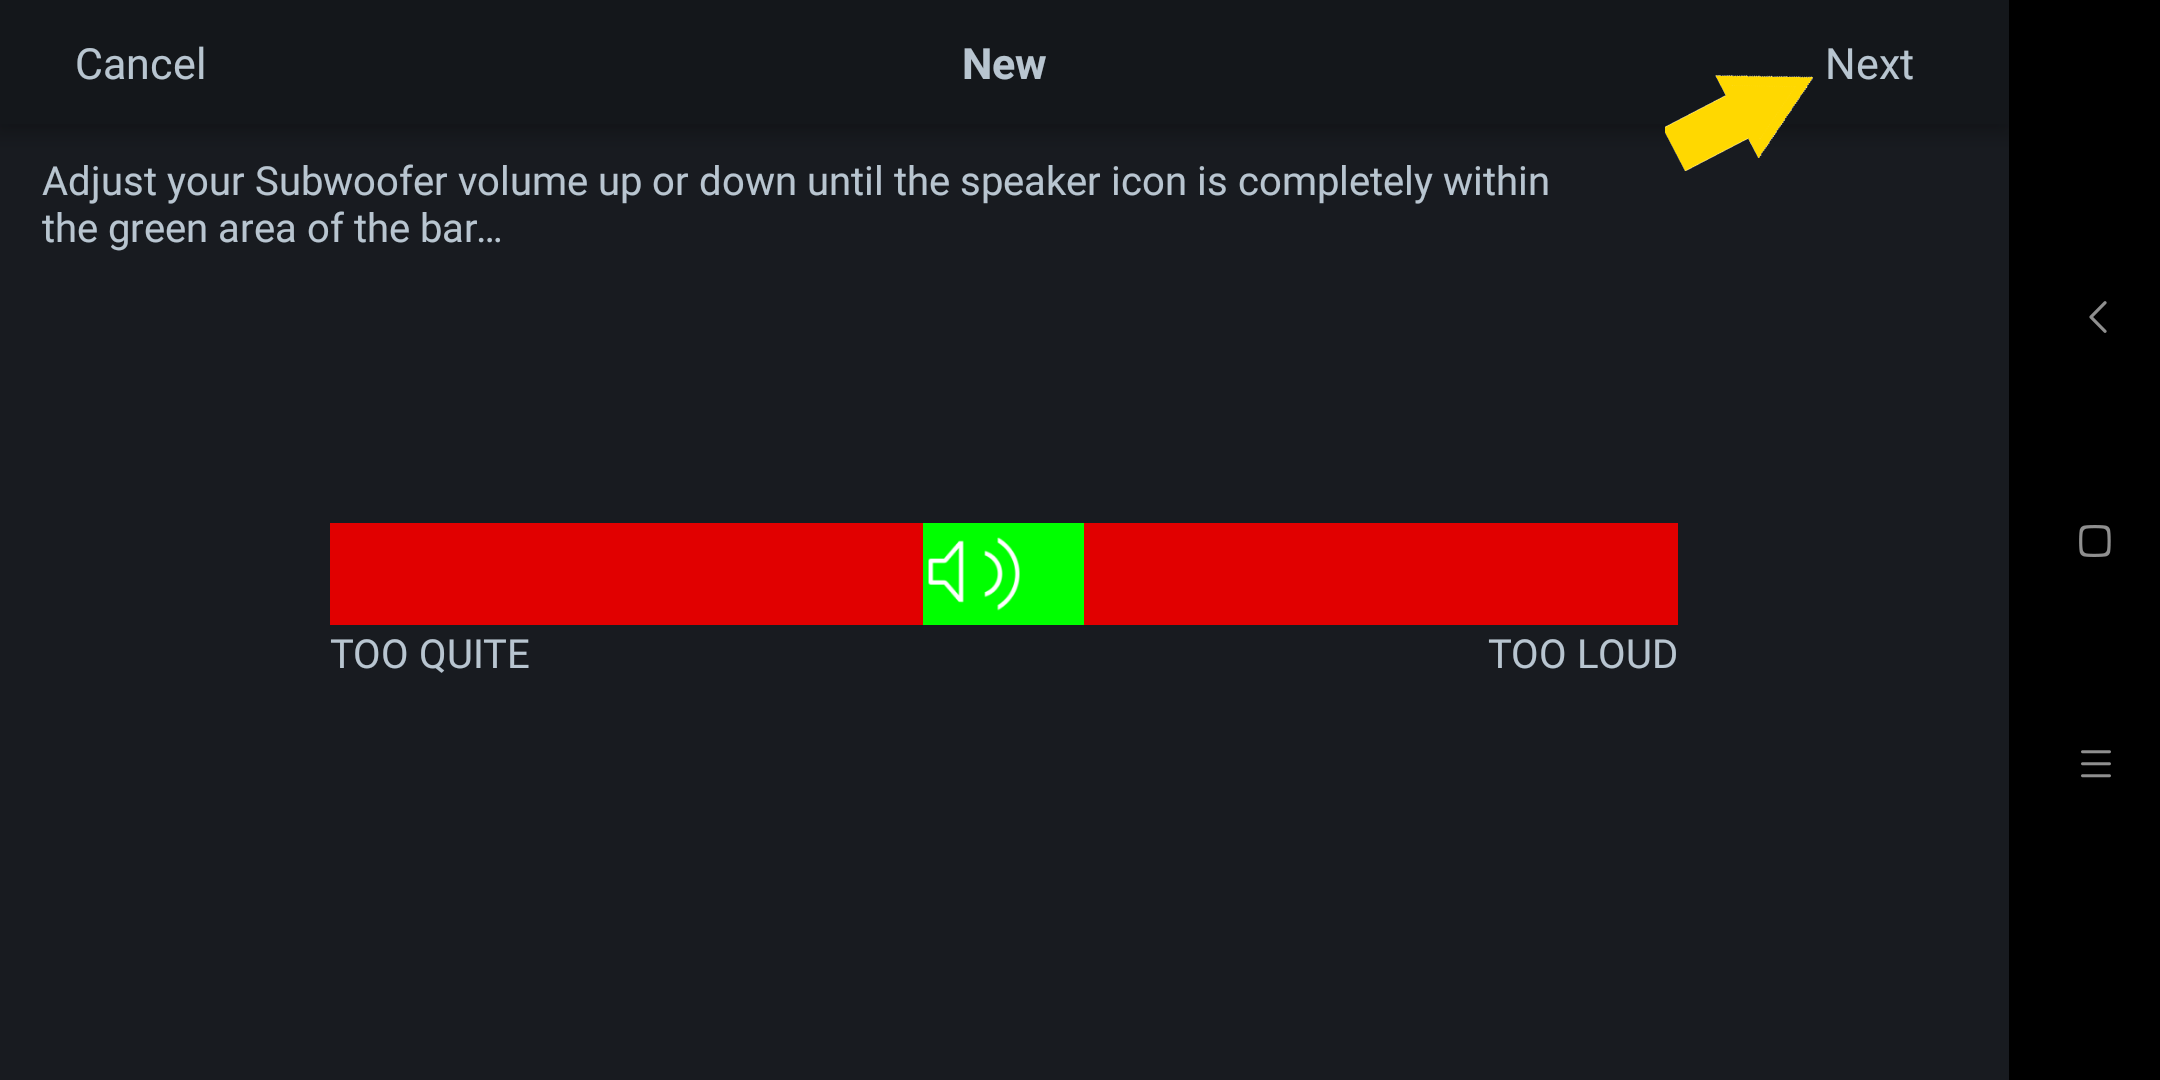
Too Quite. Not quite! It's supposed to read 'Too Quiet'. Once you're happy where the level is at, tap the 'Next' button.
Calibration
Calibration begins from the Front Left, and it will go through all your speakers. Ideally make sure you have removed all ambient noises as much as you can when performing this calibration.
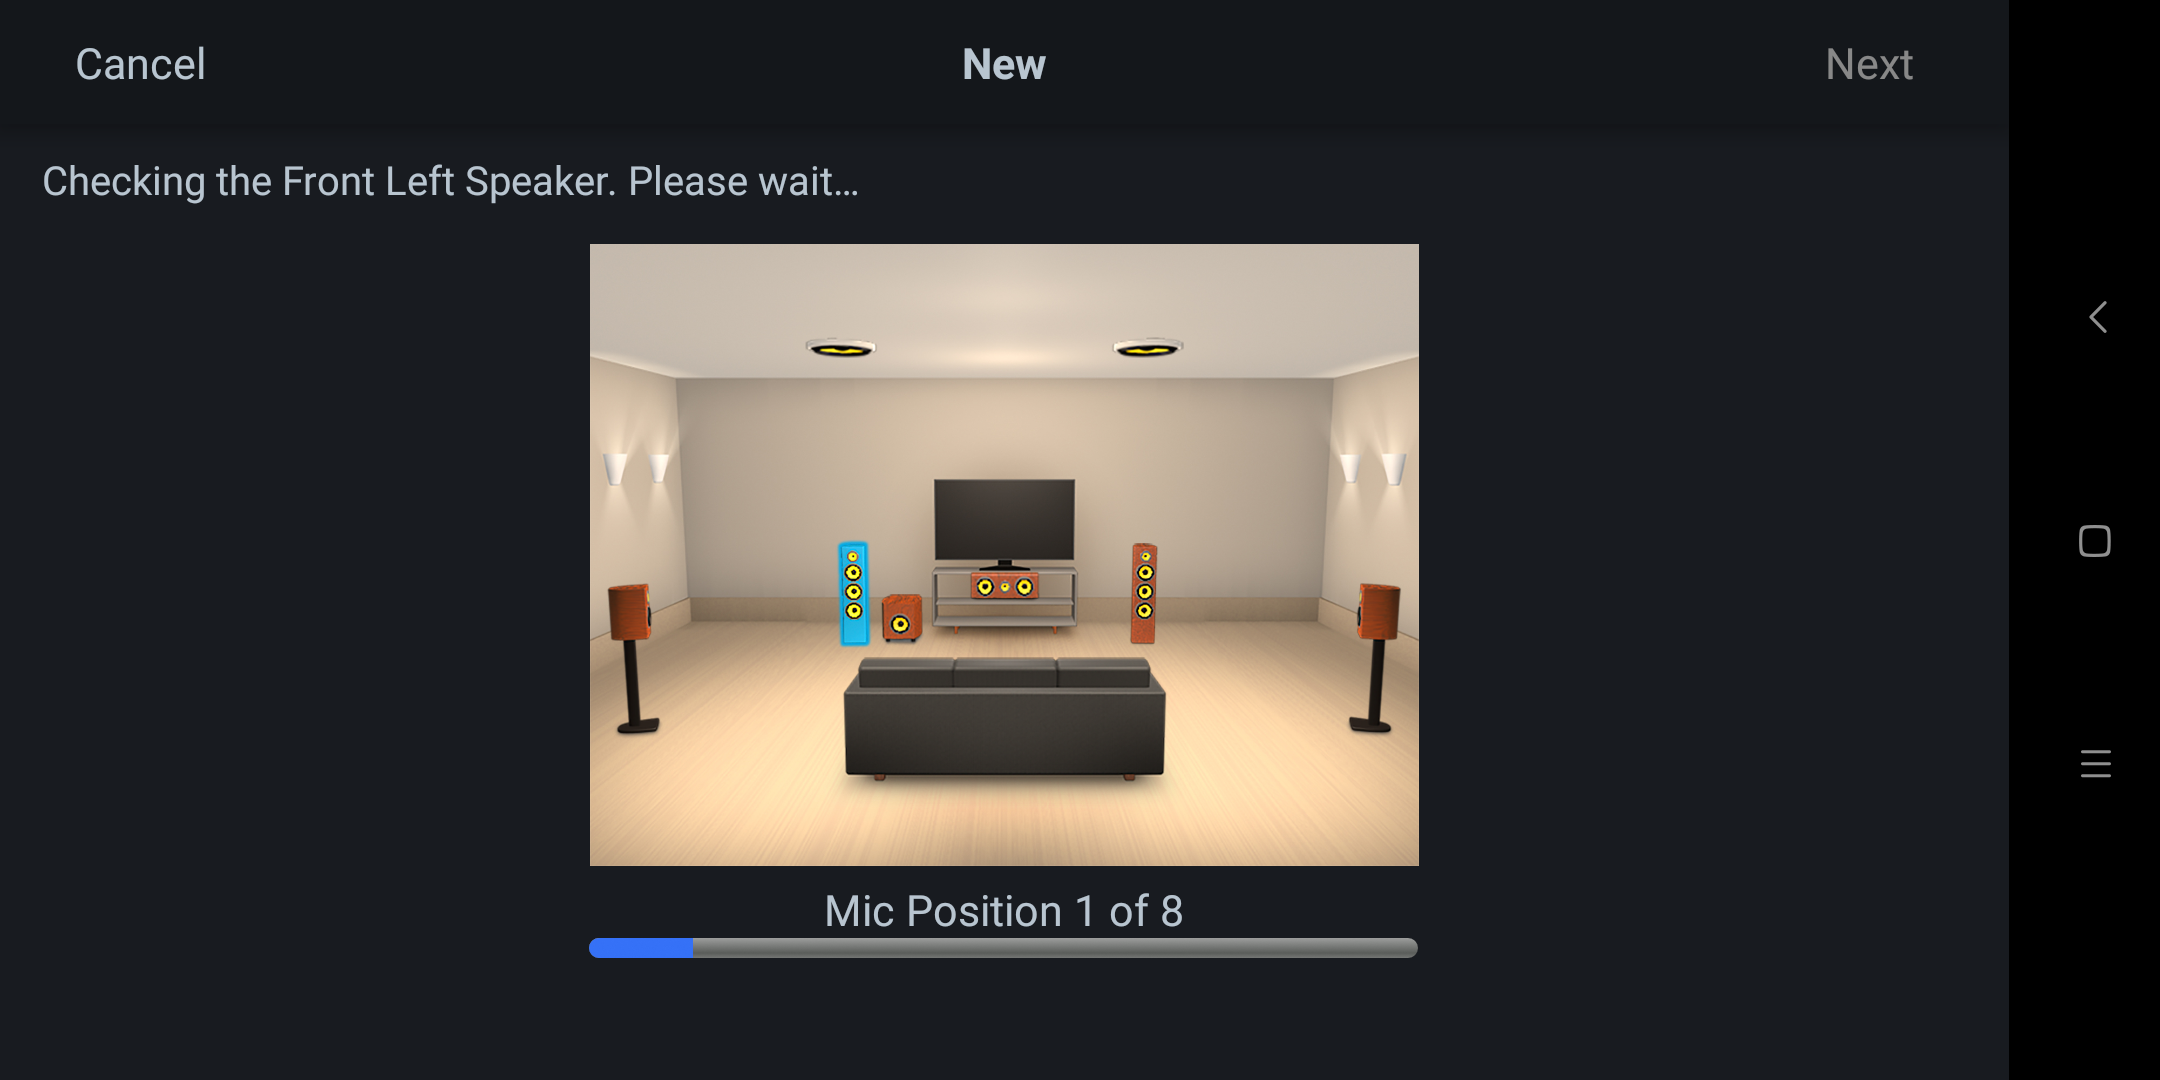
At the end of each measurement cycle, the MultEQ app will transfer the measured data from the Av8805 to your android device. This can take a while (see arrow). The status will be changed to 'Next' once transfer is complete. Tap 'Next' to measure the next position.
You can also tap on 'Repeat last' to re-measure the current listening position (do this if there are sudden loud noises in the room that you know will skew the results).
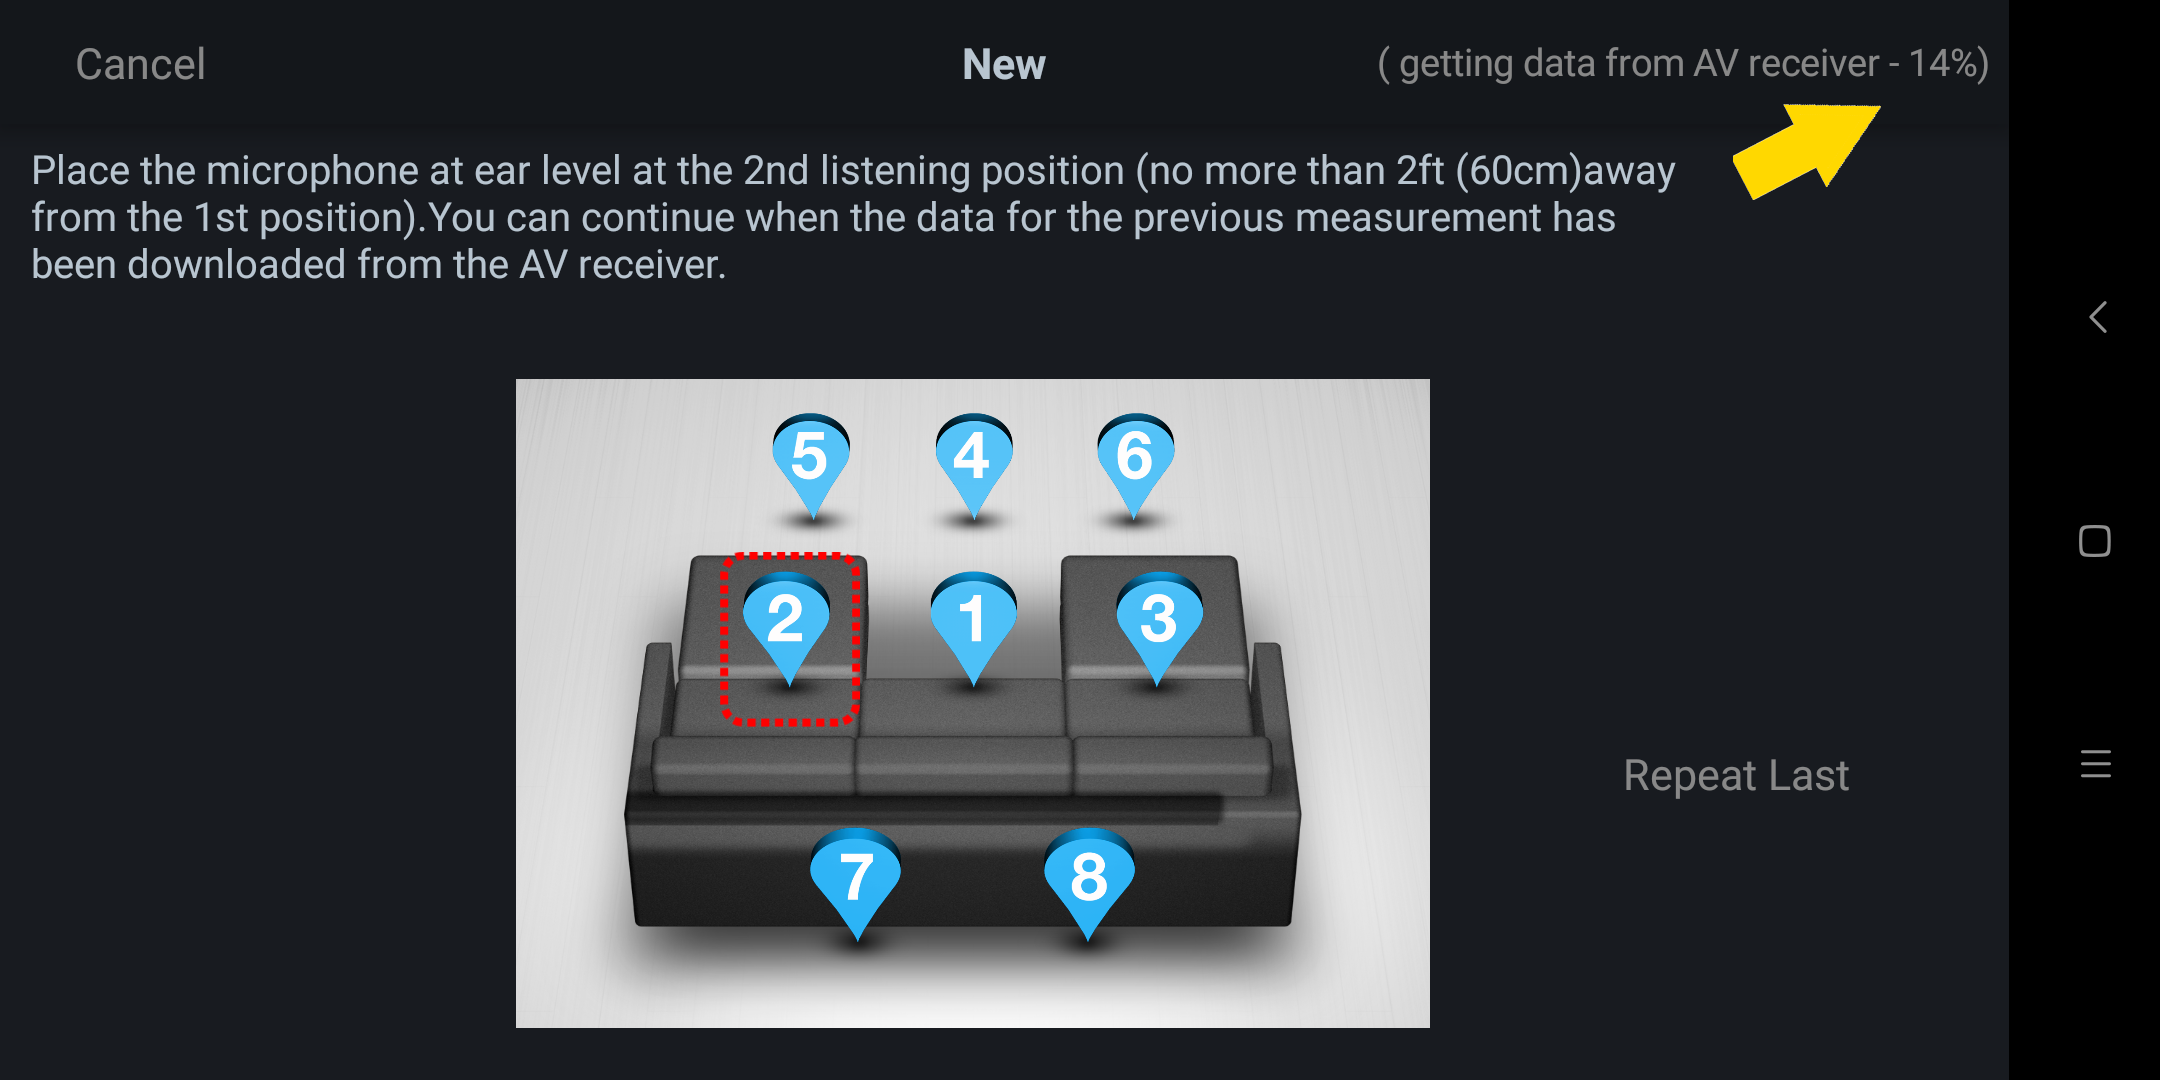
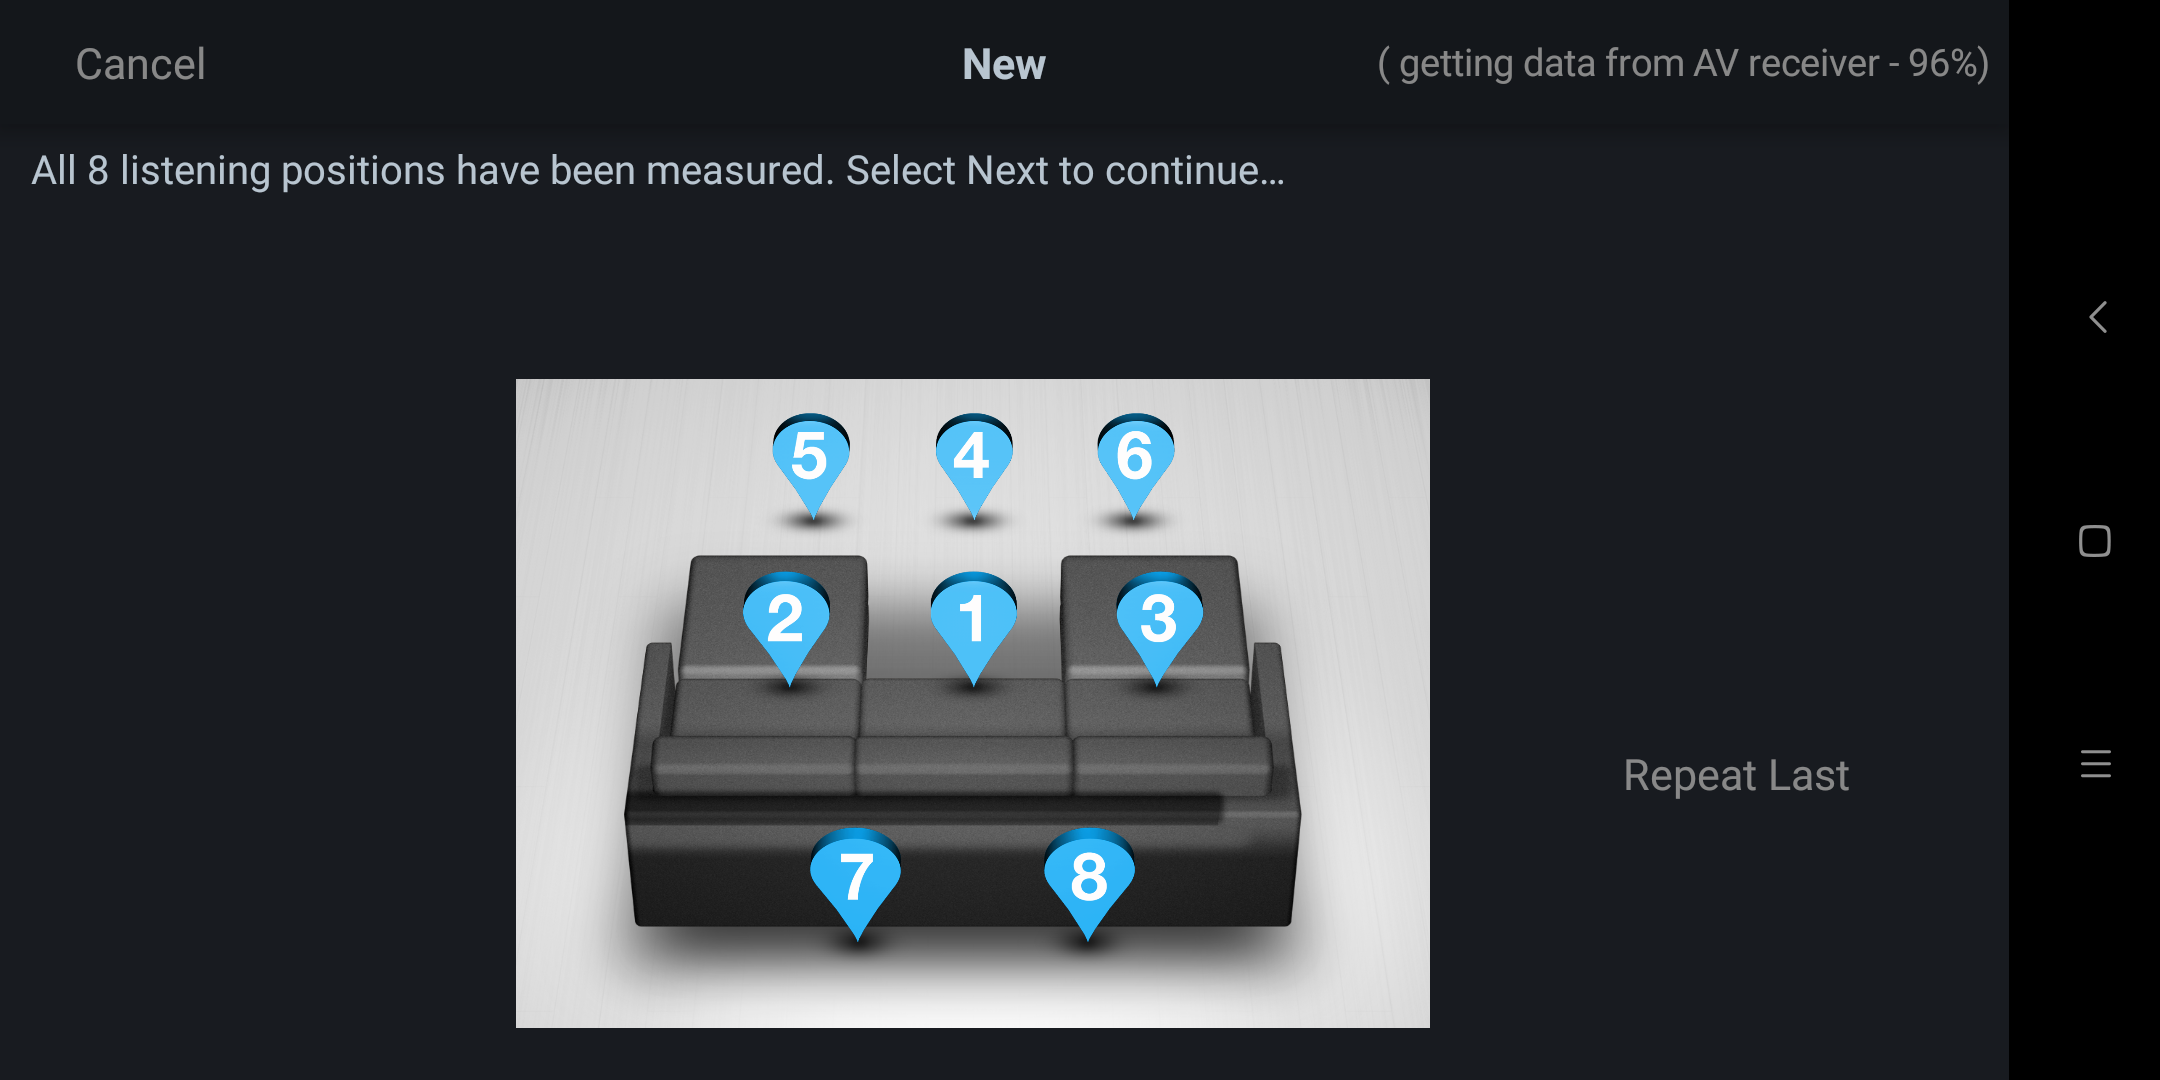
Repeat the measurement up to 8 times. You do not have to do all 8 positions, 3 is usually sufficient but your mileage will vary.
Funnily enough the box has the MultEQ XT32 logo on it. Does this mean one can use the pro kit with this? I do not know. If 8 measurements is already too tedious for me, I cannot see myself doing 32 measurements. This process sounds like averaging to me and it's not something I want to do anyway.
Saving Your Audyssey Calibration
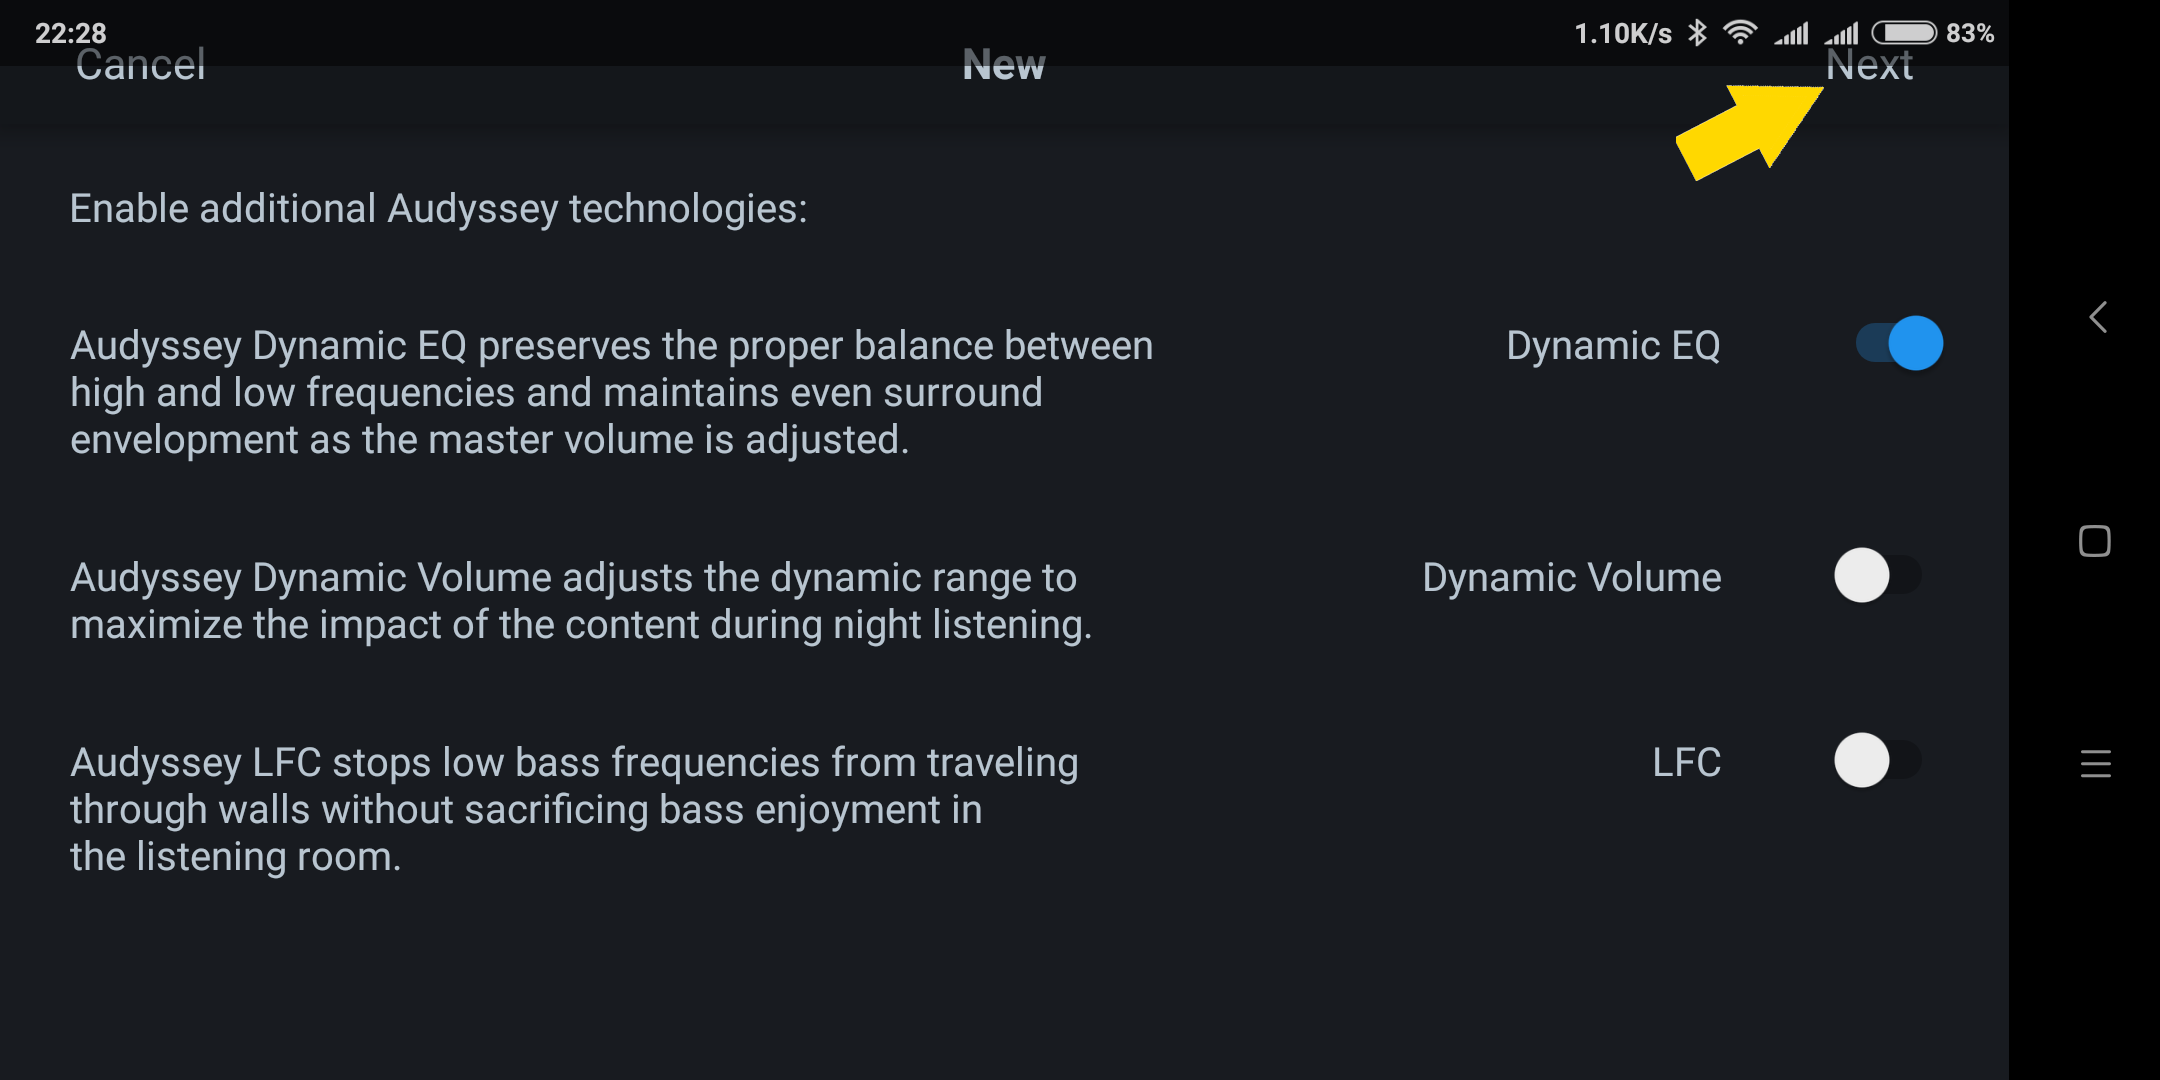
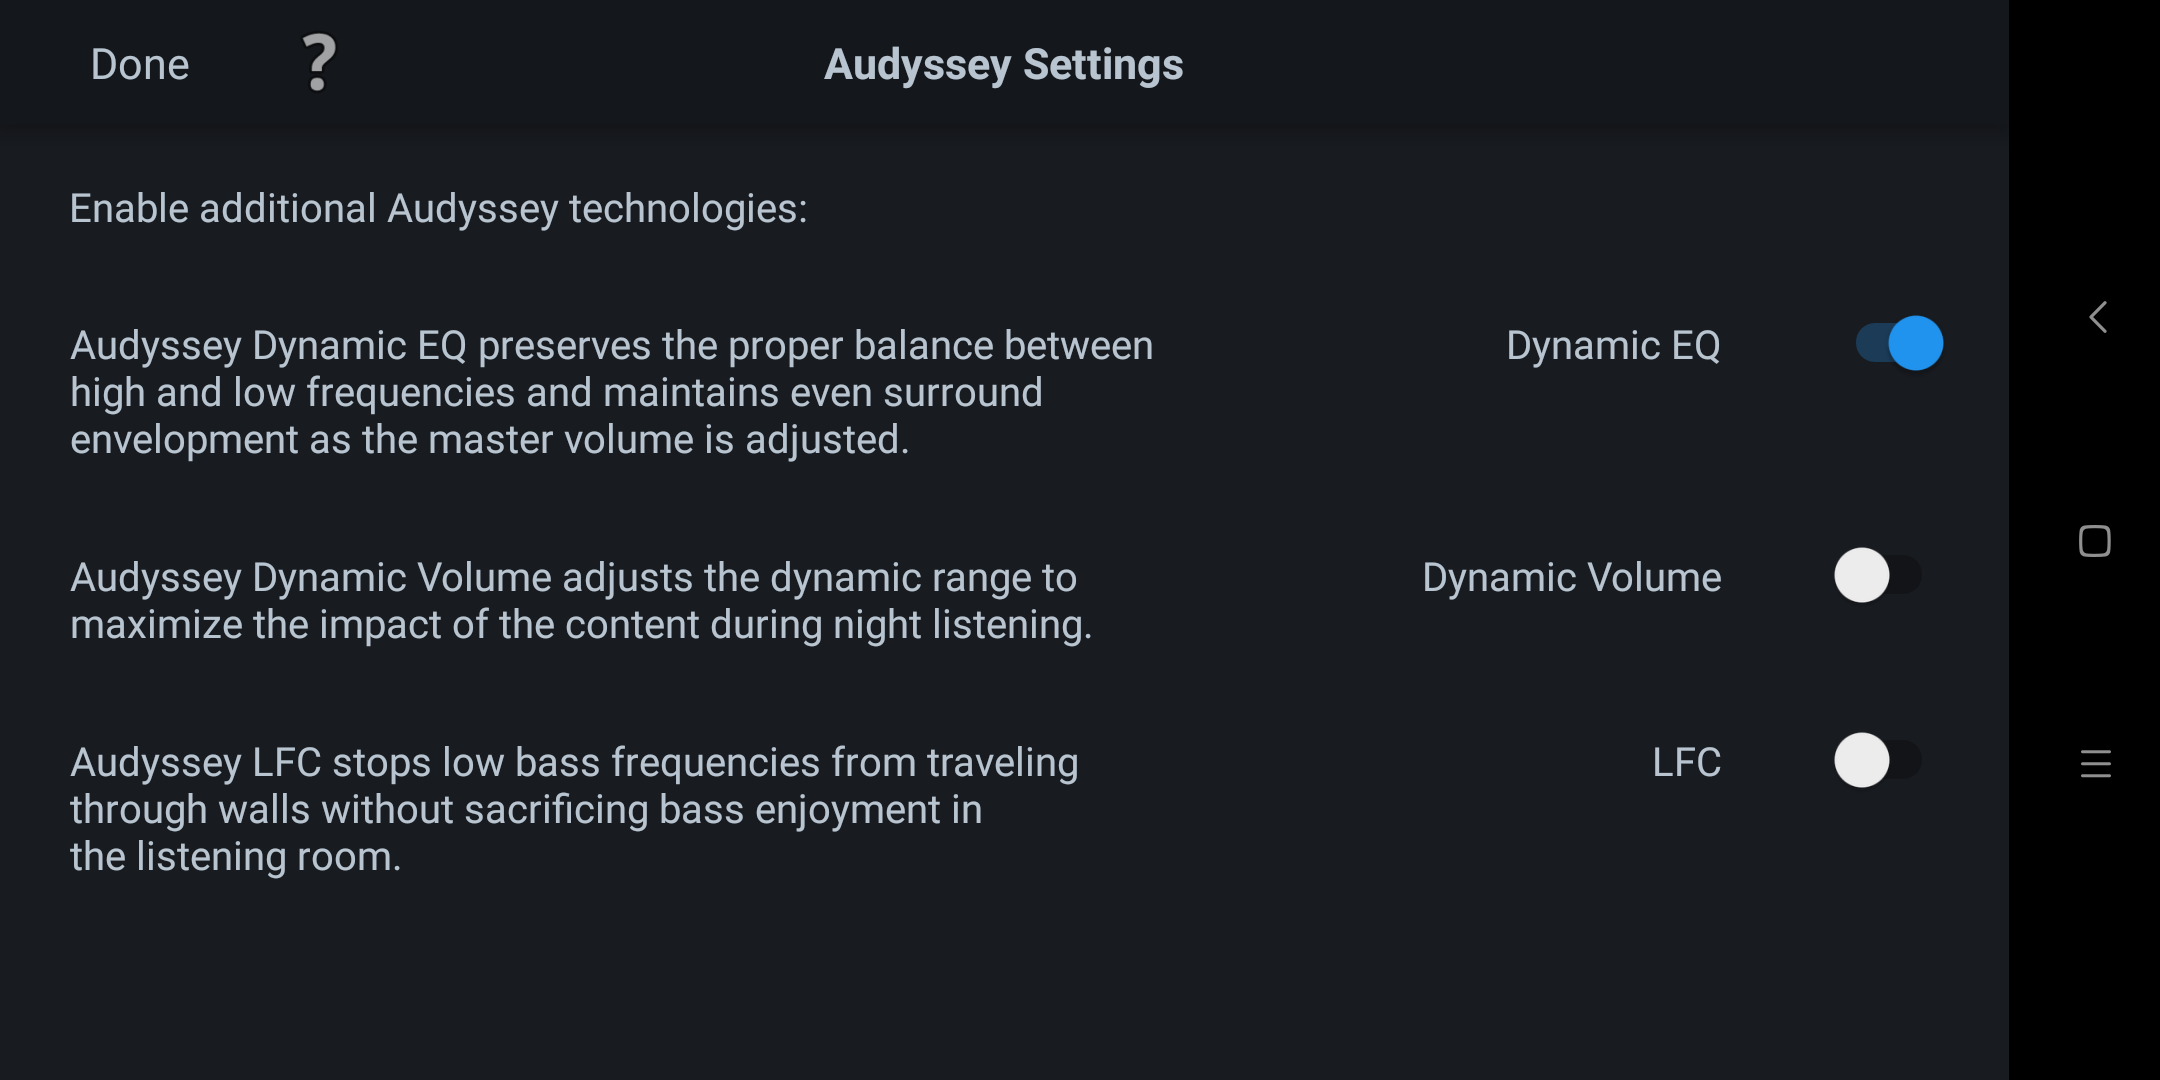
Here you setup some basic Audyssey DSP. My preference is to enable DynamicEQ and leave everything off. Dynamic Volume can be enabled manually in late nights when I want to watch a movie. As for LFC (Low Frequency Containment), not going to turn it on ever 👀!!
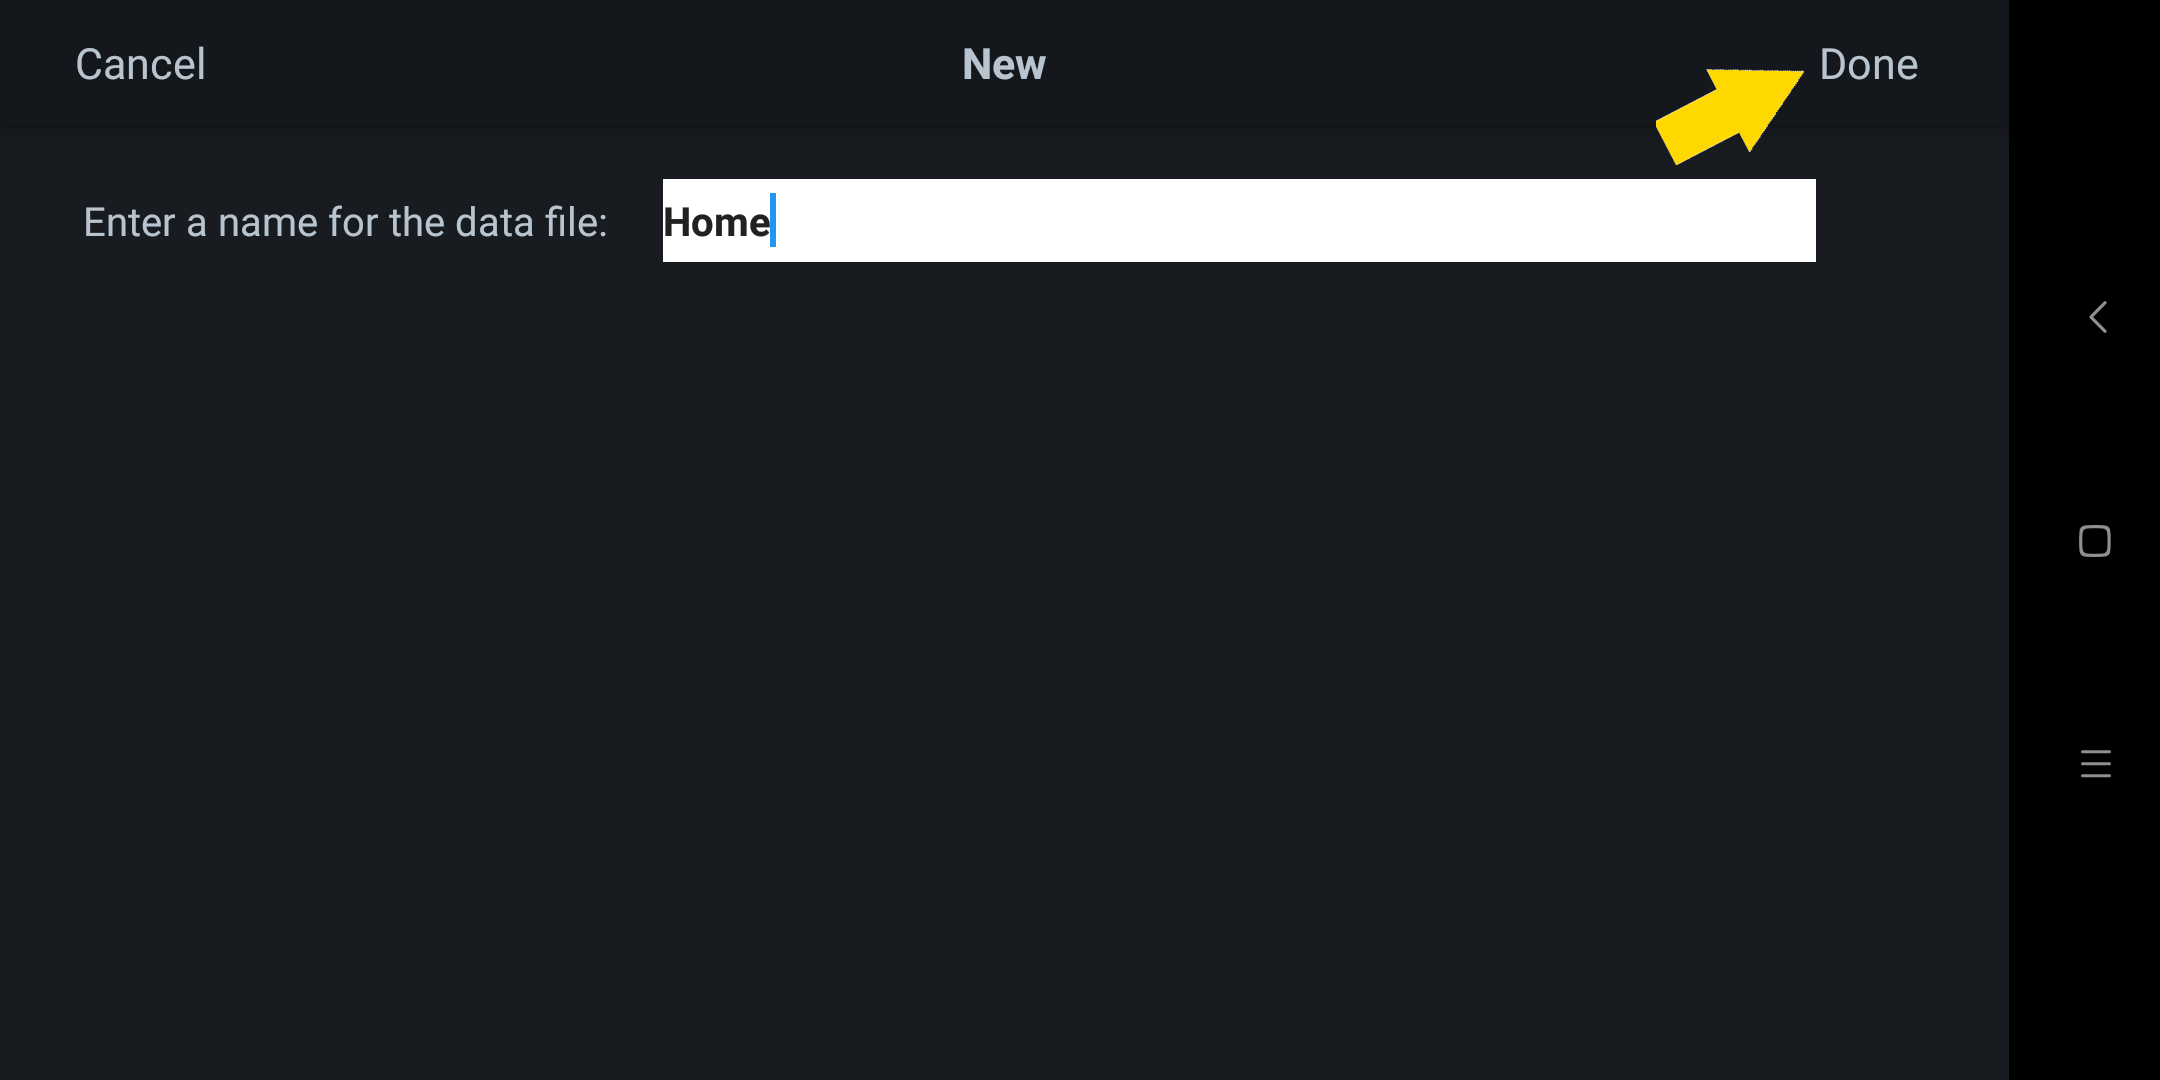
Click next and you will be prompted to save your measurements. Enter a name and hit the 'Done' button. Woohoo! You have your first dataset to play with.
Alright. Now the tedious part is over, time for some fun - edit!.
Note that at this stage all the data resides on your Android (or iOS device). You'd need to upload this back to the receiver for the Audyssey DSP to take effect. I'd touch on how to do this at the end of this article.
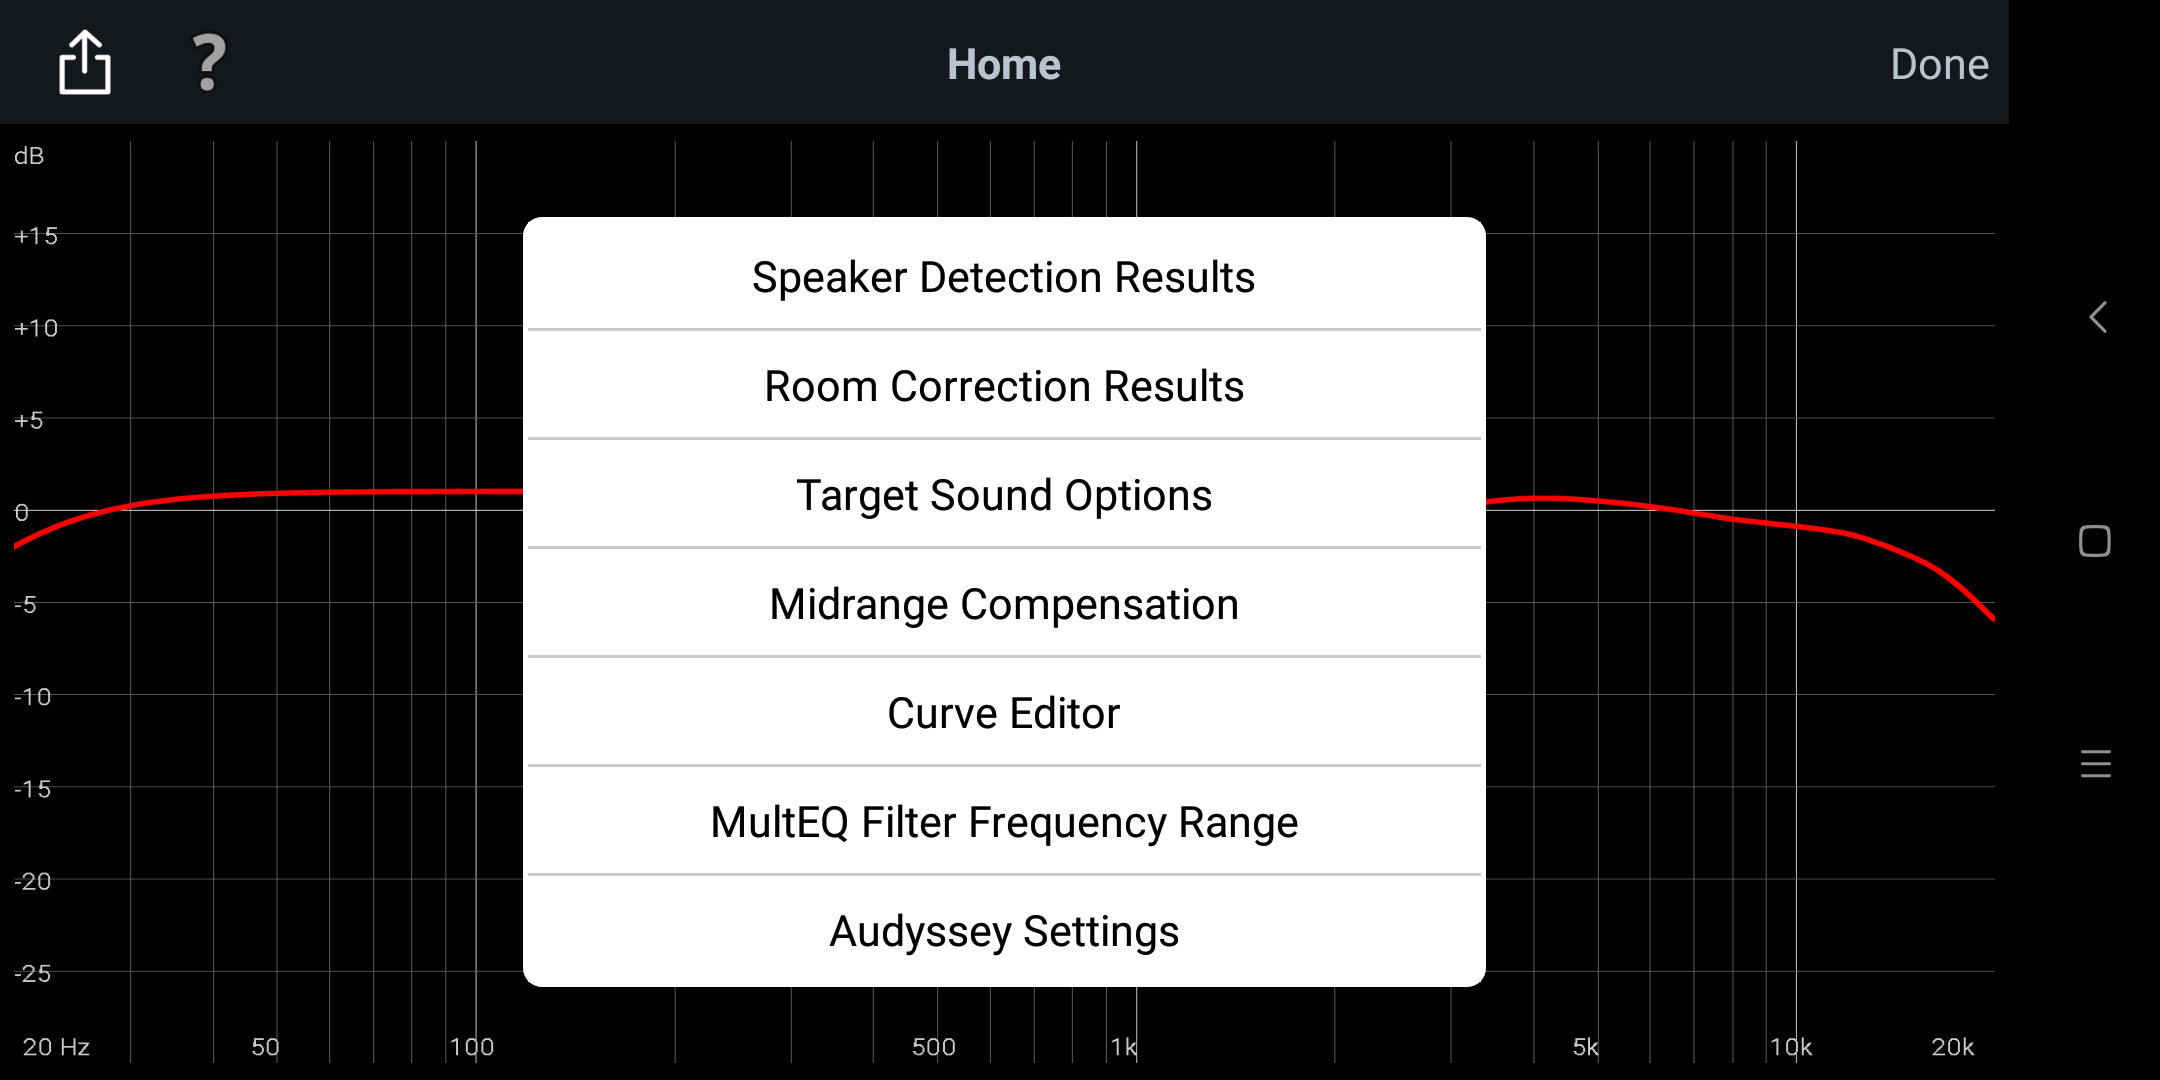
First I'd briefly walk you through all the options available to you when you are editing a dataset.
Editing Your Curves - Speaker Detection Results
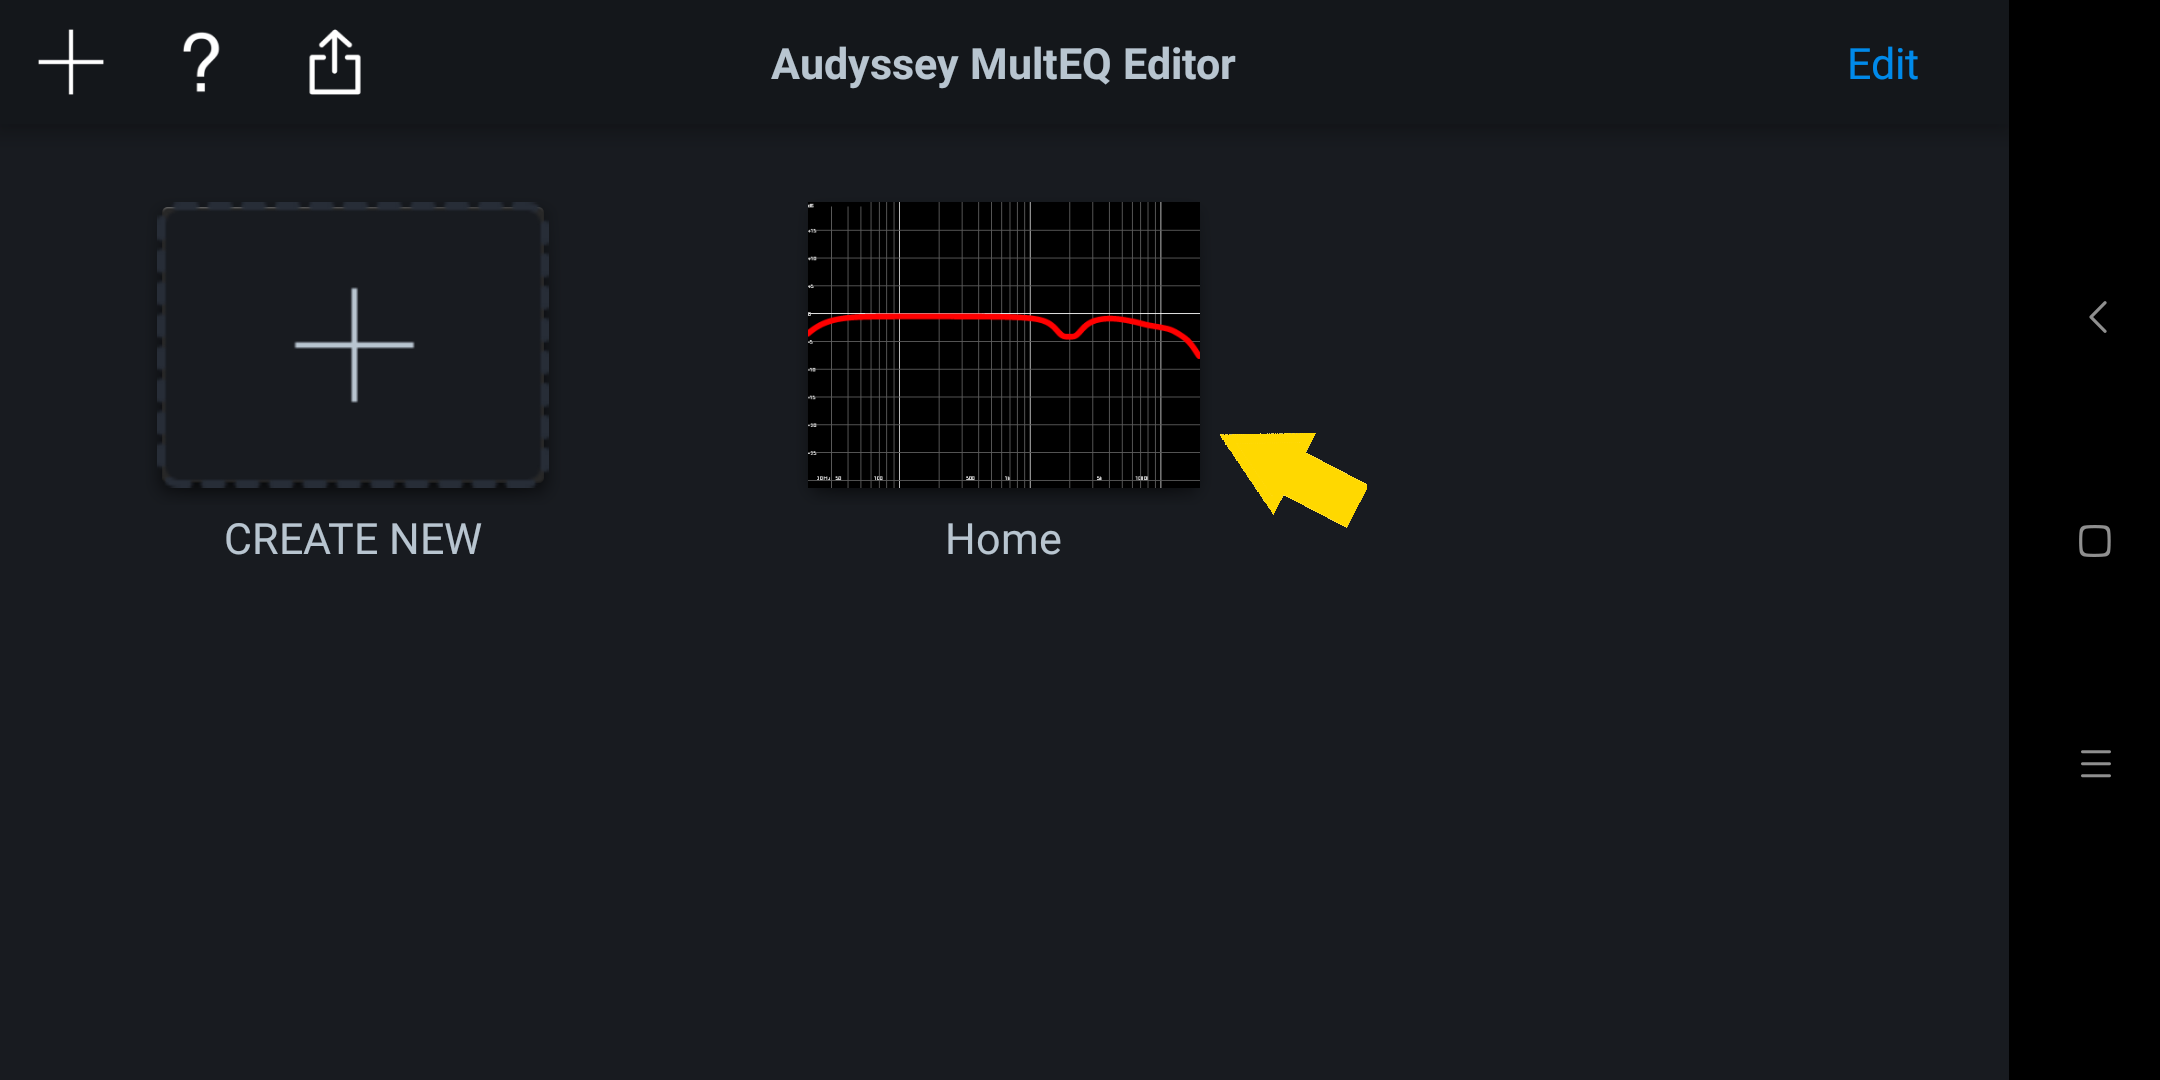
This is the screen you'd see once you decided to edit a dataset.
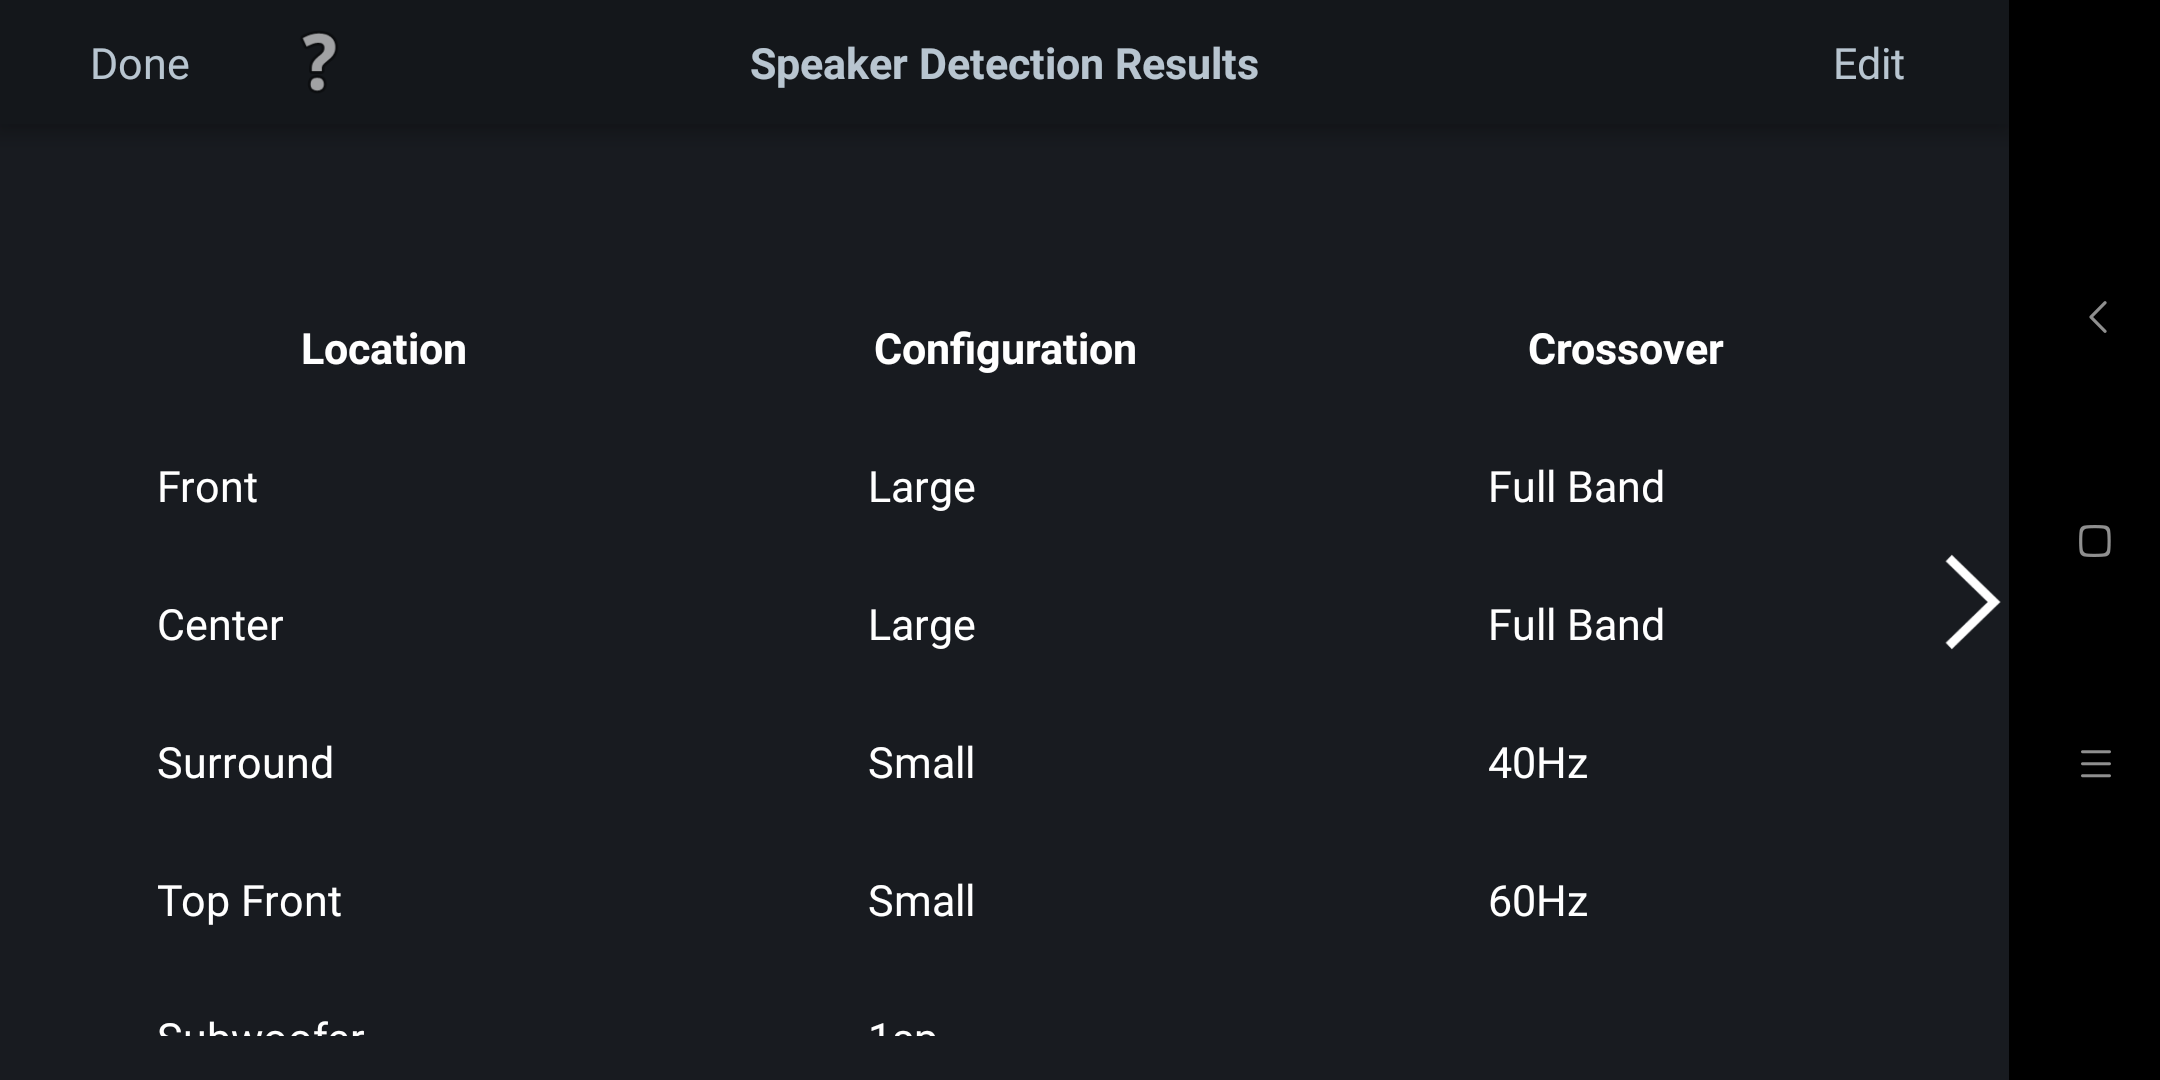
Speaker Detection Results shows you the speaker distance plus it's cross over points.
Always hit the 'Done' button on the top right when exiting screens, or closing the editor. Avoid using the 'Back' button on your Android whenever possible.
Editing Your Curves - Room Correction Results
Room Correction Results shows the raw measure response and the simulated response after Audyssey filters are applied. Here are the results of my front stage (Left, Right, Center and sub-woofer).
These charts are irritating on two counts:
- Both axis unmarked. One can only assume every Y axis markers is 5 dB, while the major X markers are 100 Hz, 1 kHz and 10 kHz respectively.
- No idea what smoothing filters are been applied.
I'm sure the information is available somewhere, these should be included right inside the App!
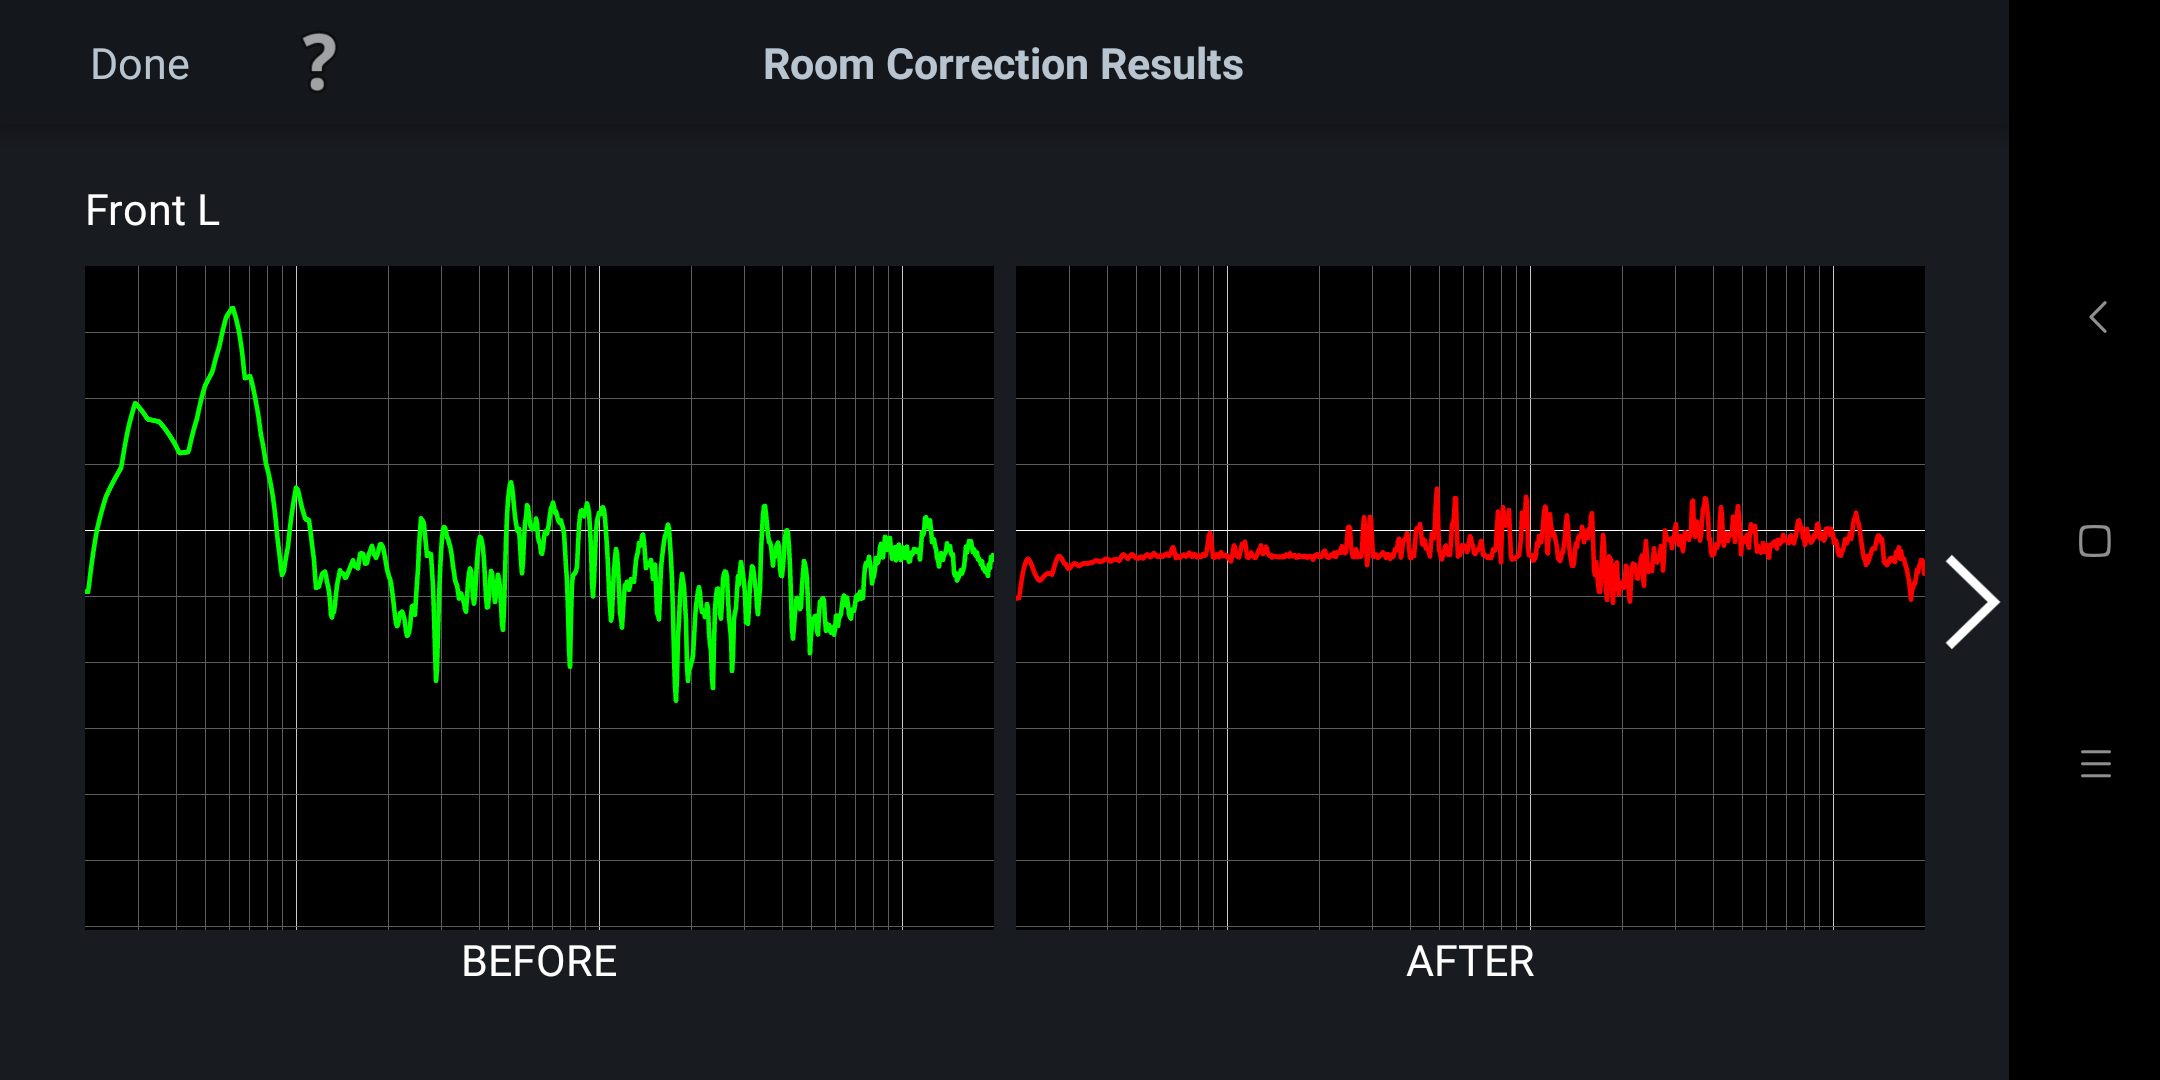

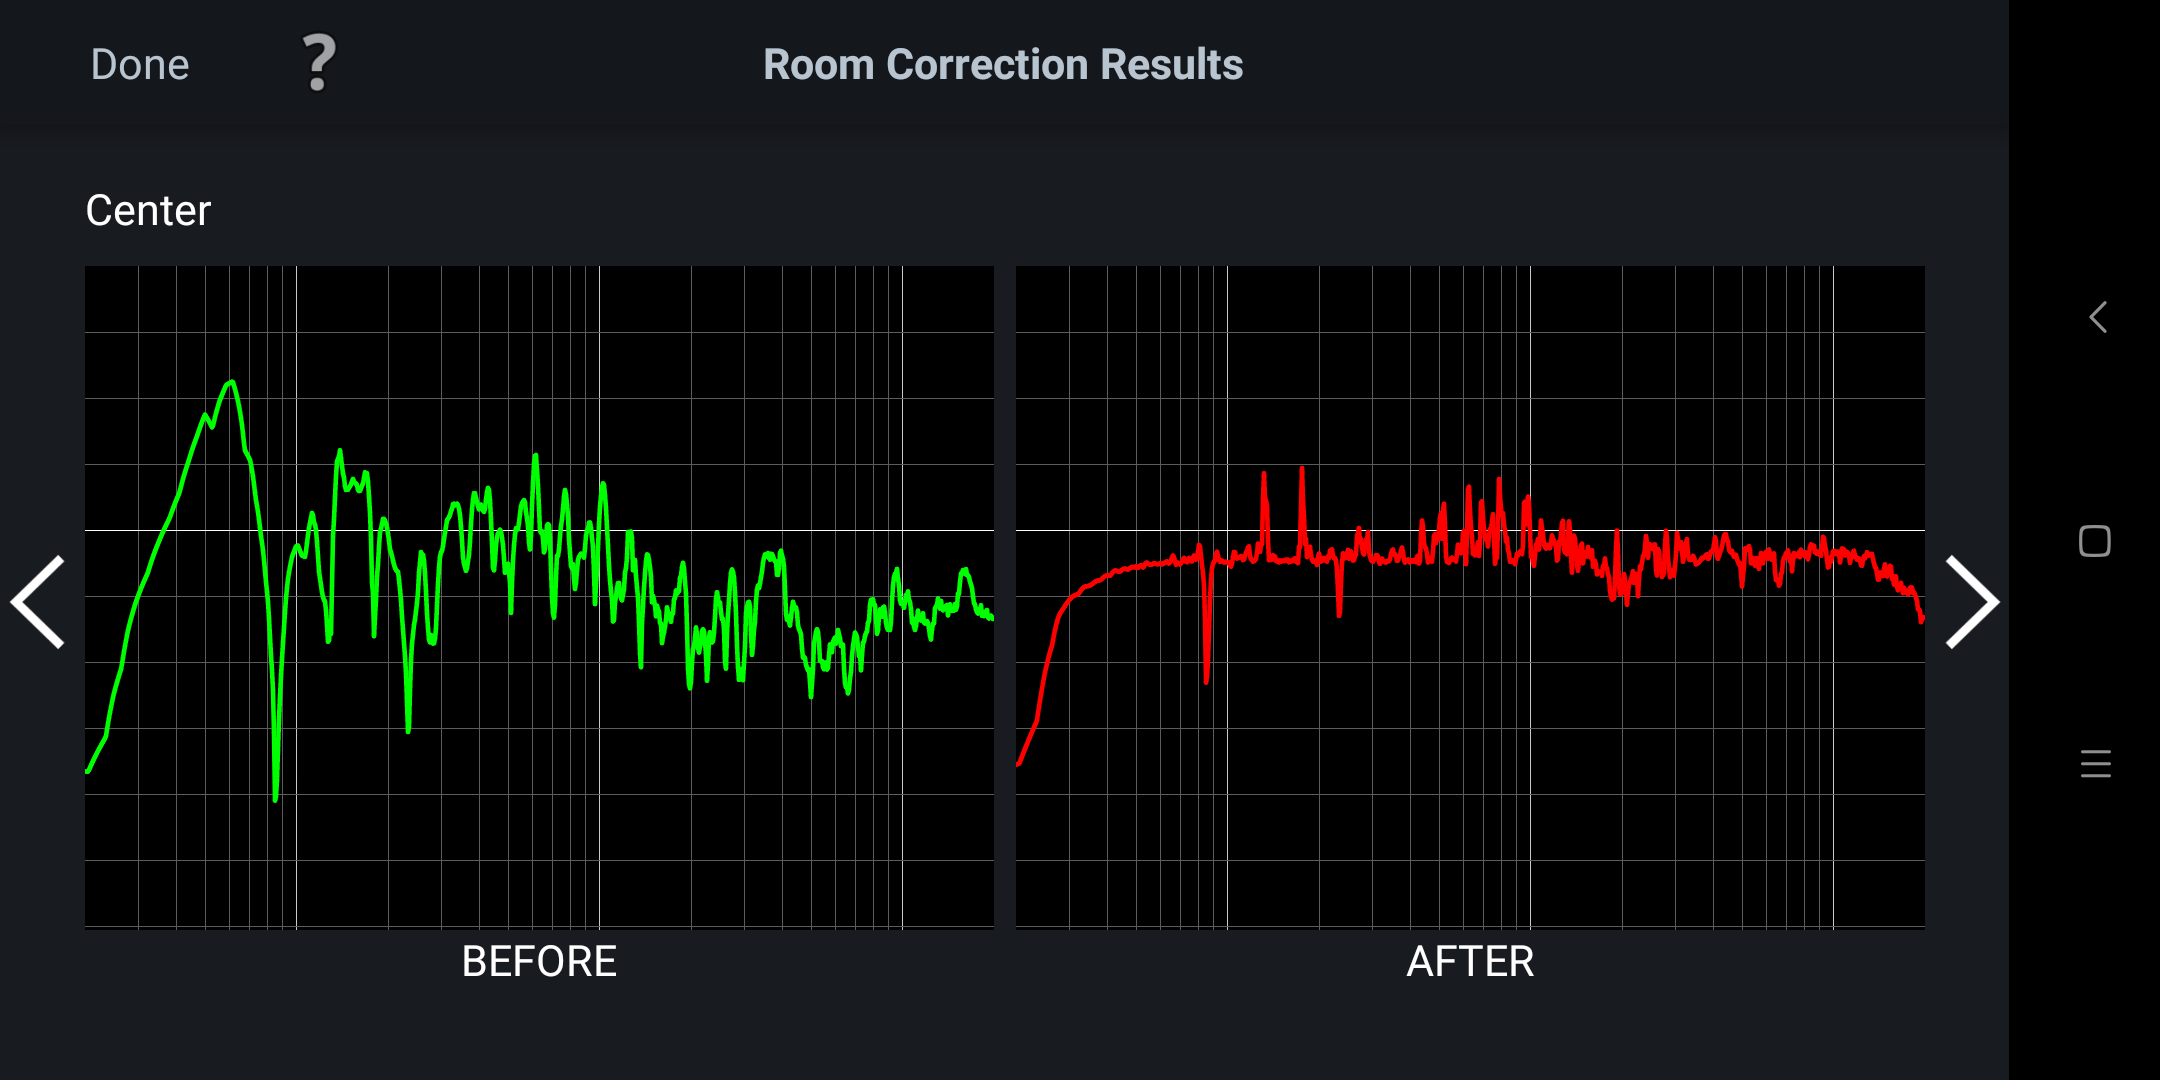

You can scroll left and right to look at all your speakers. Hit the 'Done' or Android 'back' button to get back to the options menu.
Editing Your Curves - Target Sound Options
You can choose between two, un-intuitively called High Frequency Roll Off 1 and High Frequency Roll Off 2. Contrary to what many audiophiles believe, fundamental frequencies at about 15 kHz is piercing uncomfortable for young people. Almost all audiophiles cannot hear frequencies about 15 kHz (most probably cannot hear past 12 kHz). Do not get alarmed by the downward slopes.
Note the dip at the 2 kHz band, this will be expanded upon later.
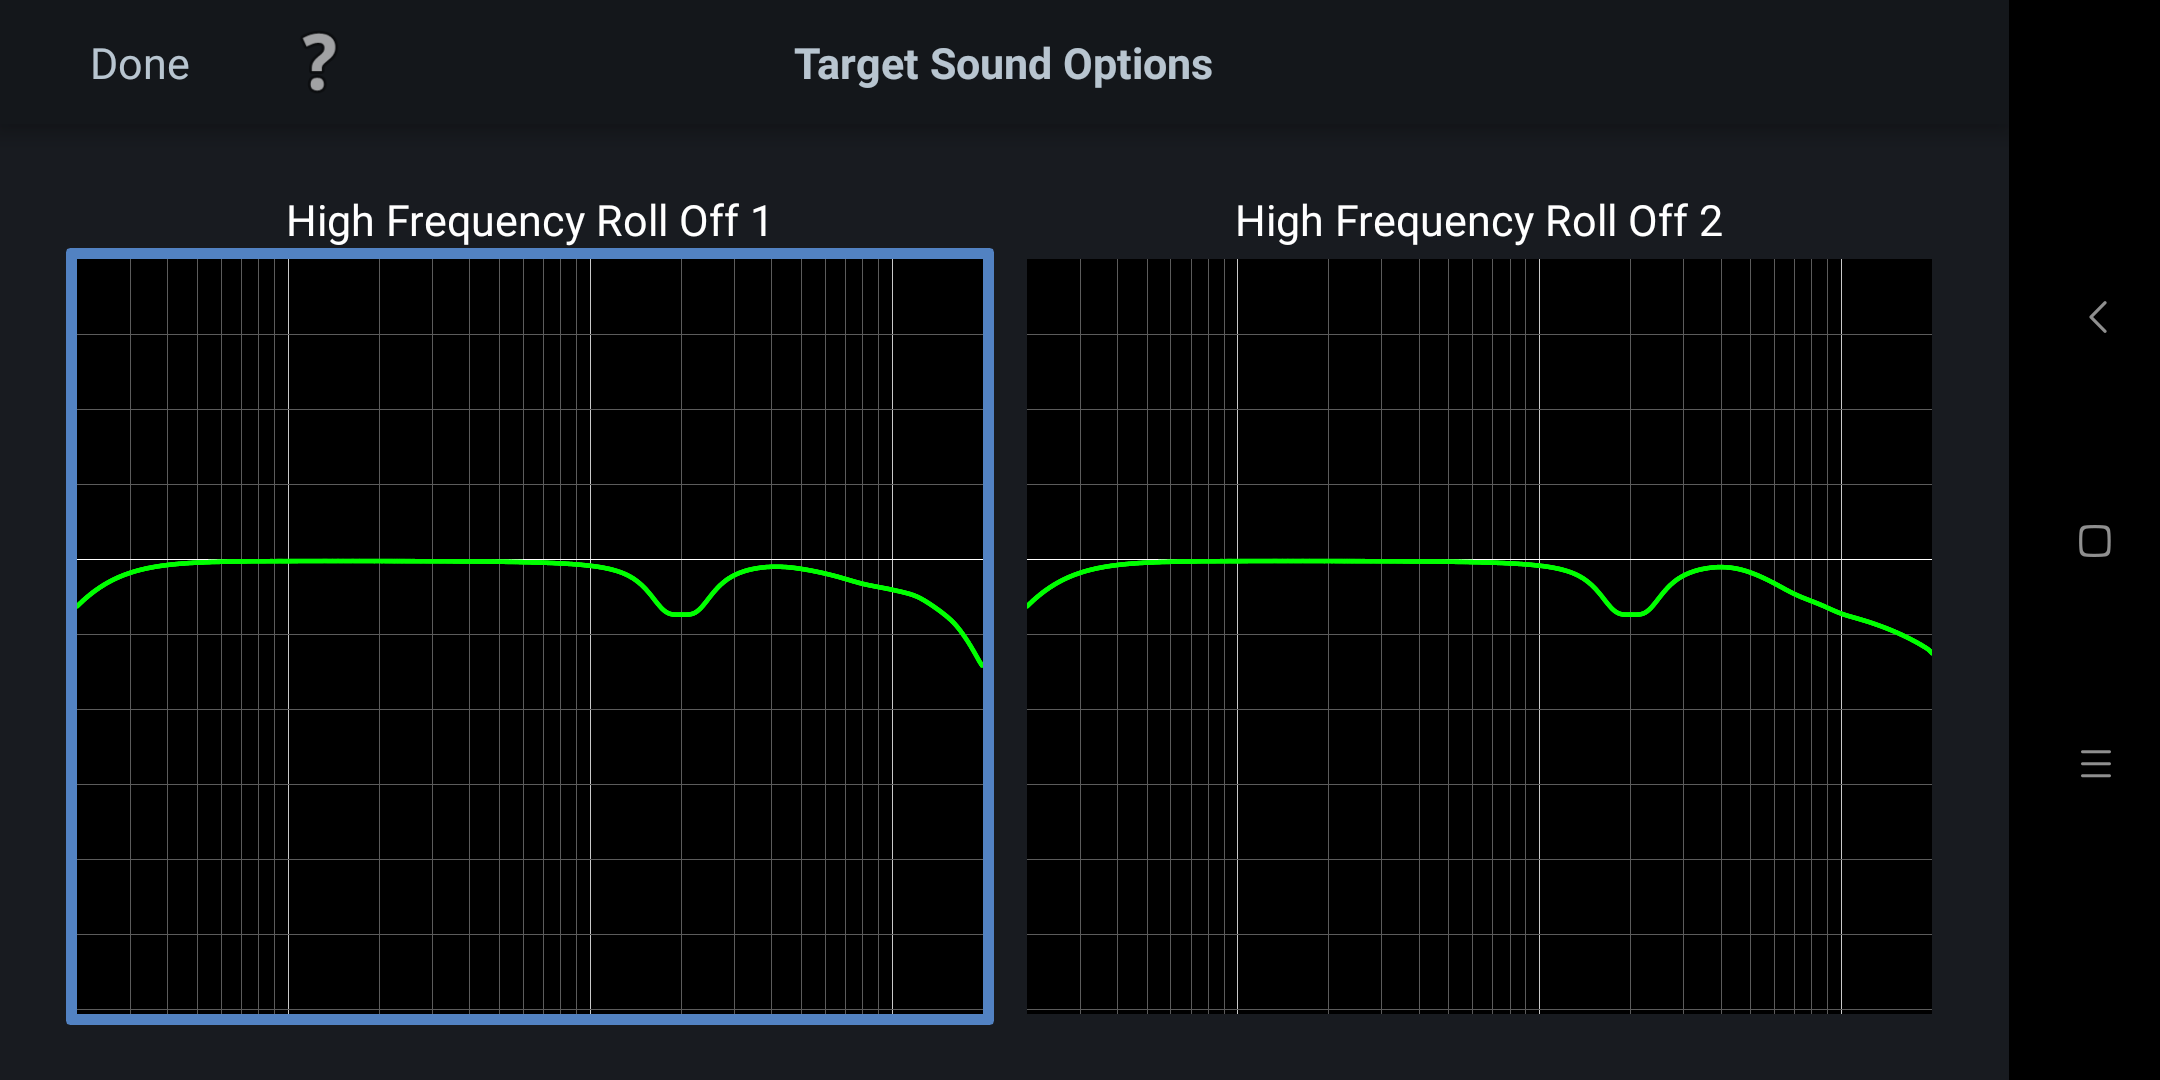
So which filter should you use? It depends on your gear, your room and most important of all - your hearing. Take the Yanny vs Laurel test. If you are hearing Laurel all the time choose filter 2. This is a steeper roll off and should give you a better audio quality perceptionally.
Editing Your Curves - Midrange Compensation
I had to lookup the Internet to discover what this option does:
Midrange compensation is an intentional dip in the 2 kHz region where the vast majority of tweeter-to-midrange crossovers are. In that region the tweeter is at the low end of its range and the midrange at the high end of its range and the directivity of the speaker goes through major changes. We found that if that region is equalized to flat, the change in direct to reflected ratio that happens because of the directivity variations causes voices to sound harsh (among other things). So, we have this implemented in the Audyssey target curve. With MultEQ Pro you can choose to turn it off, but we don't recommend it. This notion was observed 40 years ago by BBC speaker designers in their studio monitors. They designed their speakers with this "BBC dip" intentionally in the speaker response.
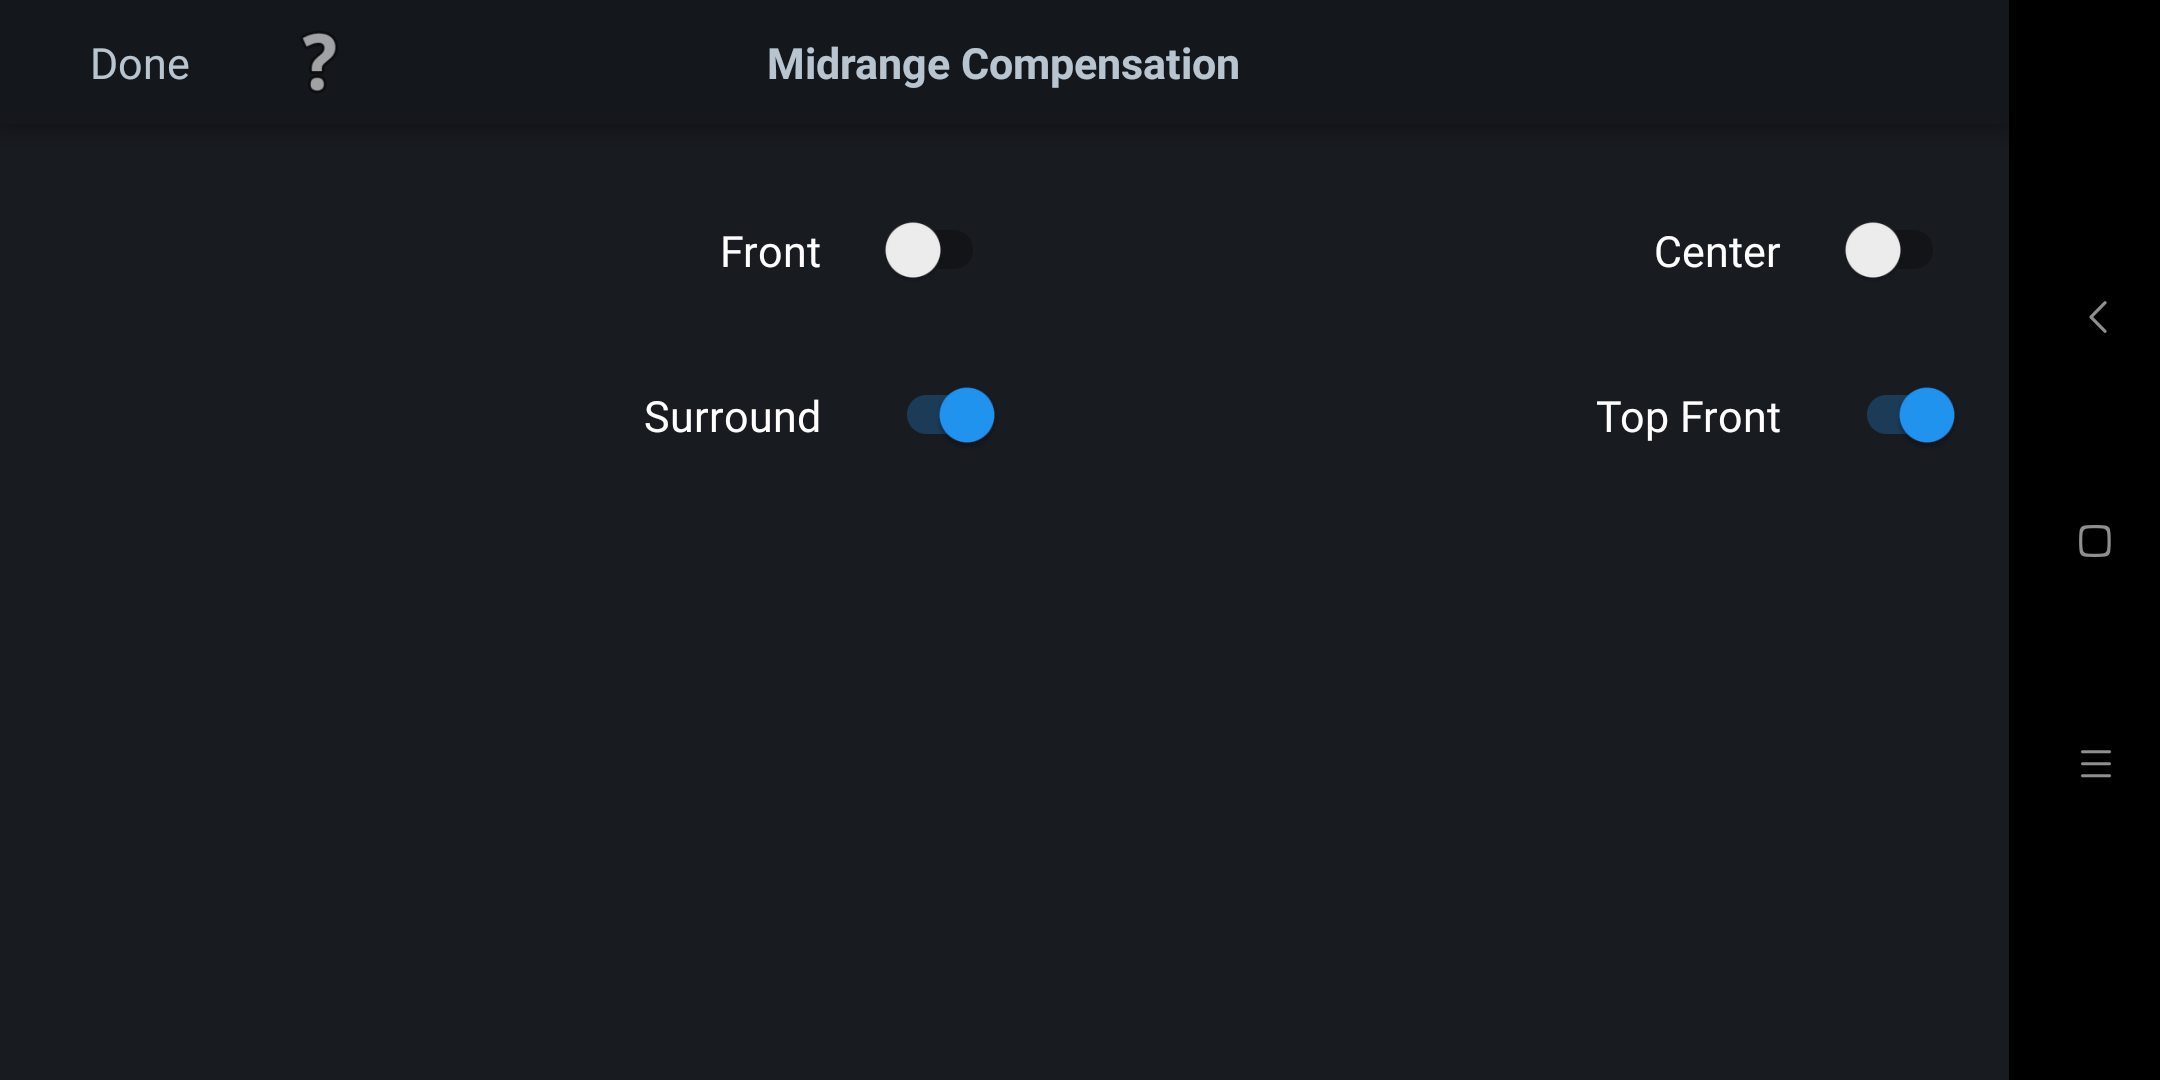
Turn this option off for the speaker will disable the 2 kHz dip from the previous page. i.e. you are getting a flat response all the way to around 14 kHz before rolling off. You can verify this is happening by looking at the 'Target Sound Options (the 2 kHz dip should be gone if this if off).
So what should you do here? Try turning off the 'Midrange Compensation' and listen for a few days.
If you notice a lot of harsh noises, or when the sound gets uncomfortable for your ears, it means your system requires the 2 kHz dip. Pay extra attention to any words or noises that sounds like 'S' or 'SSSH'. If it's a problem, go back here and turn 'Midrange Compensation' back on.
Editing Your Curves - Curve Editor
This is probably the best part of this app. Here you can ignore the two target curves supplied by Audyssey and create your custom filter to your heart's content.

You can click on the yellow arrow marked above to move to another set. This is the filter for the subwoofer. As I only have one sub-woofer, I do not know if there is a single filter for both, or one filter for each.
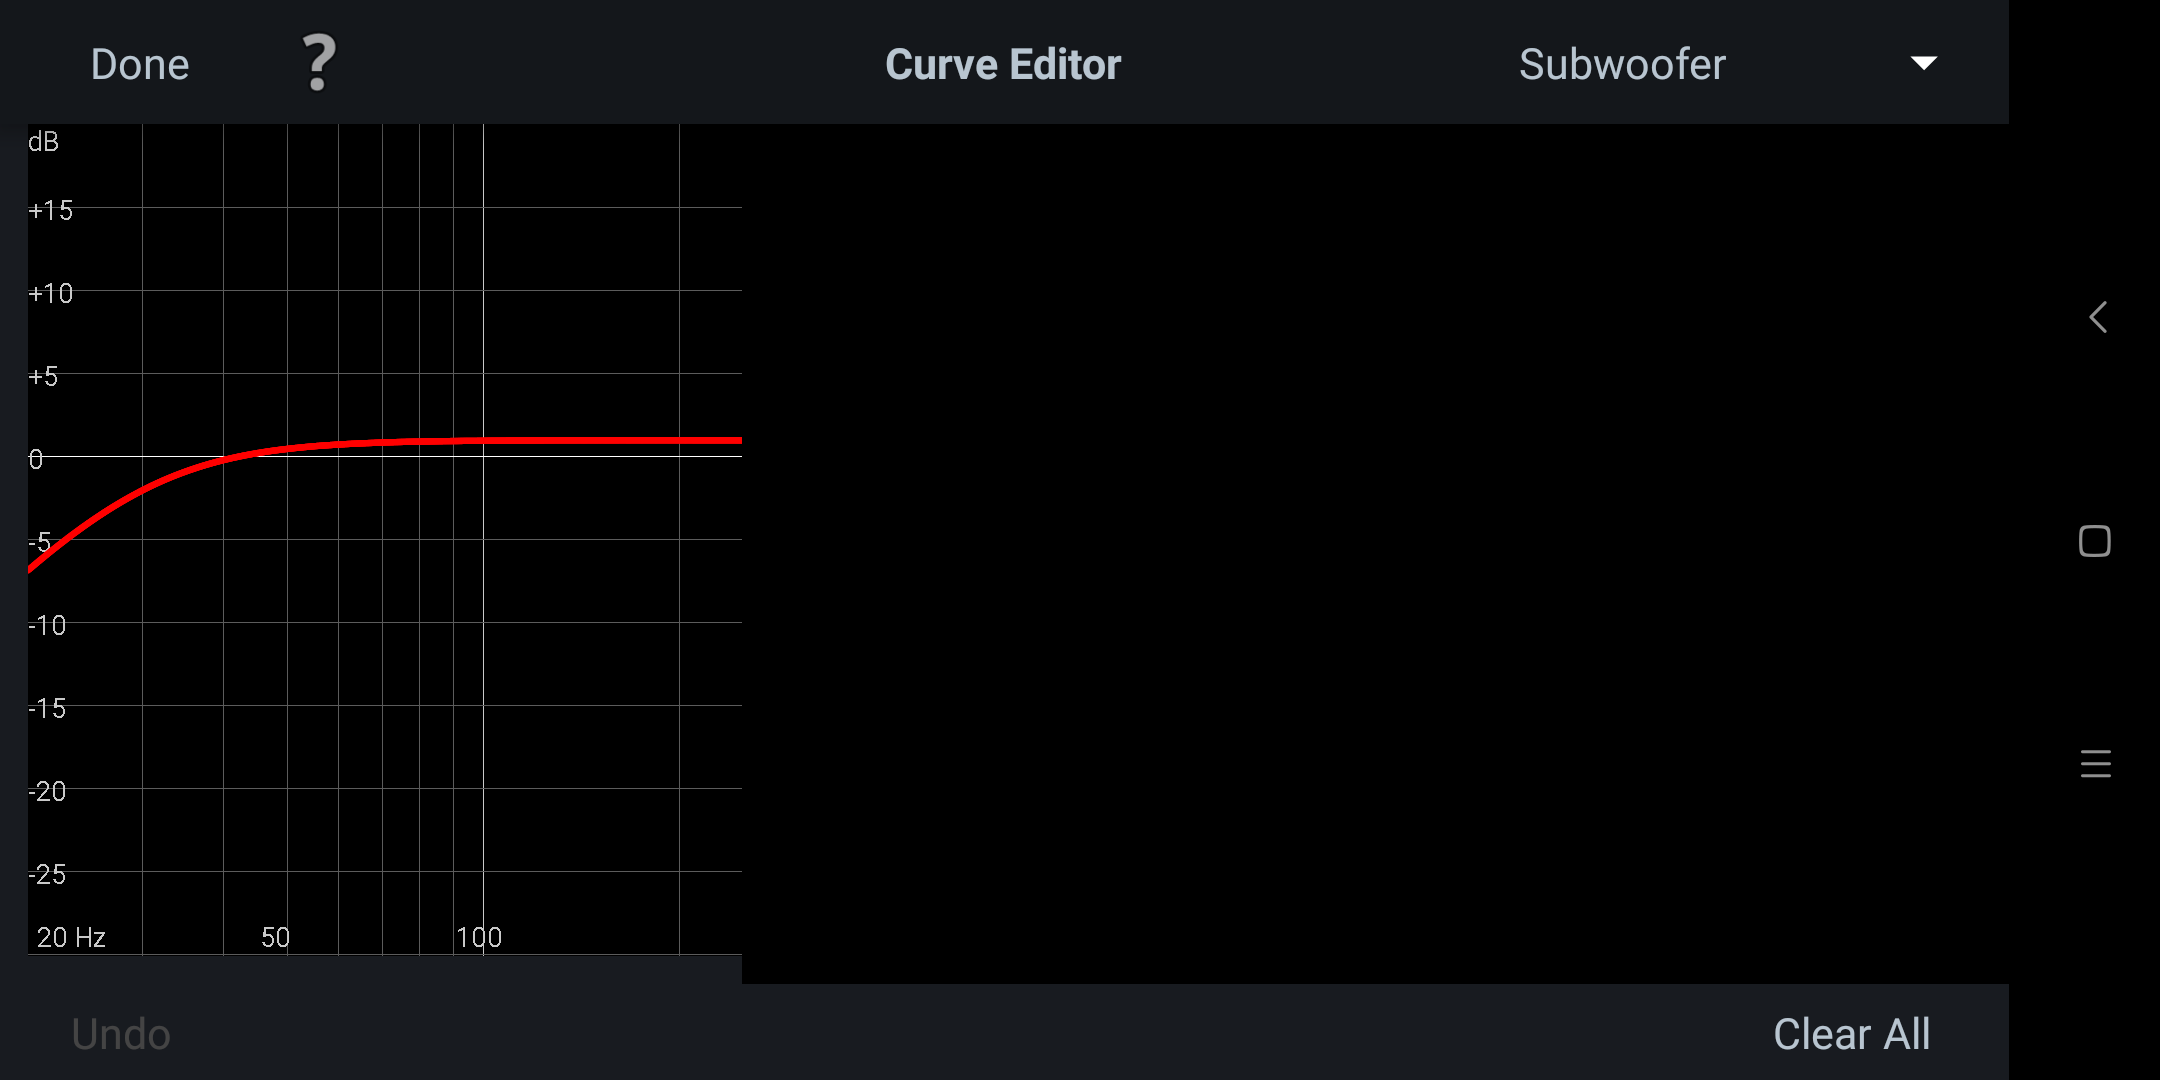
Manipulate the curve to get your desired target curve. Green is the Audyssey default, while red will be the new filter to apply.
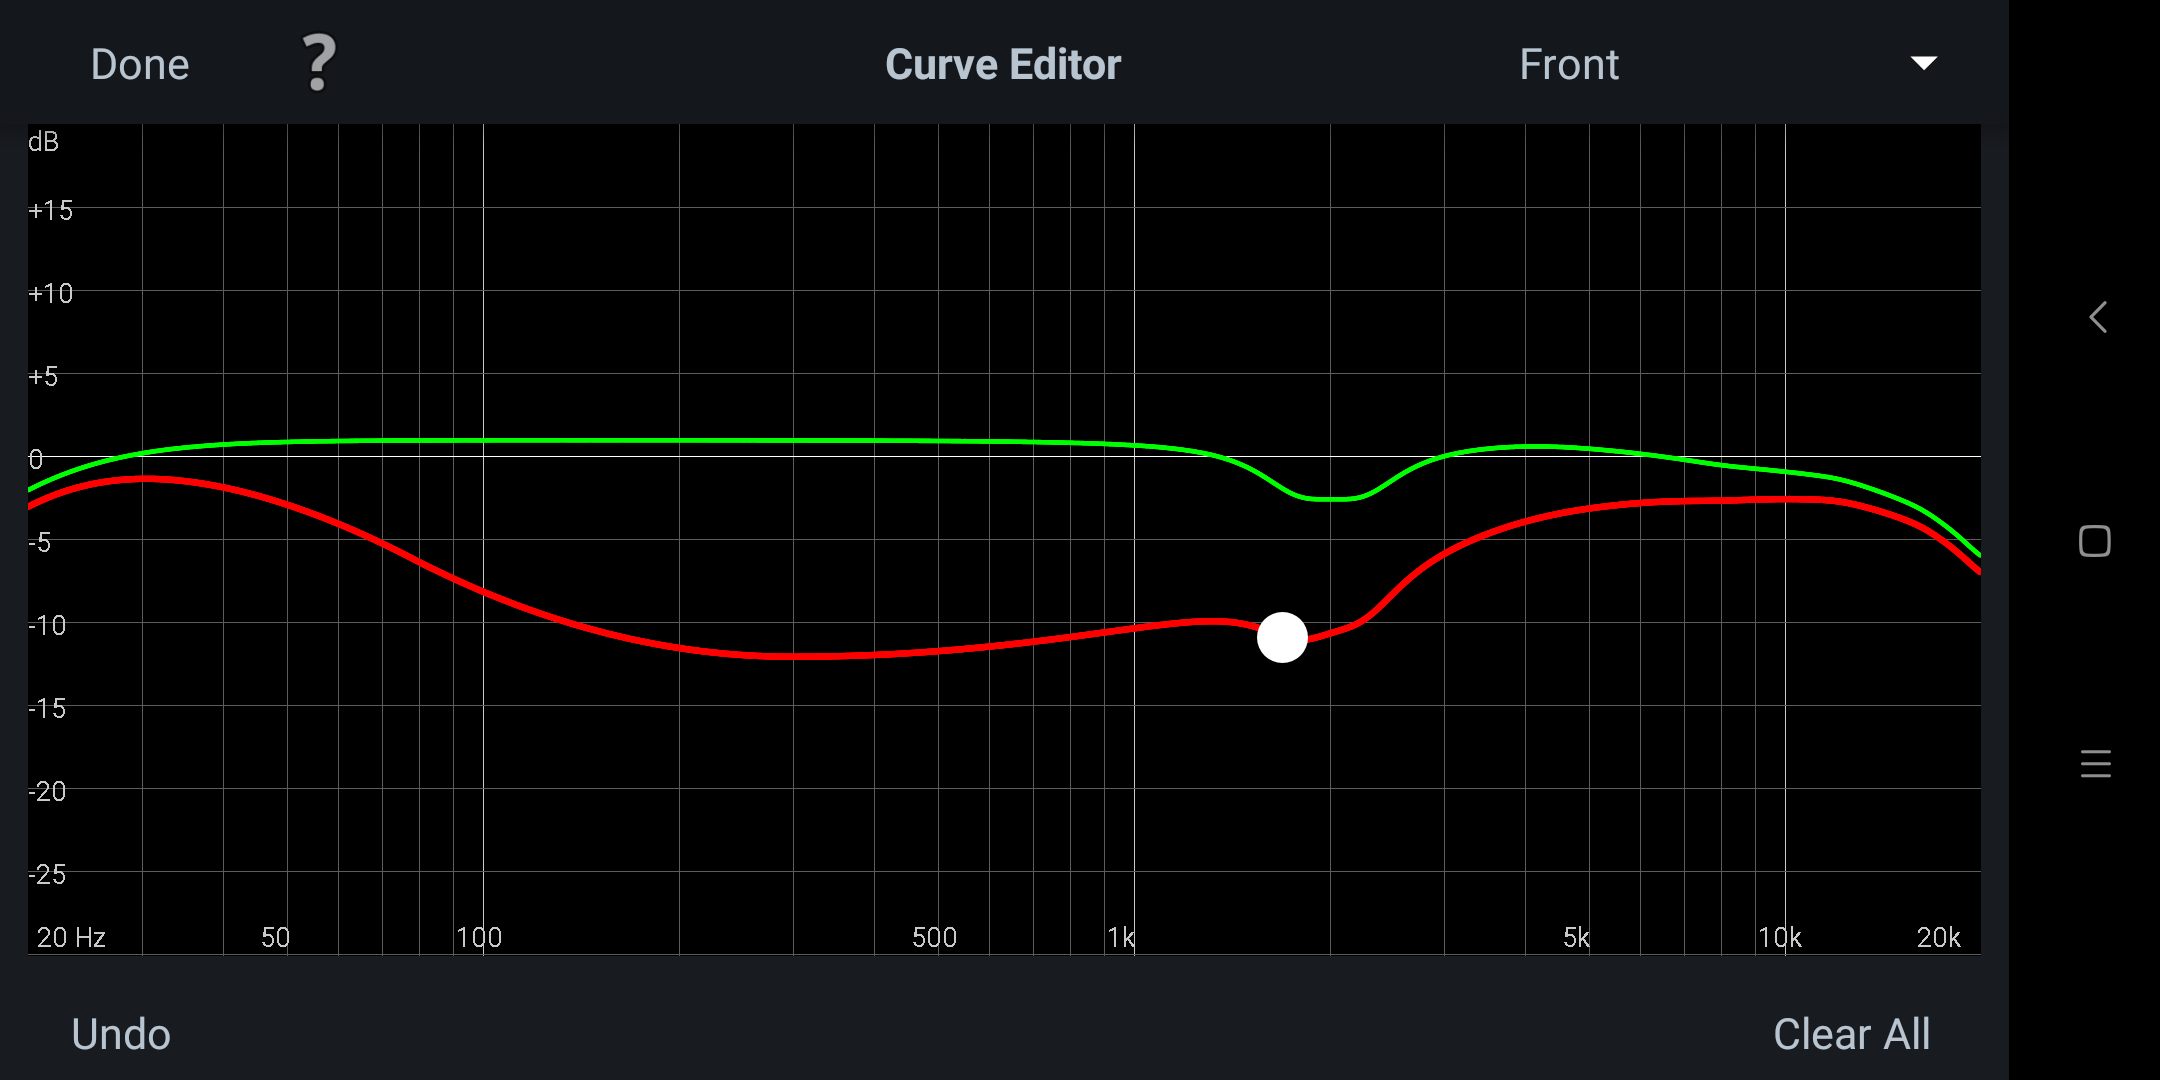
As an example, if you want a flat 20 Hz to 20 kHz curve, you can manipulate the target curve to something like so:
The correct way to do this is to adjust your new target curve here, then look at the 'Room Correction Results'. The idea is to create a target curve that is customised to your home theatre - removing the big peaks and troughs giving you a flat response that starts to roll off at around 14 kHz.
Work on the sub-woofer first, then move on to center, fronts and everything else.
Easier said than done. There's probably not enough points you can use to get a truly flat curve. And at around this point you'd probably realised you should have done all this on a tablet instead of on your mobile phone :roll:.
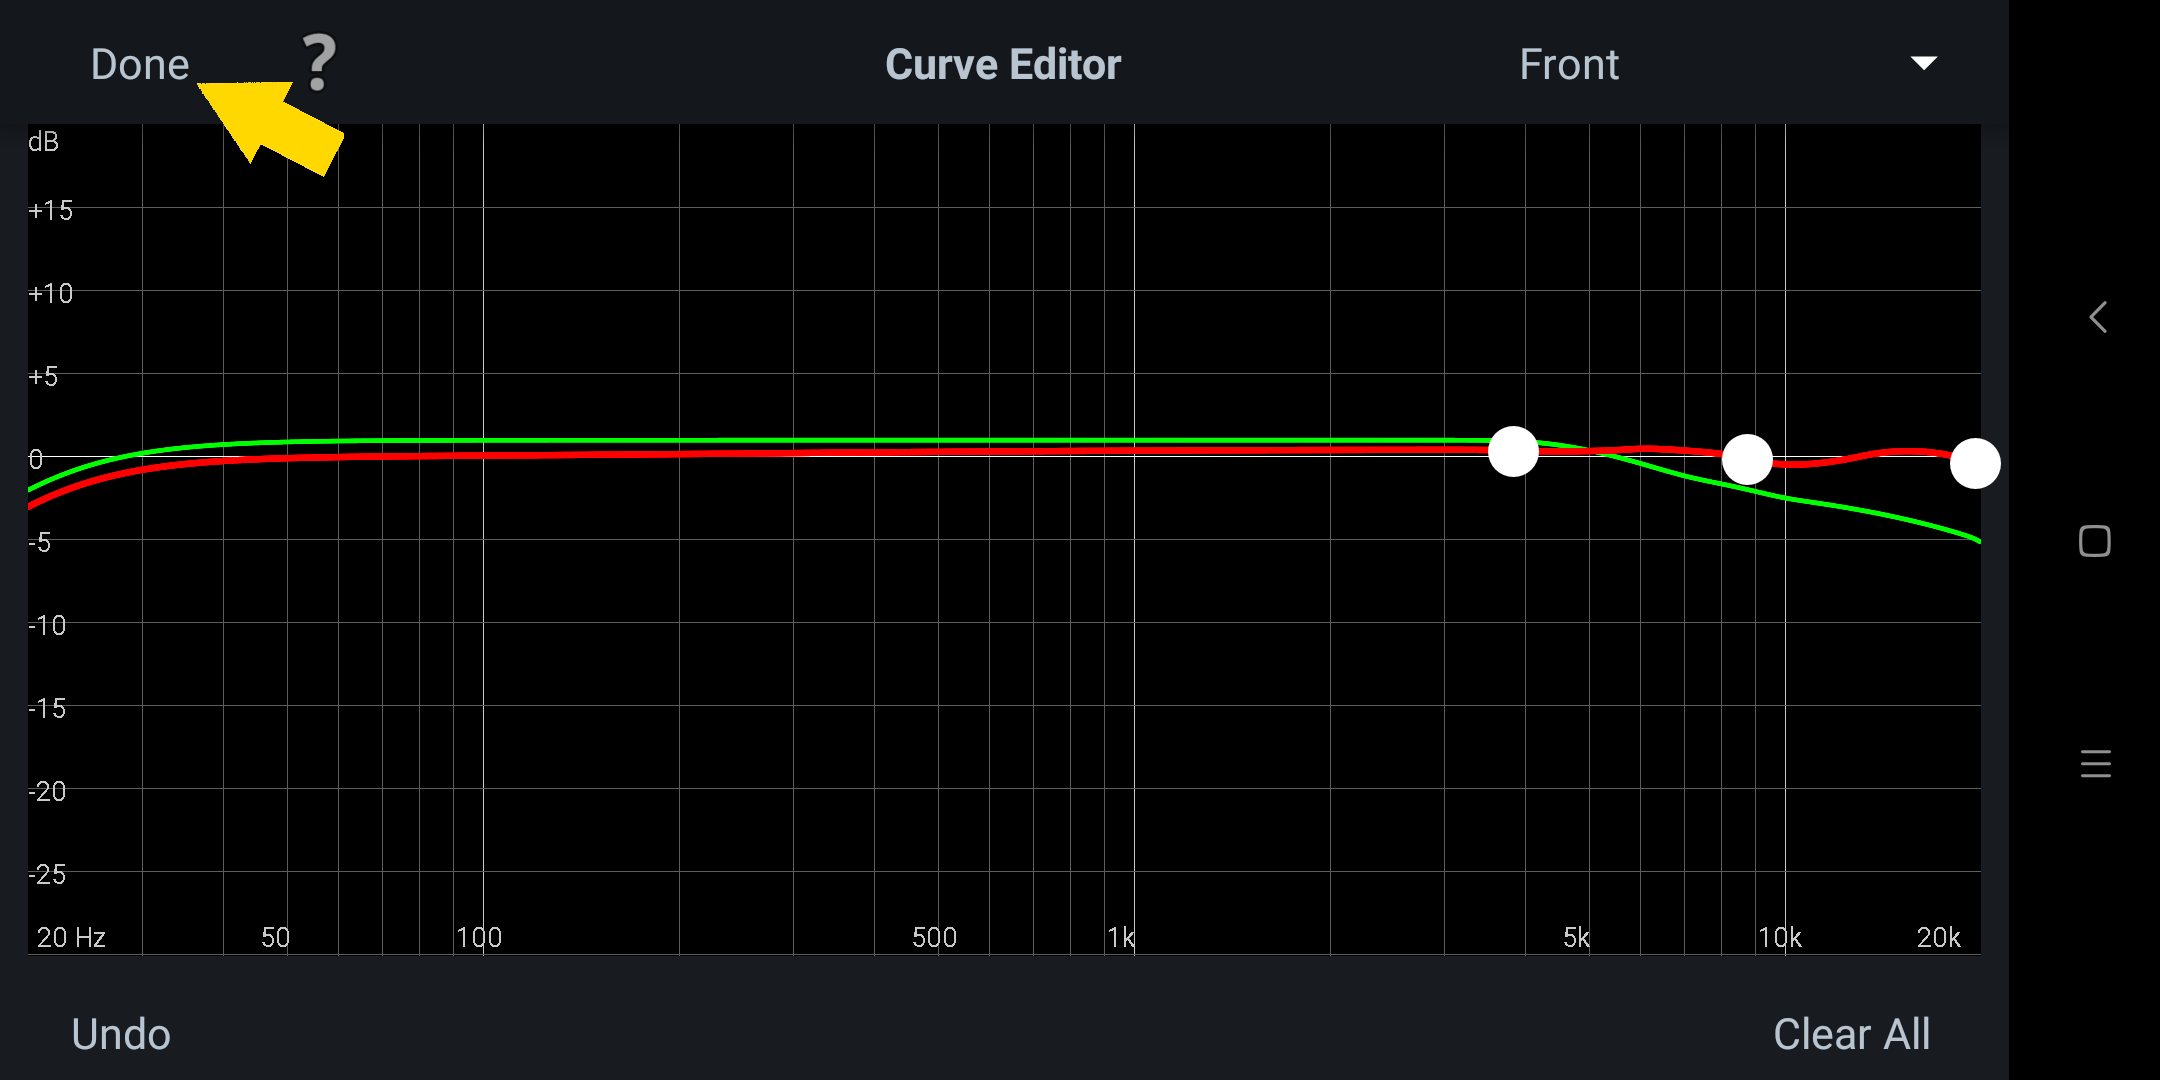
!! VERY IMPORTANT !!
Remember to press the 'Done' button (see arrow above) after you have changed the curve. Do not hit the 'Back' button on your Android remote. There is a bug in the Android addition and pressing the Android 'back' button will CORRUPT the data set. You have to delete and restore from a backup or re-take all your measurements again to continue!
Editing Your Curves - MultEQ Filter Frequency Range
By default the Audyssey filter is applied all the way to 20 kHz. You can adjust where the filter stops here. Click the area marked by the yellow arrow to switch to another speaker set. Here's the default target curve for the Front speakers.

And this is the target curve for the sub-woofer.
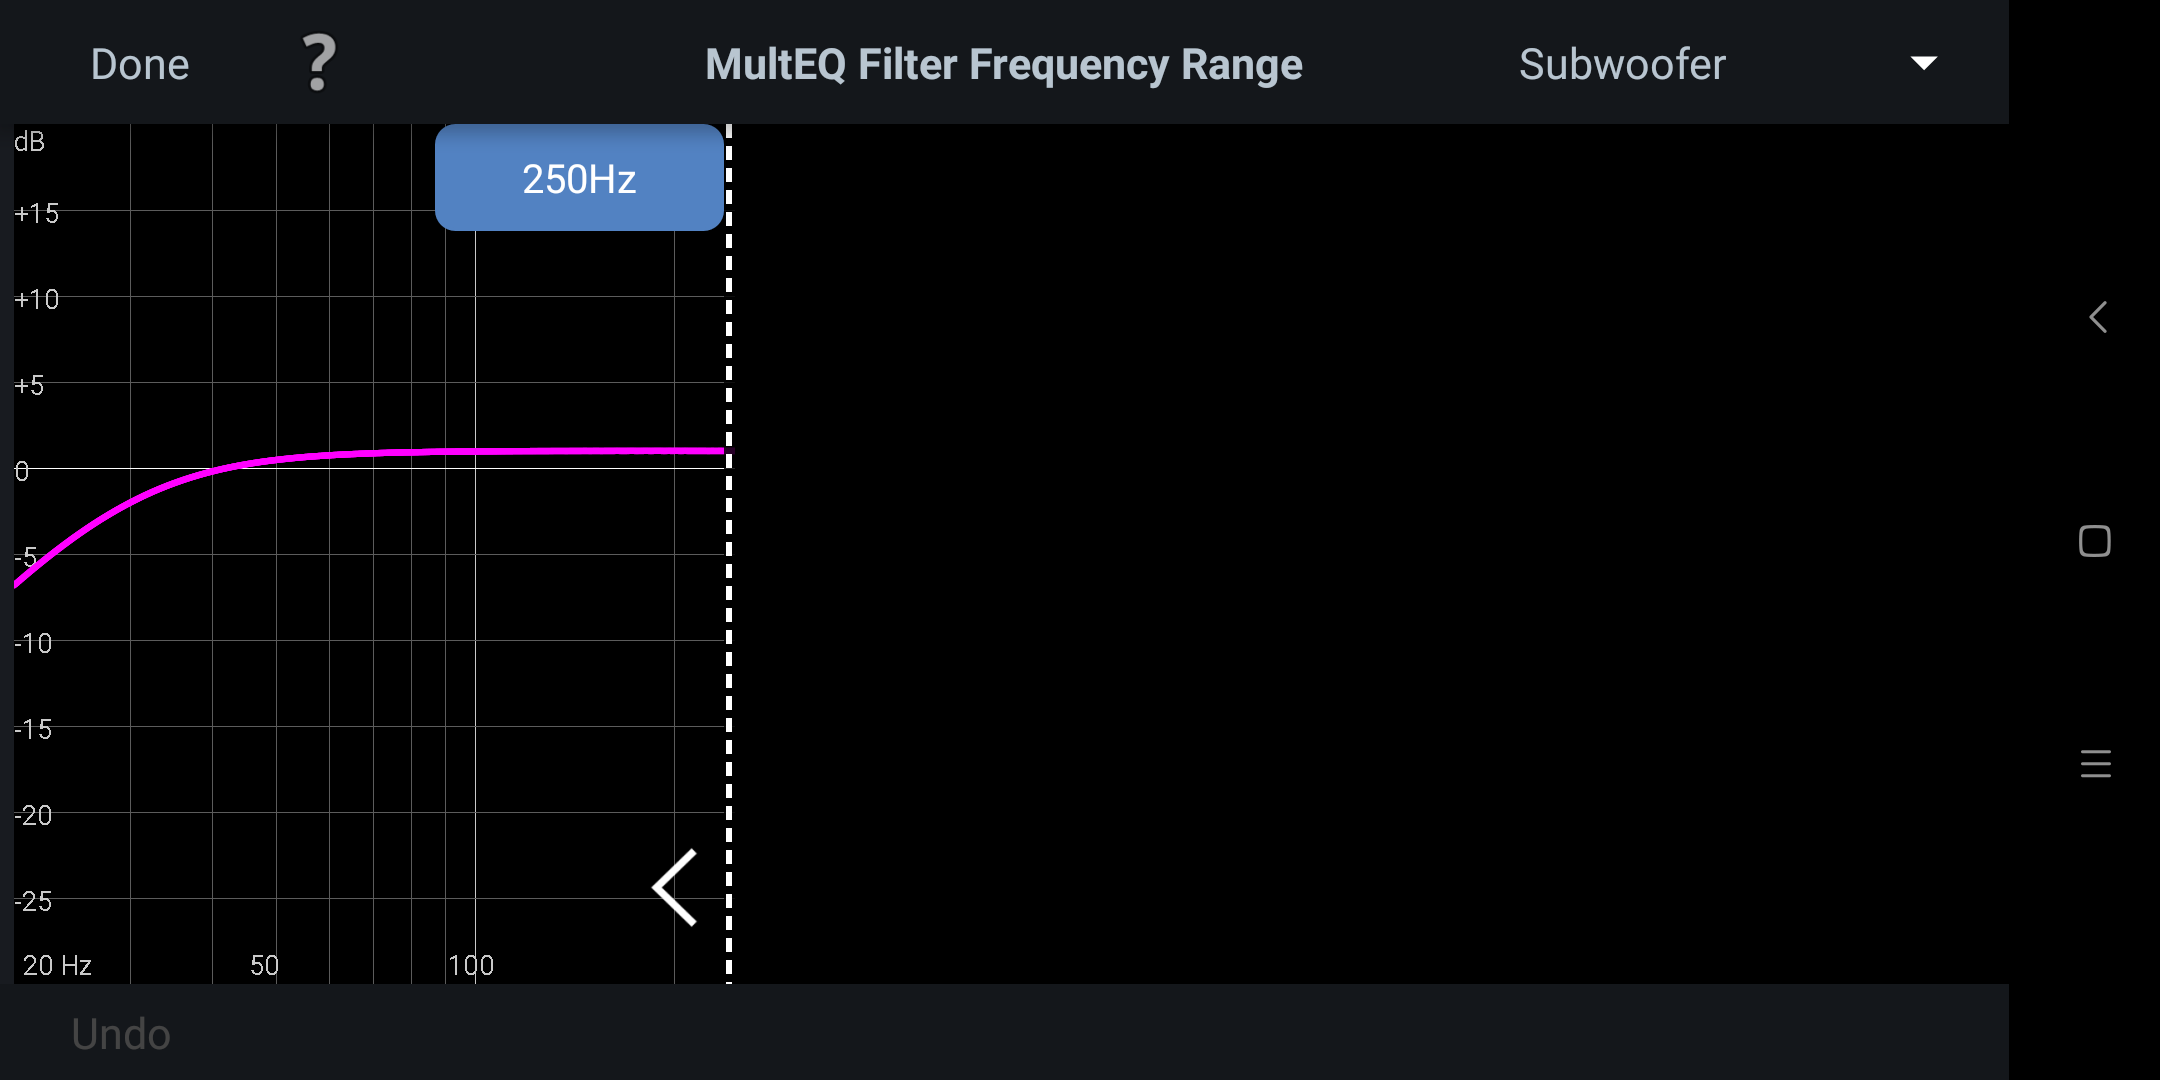
Adjust the vertical dashed line to where you want the filtering to stop. The cut off frequency is shown in the blue box next to the line. This is an example where the cut off is at around 5 kHz. This means I am EQ my mains up to the 5 kHz band, the rest will be passed unprocessed.

Click the 'Done' button after you are finished.
Editing Your Curves - Audyssey Settings
You have already setup some basic Audyssey DSP modes during calibration. If you made a mistake then you can always return here to adjust them.
And that's all the options explained. Next I'd show you how to backup your measurements and also how to upload the curves to your receiver. If you are new to this, make sure you have created a backup of your measurements before you attempt your first edit.
You need to re-do your calibration all over again if the file gets corrupted and you have no backups to restore from.
Uploading Your Curves - To The Cloud
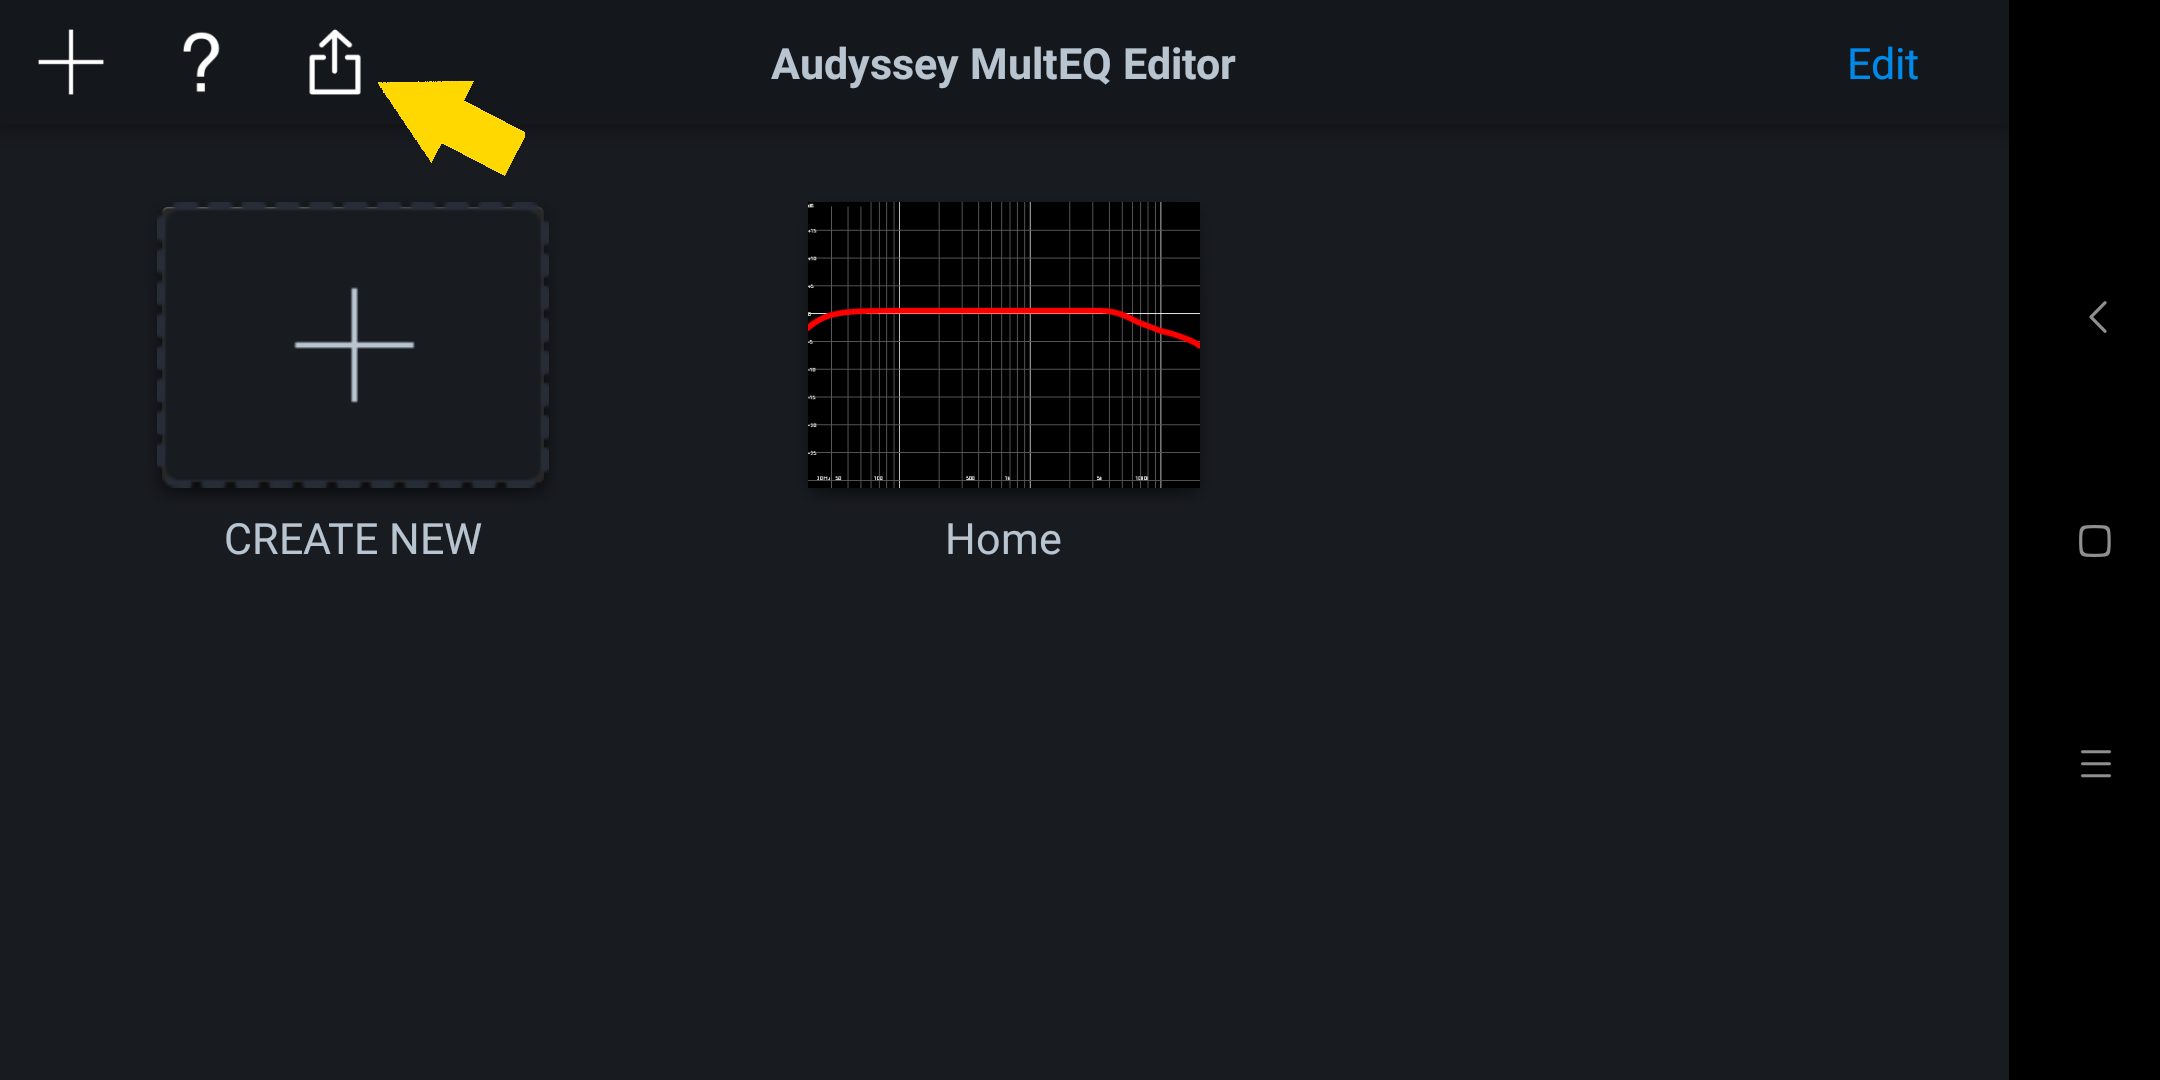
Click on the Upload button (yellow arrow):
When going through this for the first time, Android will seek your permission to grant some access to the MultEQ Editor app. Select 'Allow' for all of them.
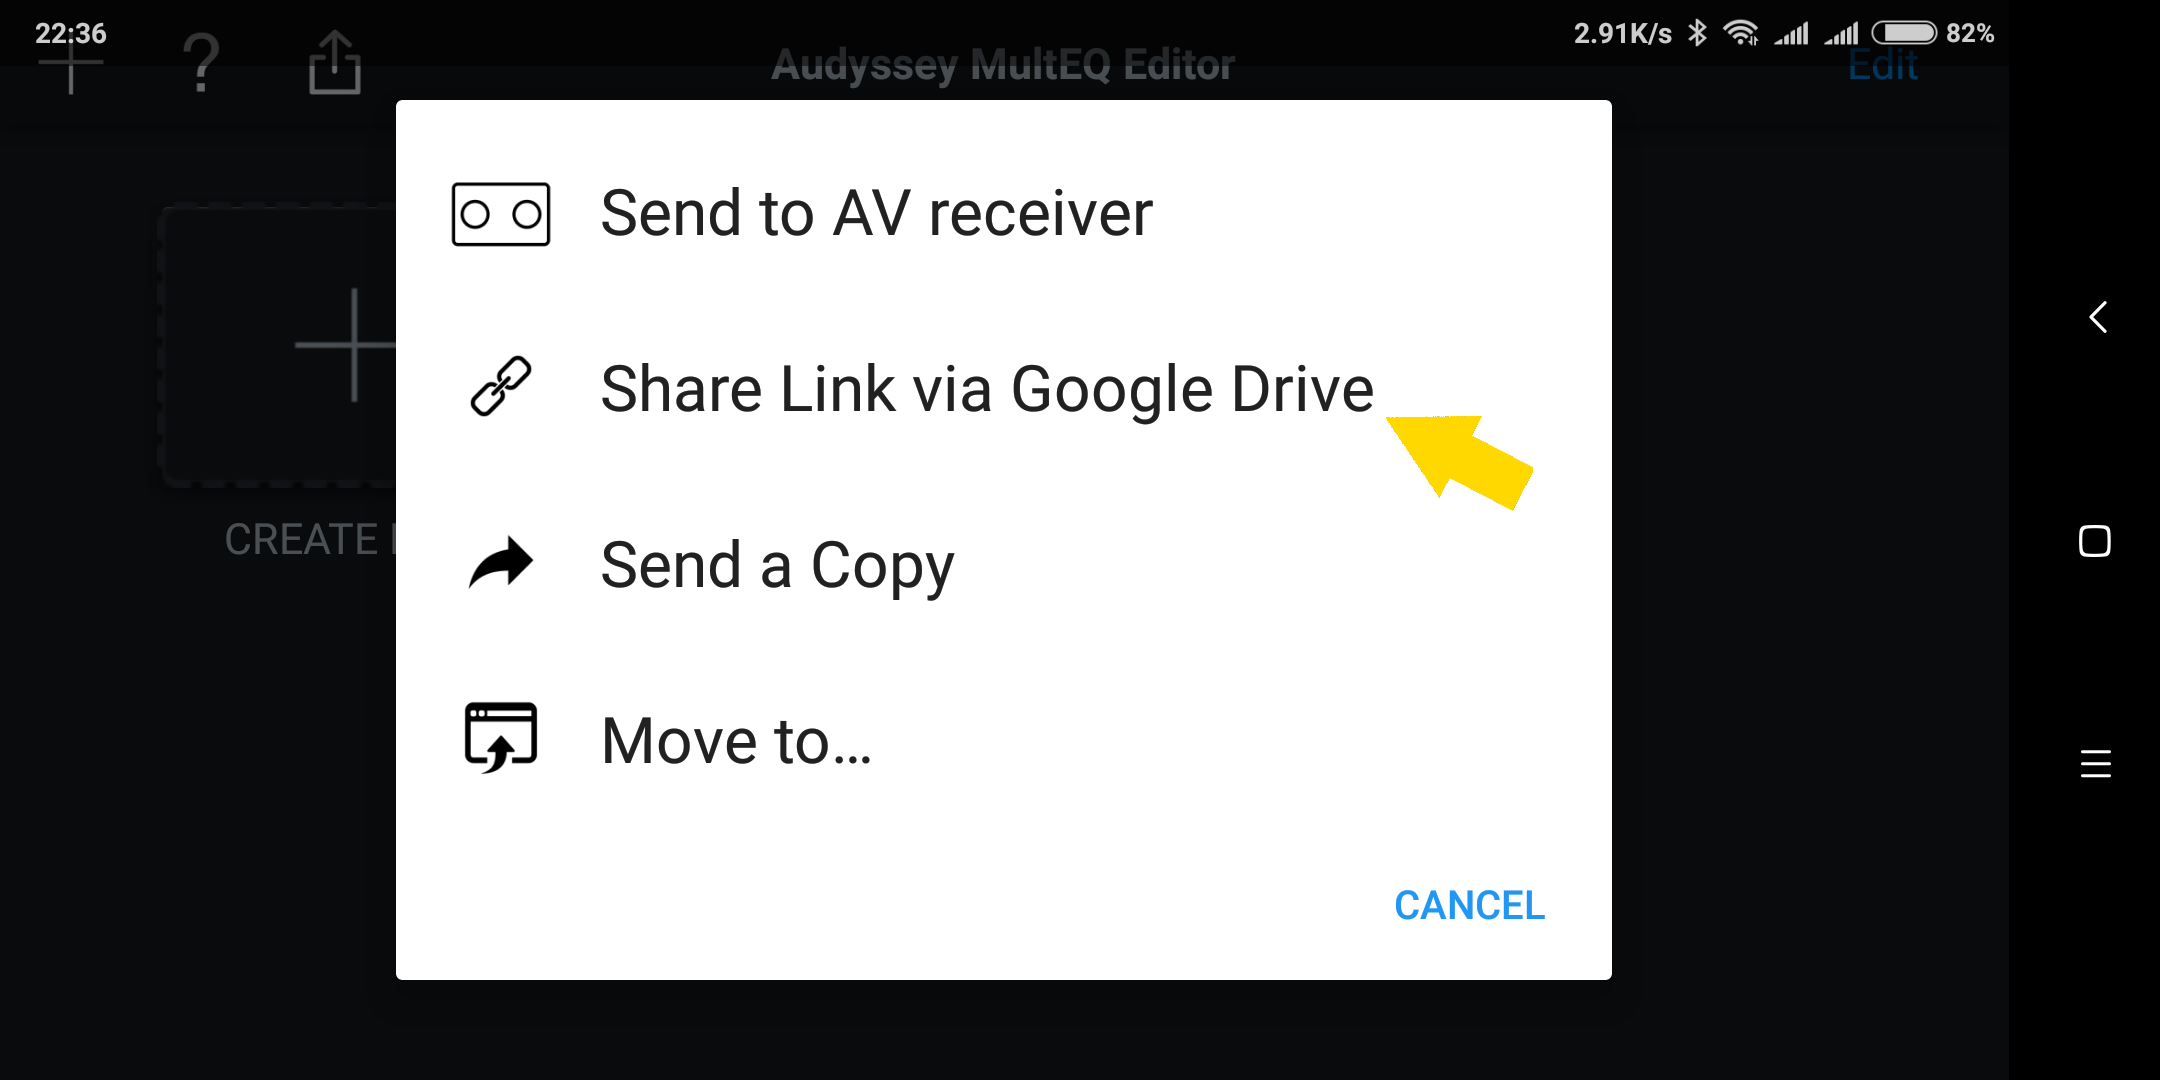
Click the 'Share link' icon. On Android the measurements are uploaded to Google Drive (on iOS this will probably be uploaded to iCloud).
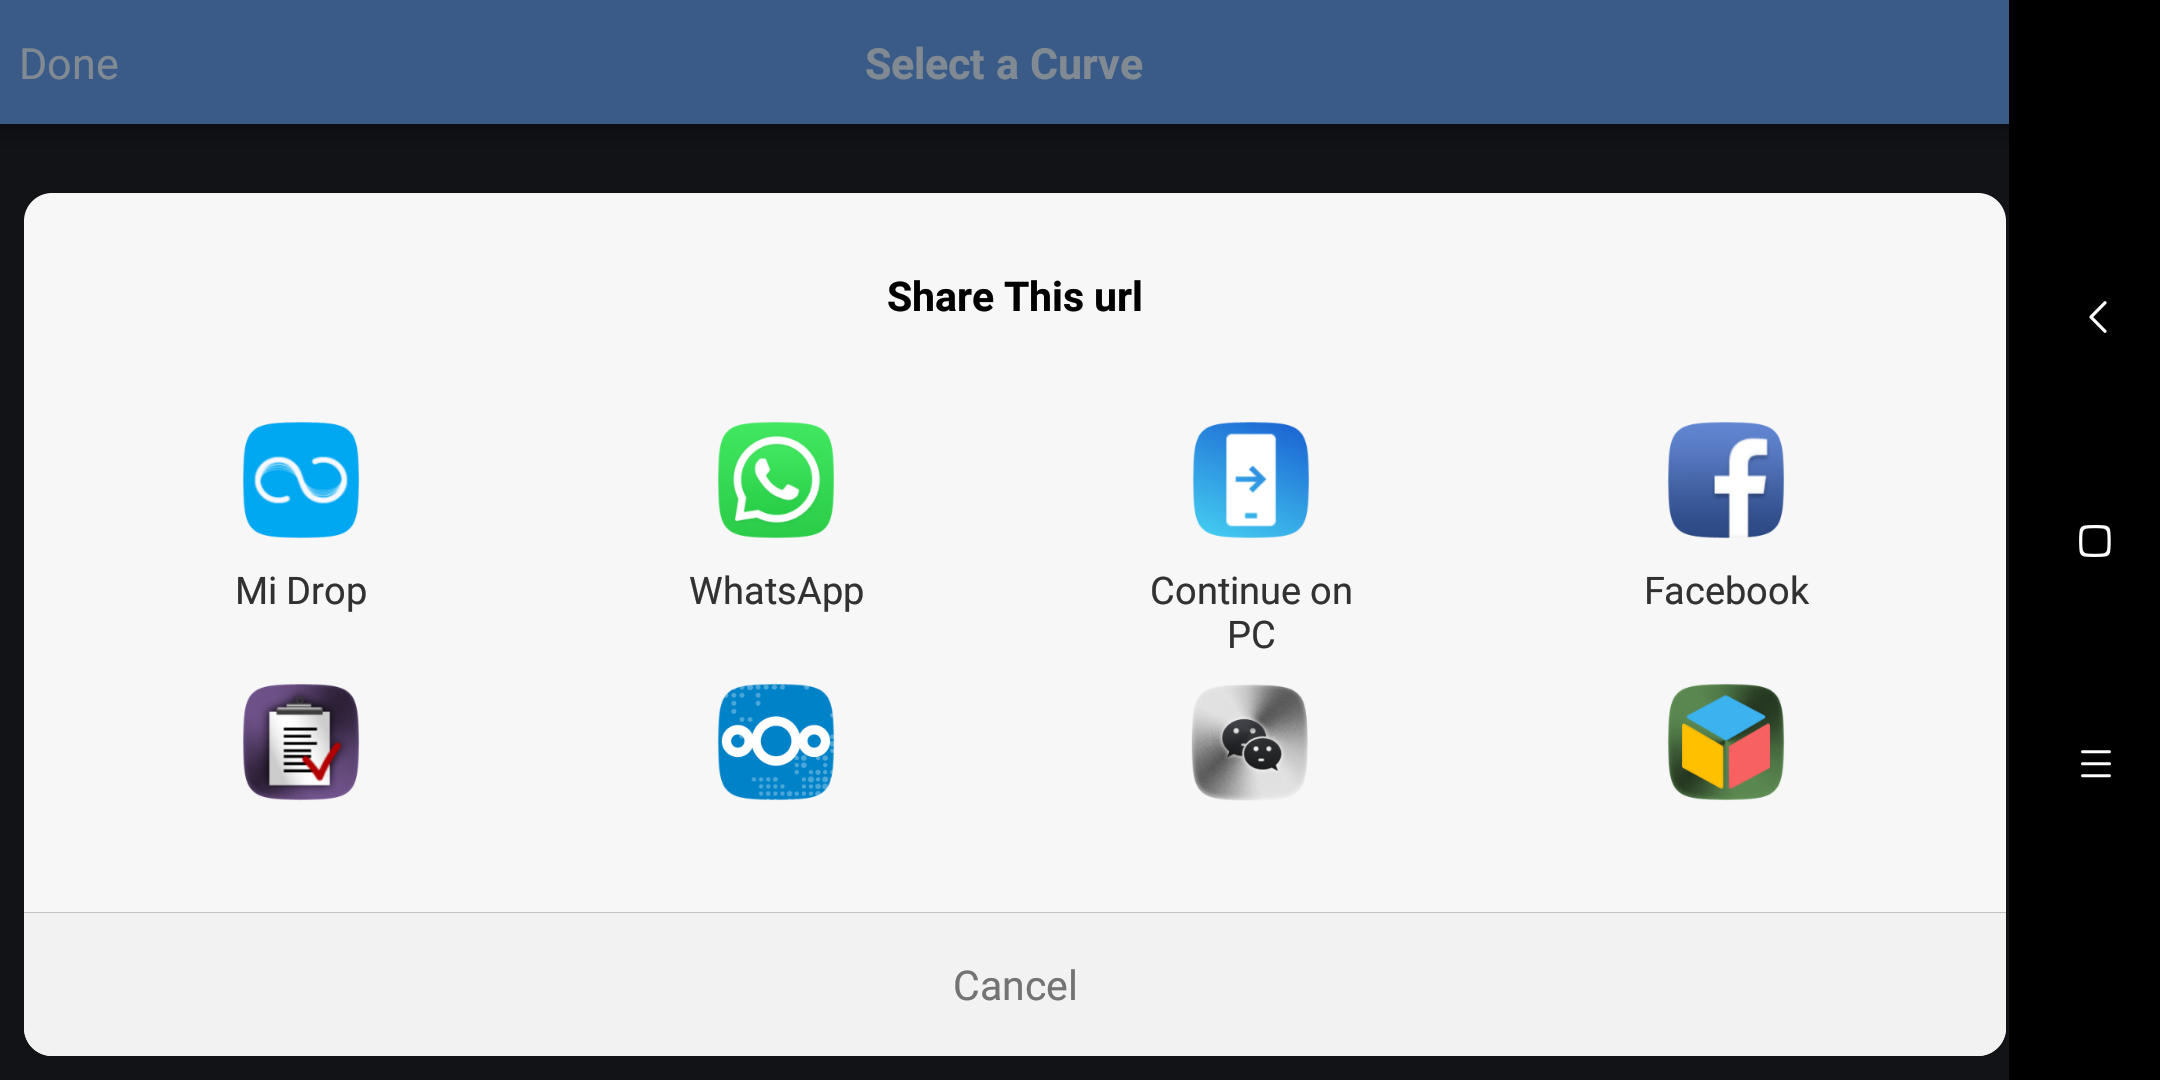
Select the measurement you wish to share:

Choose the app to share your link with, and away you go.
The link does not matter much (Unless you are sharing your configuration with others). The important bit is to confirm the settings has been uploaded to your cloud storage. Login to Google Drive (if you are using Android) or iCloud (if you are using iOS) to confirm the file is there.
The filename is the name you have given to the measurements when you save with the extension 'ady'. Here's my saved backup:
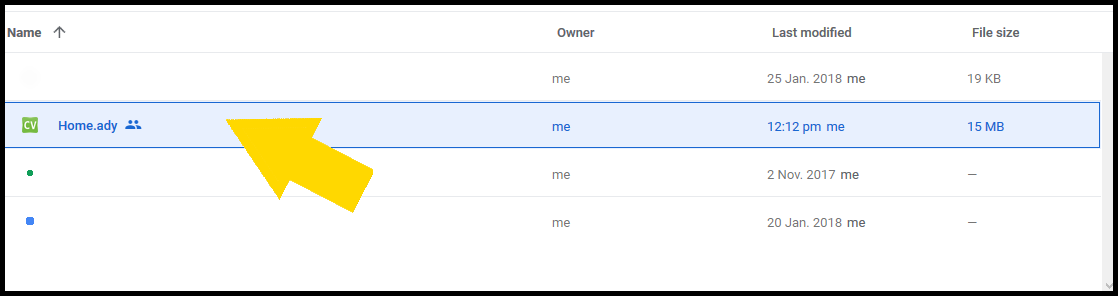
There is a second way to create the backup from within the editor. This will be covered later on in this article.
Uploading Your Curves - To The Receiver
You'd need to upload your measurements to the receiver in order for the DSP to apply. Doing this is similar to backing up your settings. Click the 'Upload' button:
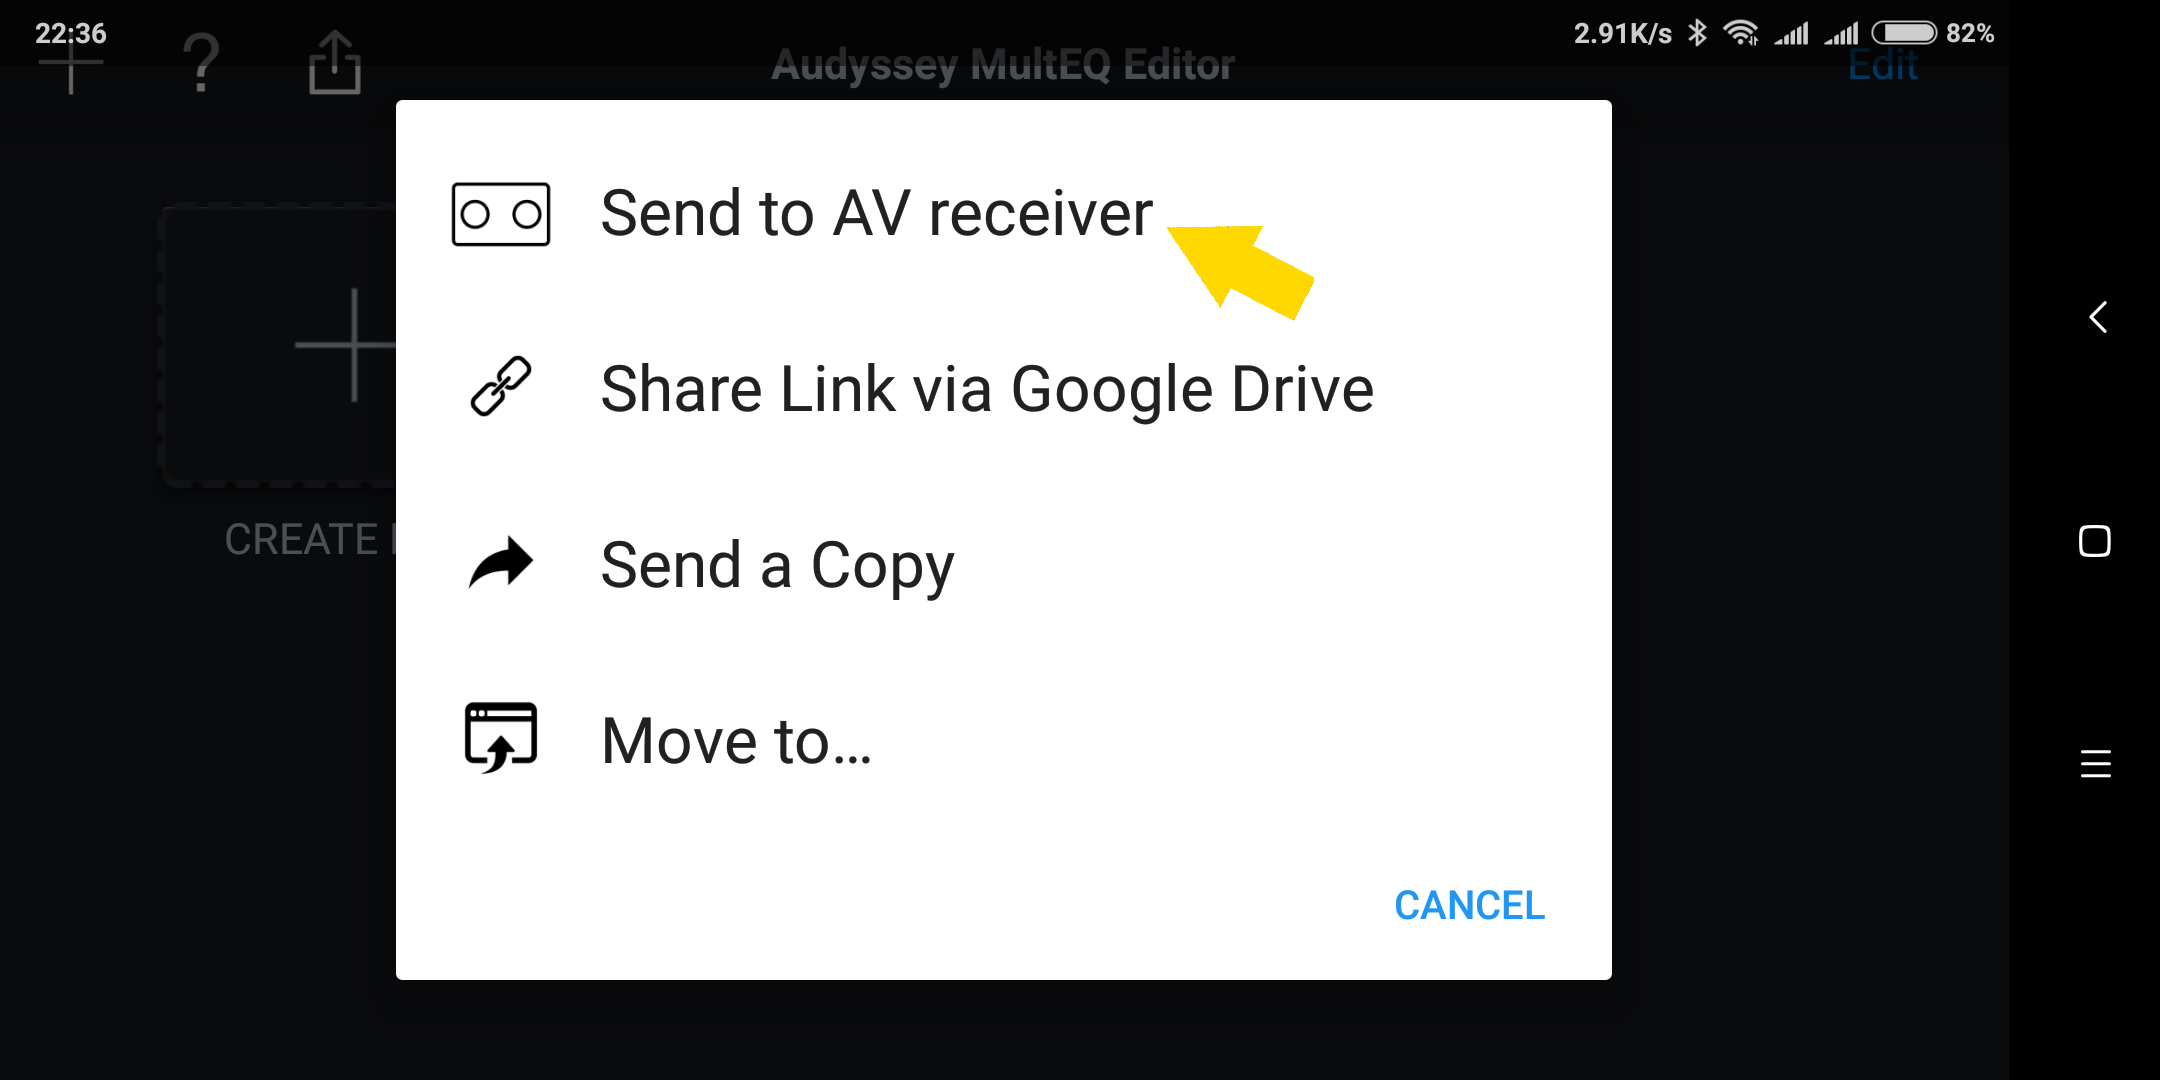
And select 'Send To AV Receiver'.
Select the curves to send.
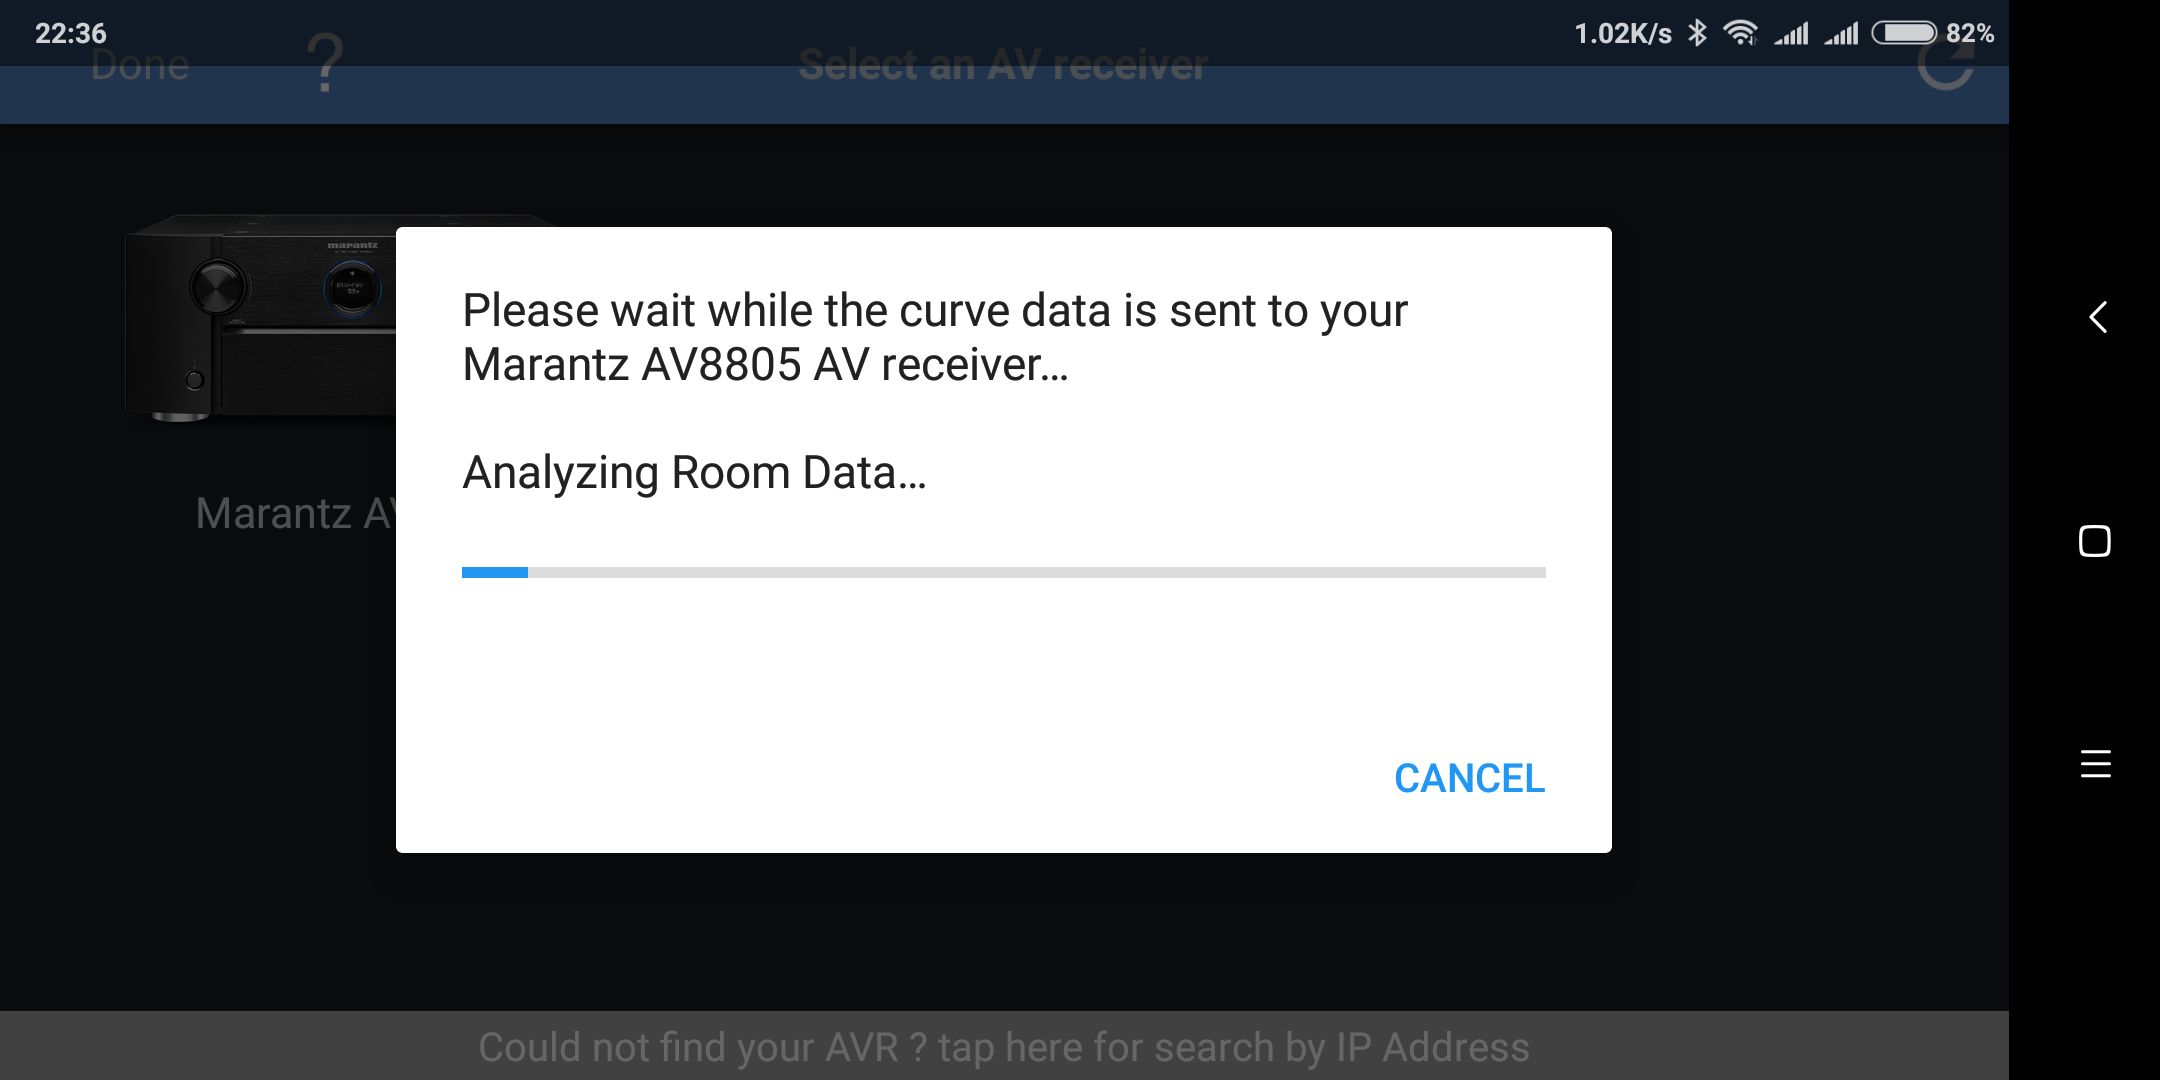
Select the receiver to upload to.
Click 'Accept' to upload. And wait for the process to finish. This should take only 10 seconds or so.
Once completed you'd be back to the 'Select An AV Receiver' screen. Click the 'Done' button to return.
And that's it. You have uploaded your first Audyssey configuration via the MultEQ editor app. Now repeat the process of adjusting the target curves, uploading, auditioning until you are happy with how it sounds.
Renaming, Copying Or Deleting Your Curves
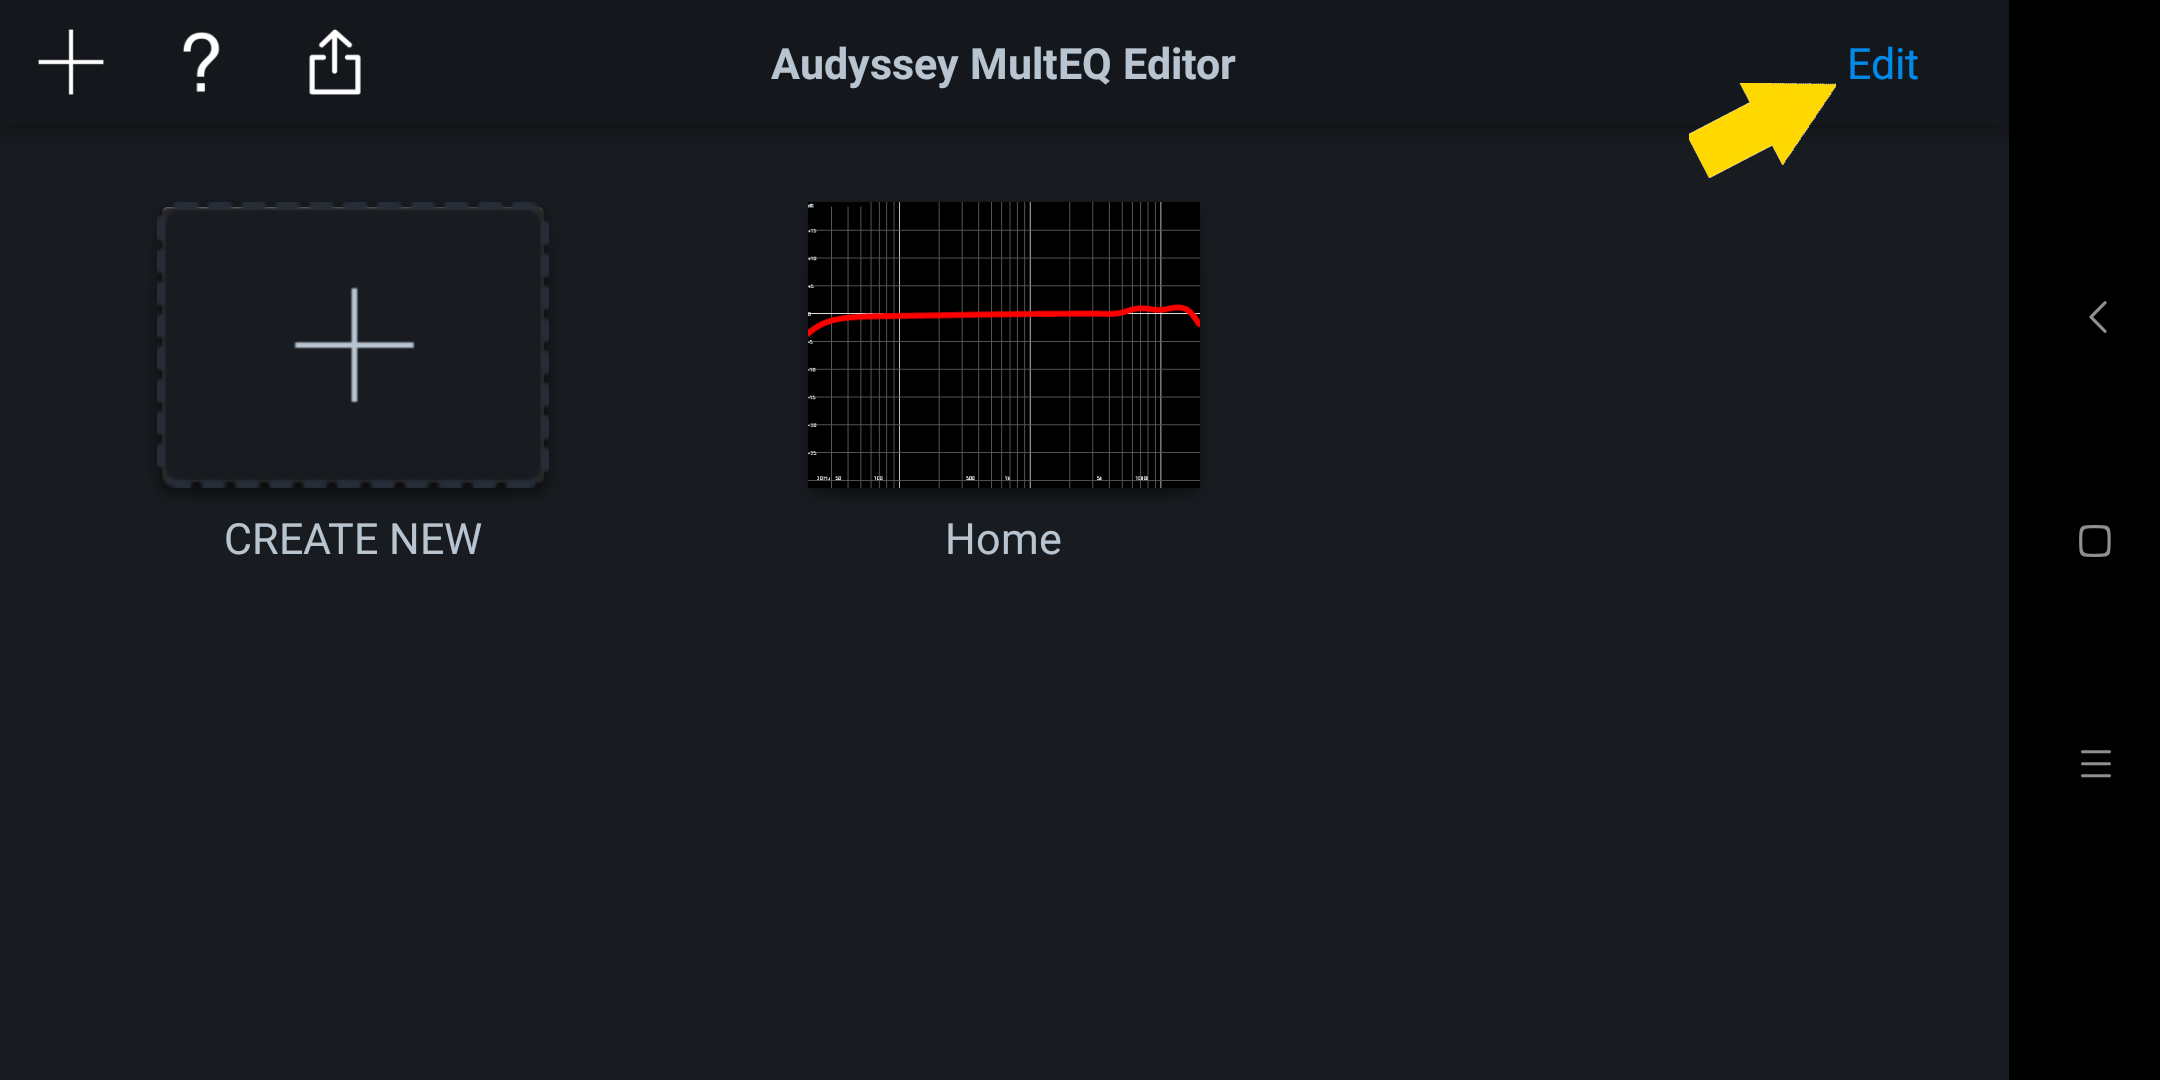
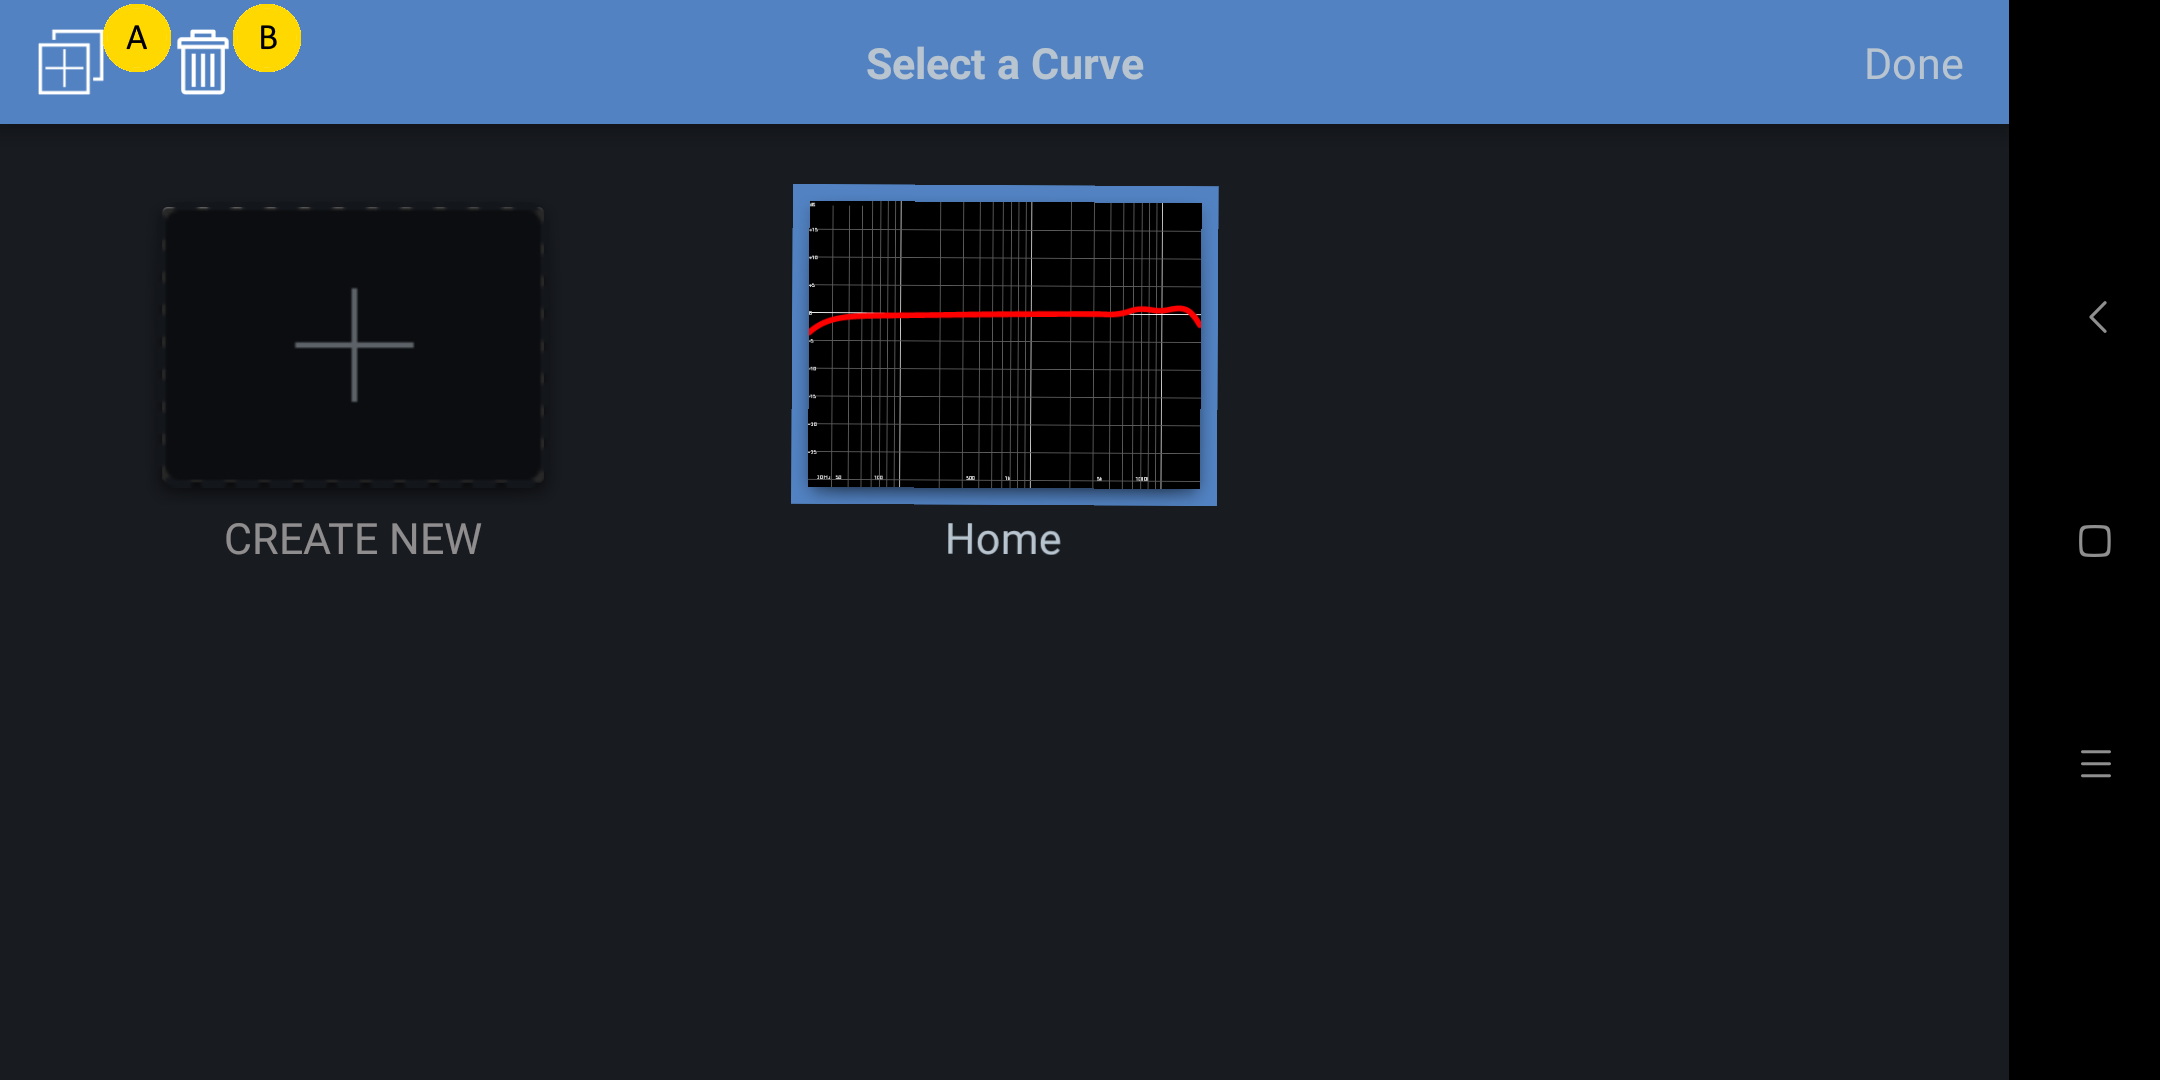
Click the 'Edit' button (see arrow) to edit a curve.
Select the curve to edit and the two top left icons will lit up. You can hit 'A' to create a copy (As a backup), or 'B' to delete (if the file is corrupted or you have no use of this curve any more).
Here is an example of me creating a backup of Home.
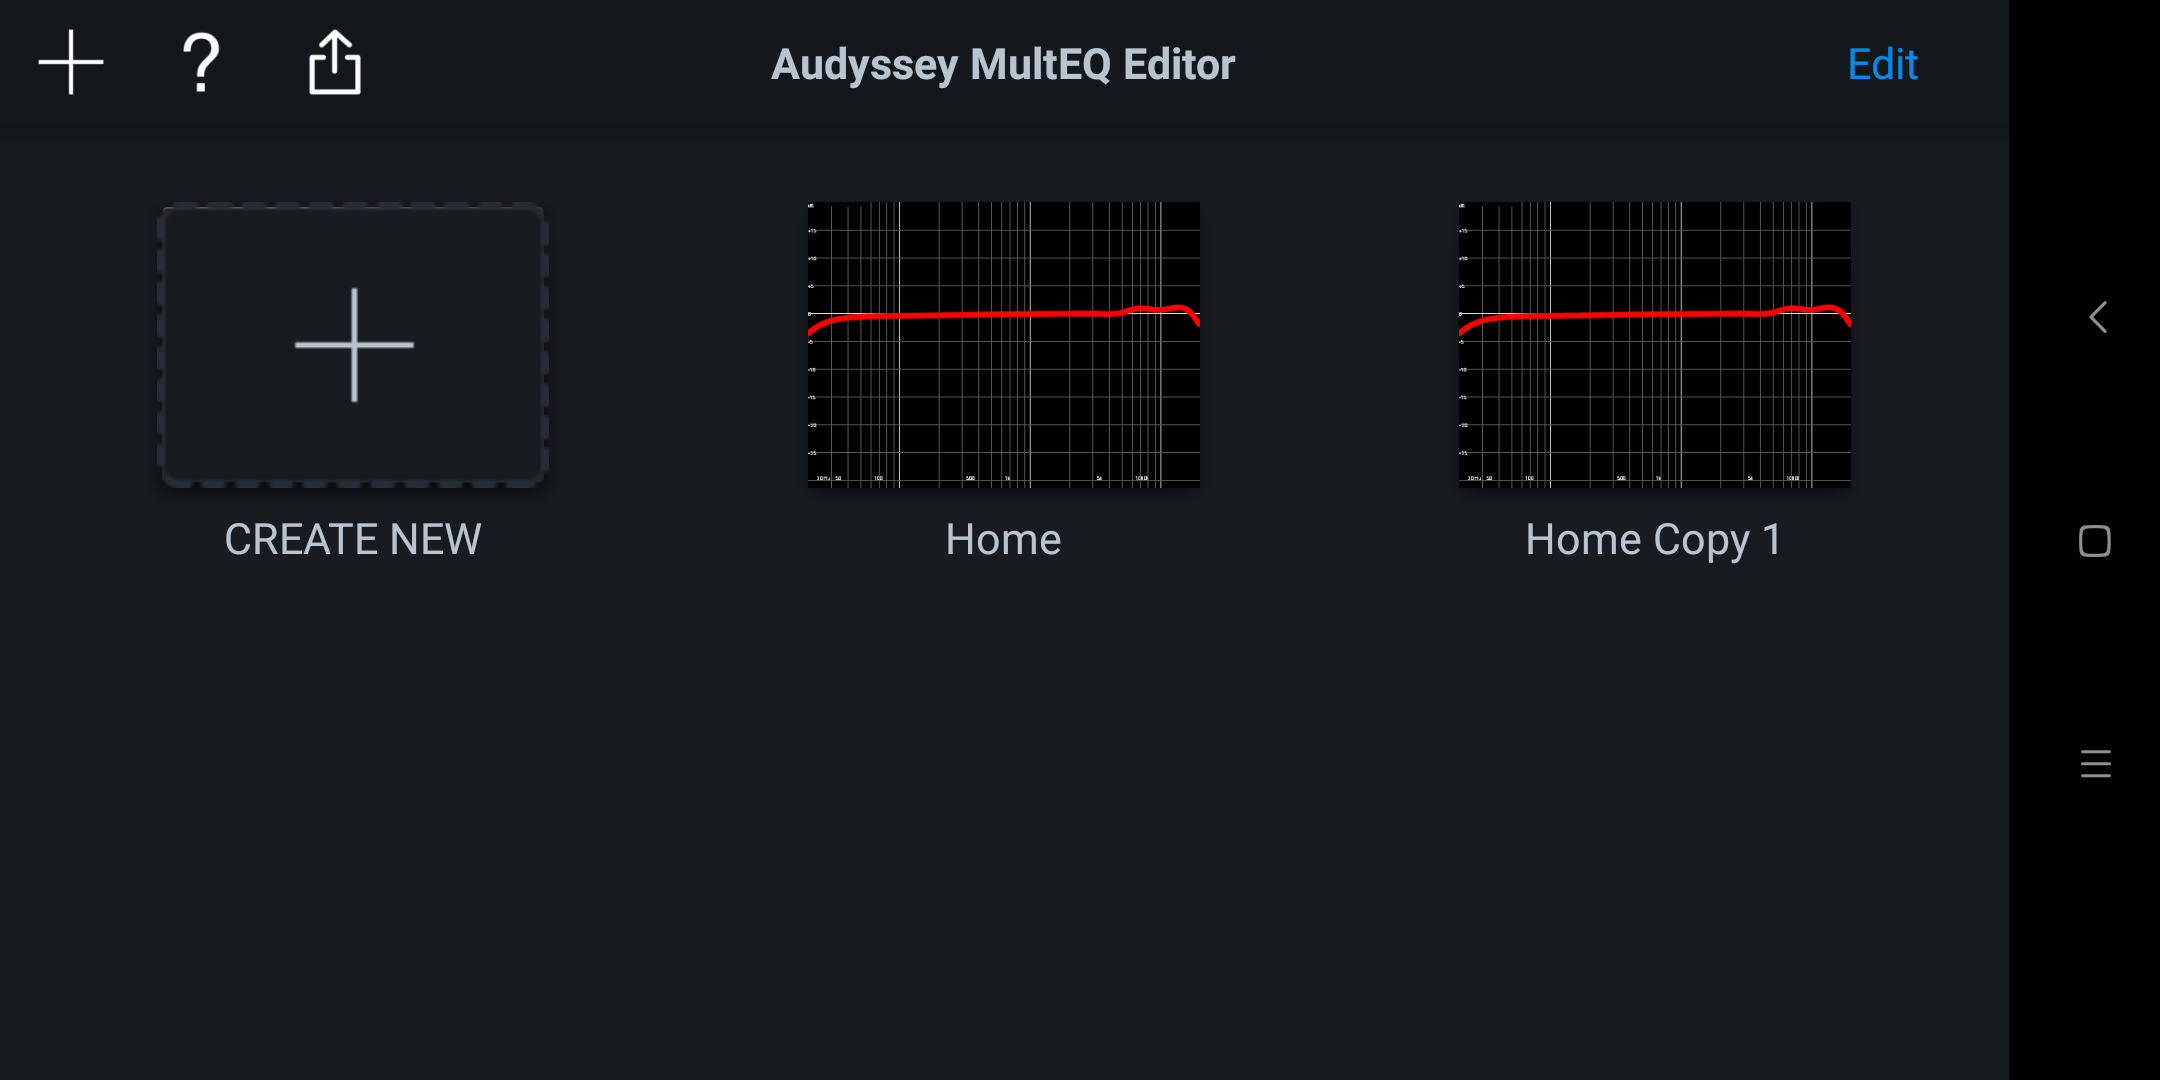
'Home Copy 1' is a bad name. You can rename this to something else by pressing the 'Edit' button again, and then tap on the text 'Home Copy 1'. This will bring up the rename window.
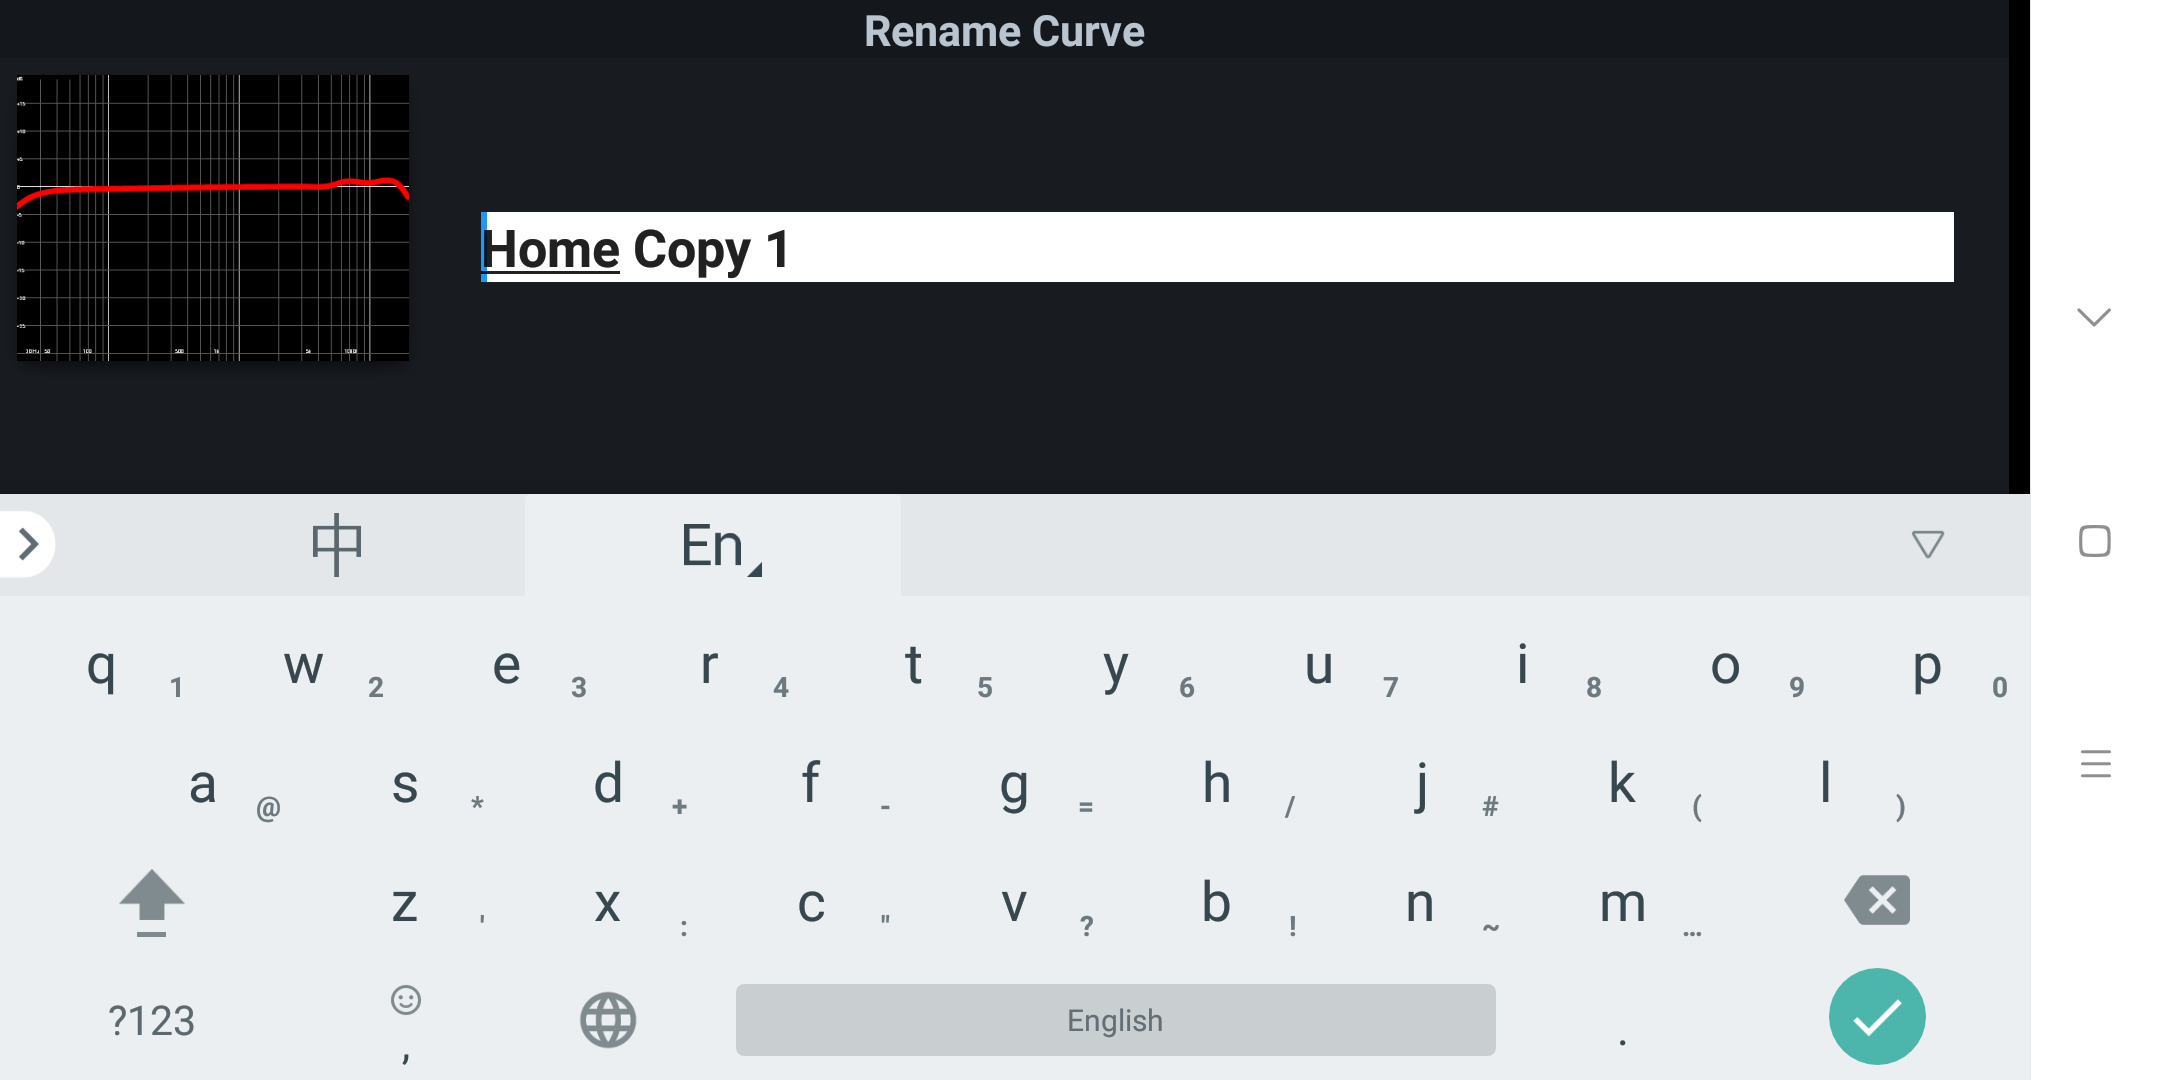
Press the 'Enter' button on the keyboard, and then 'Done' to save your changes.

Restoring Your Curves From The Cloud
I like to store my configurations on the cloud. Having your backup on another physical device have it's advantages::
- In case you lose my device
- transfer settings to another device
- Need to factory reset your device
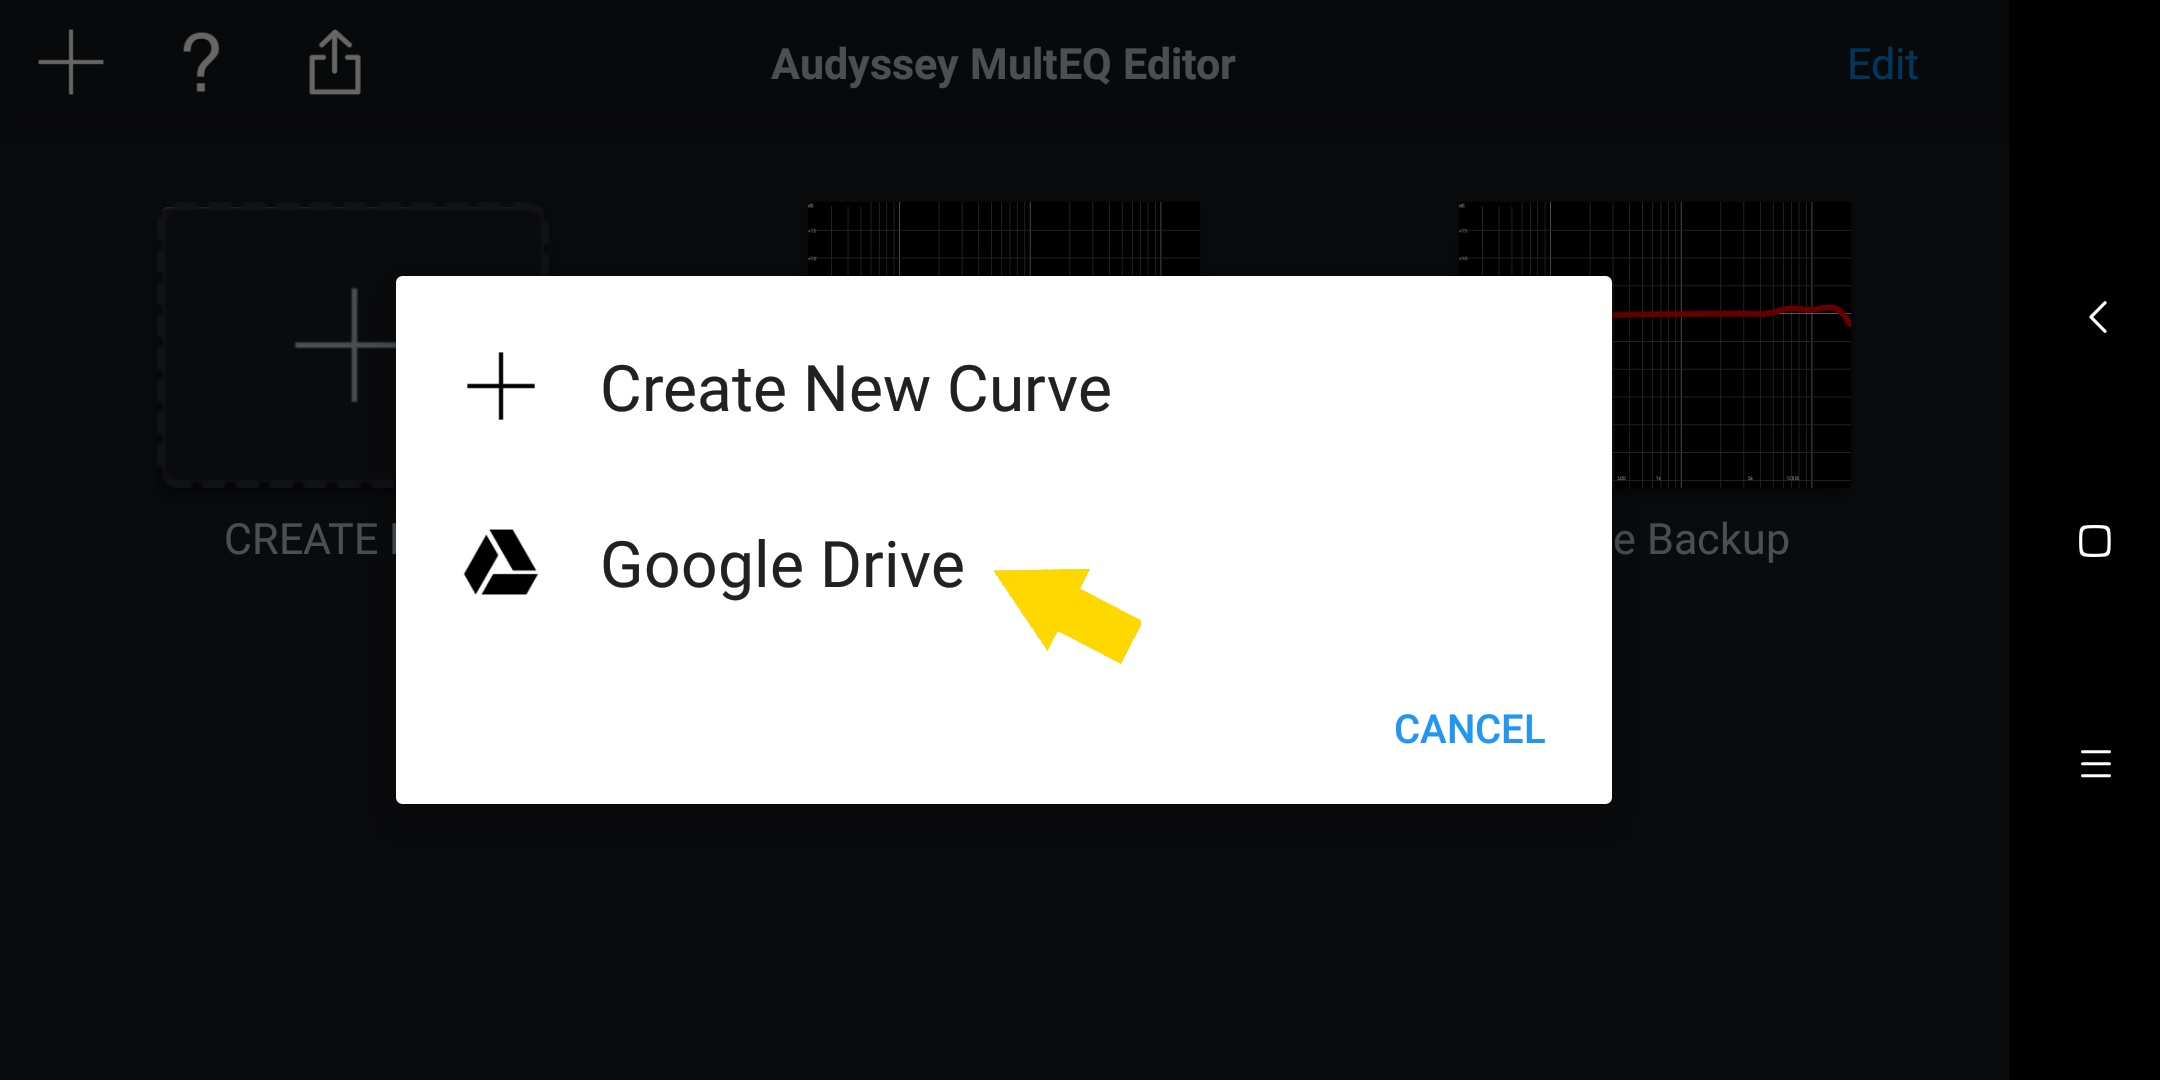
Here's how to restore your MultEQ editor files from the cloud. Click on the + sign on the top left (arrow):
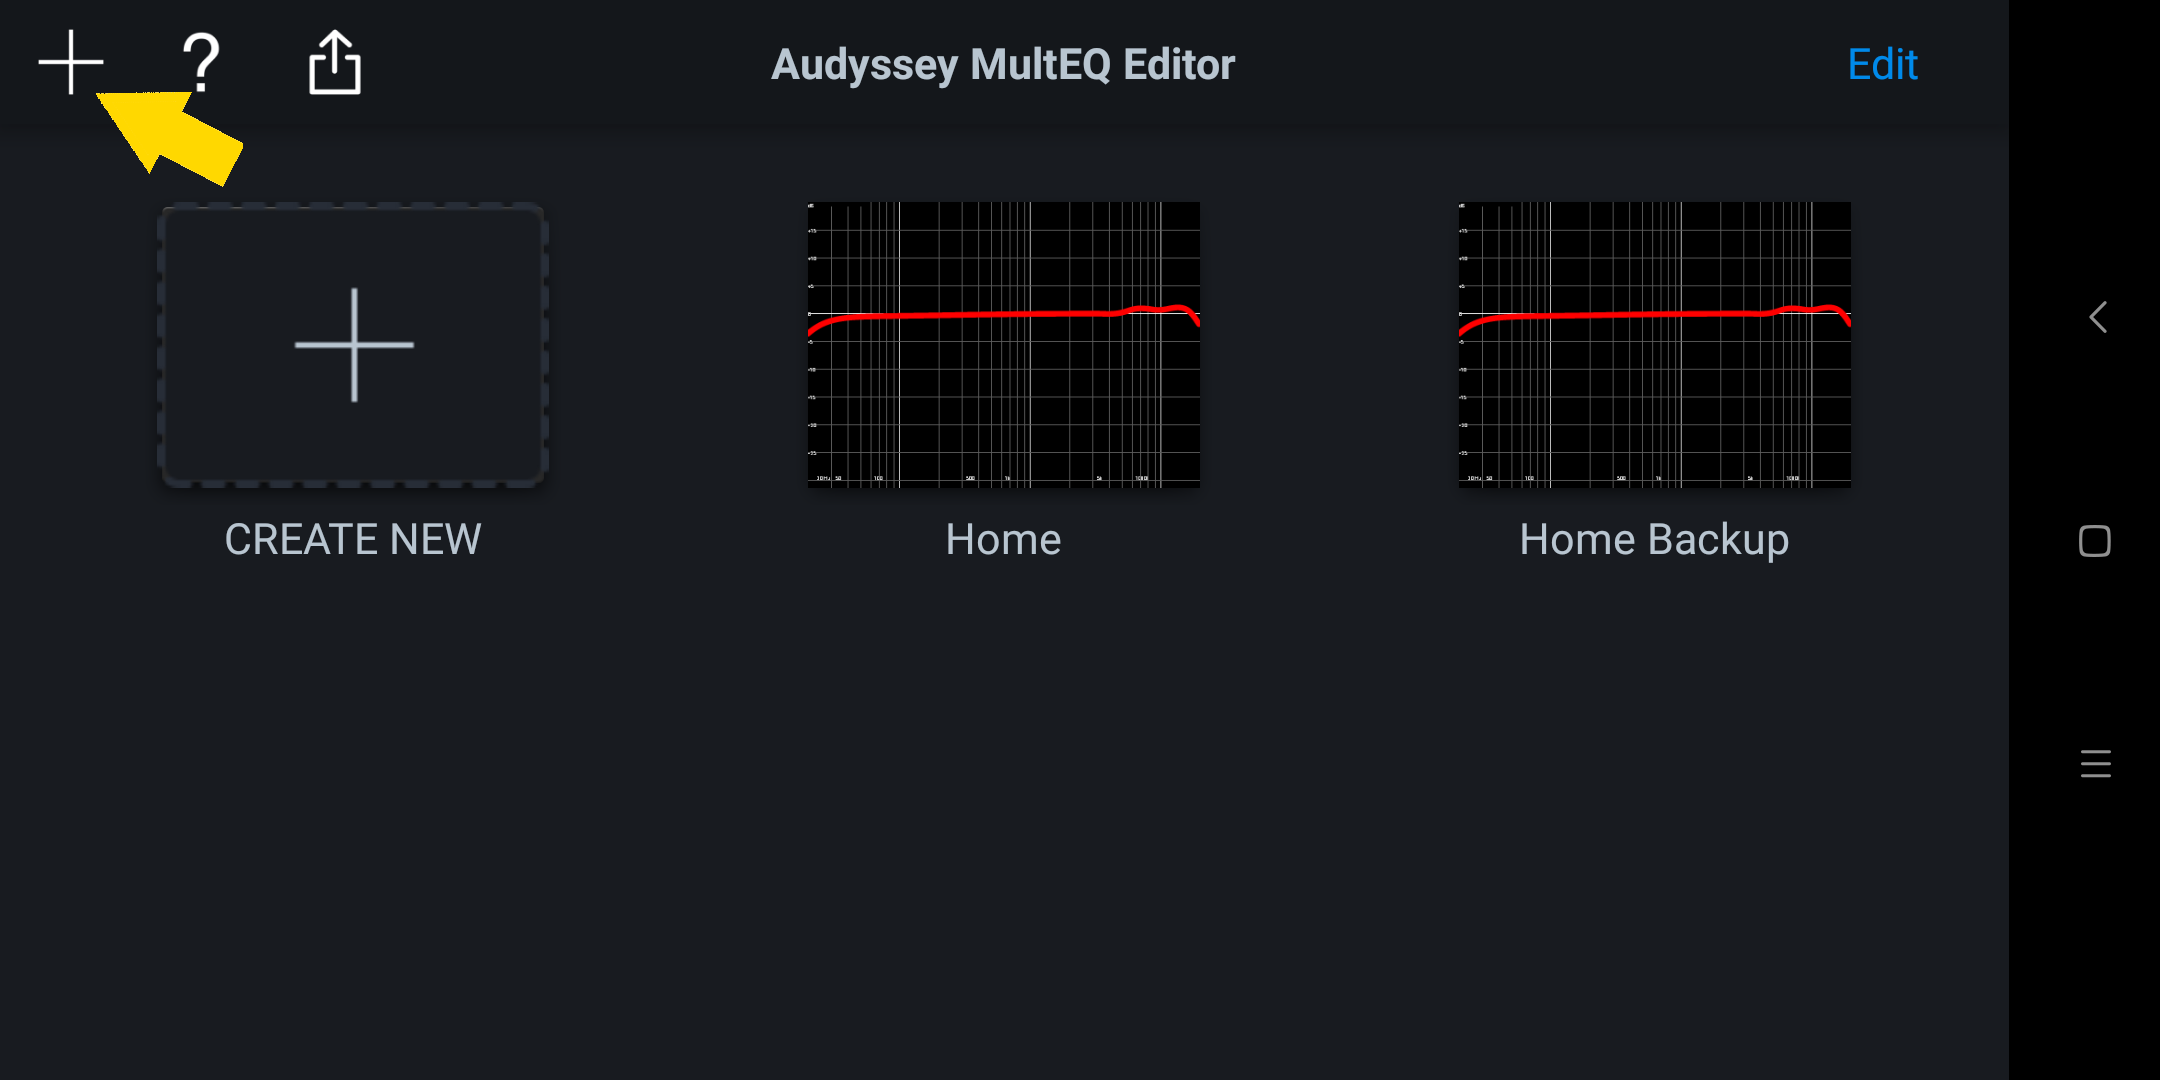
Select the cloud option. On Android this is 'Google Drive'. I'm assuming this will be iCloud if you're on iOS.
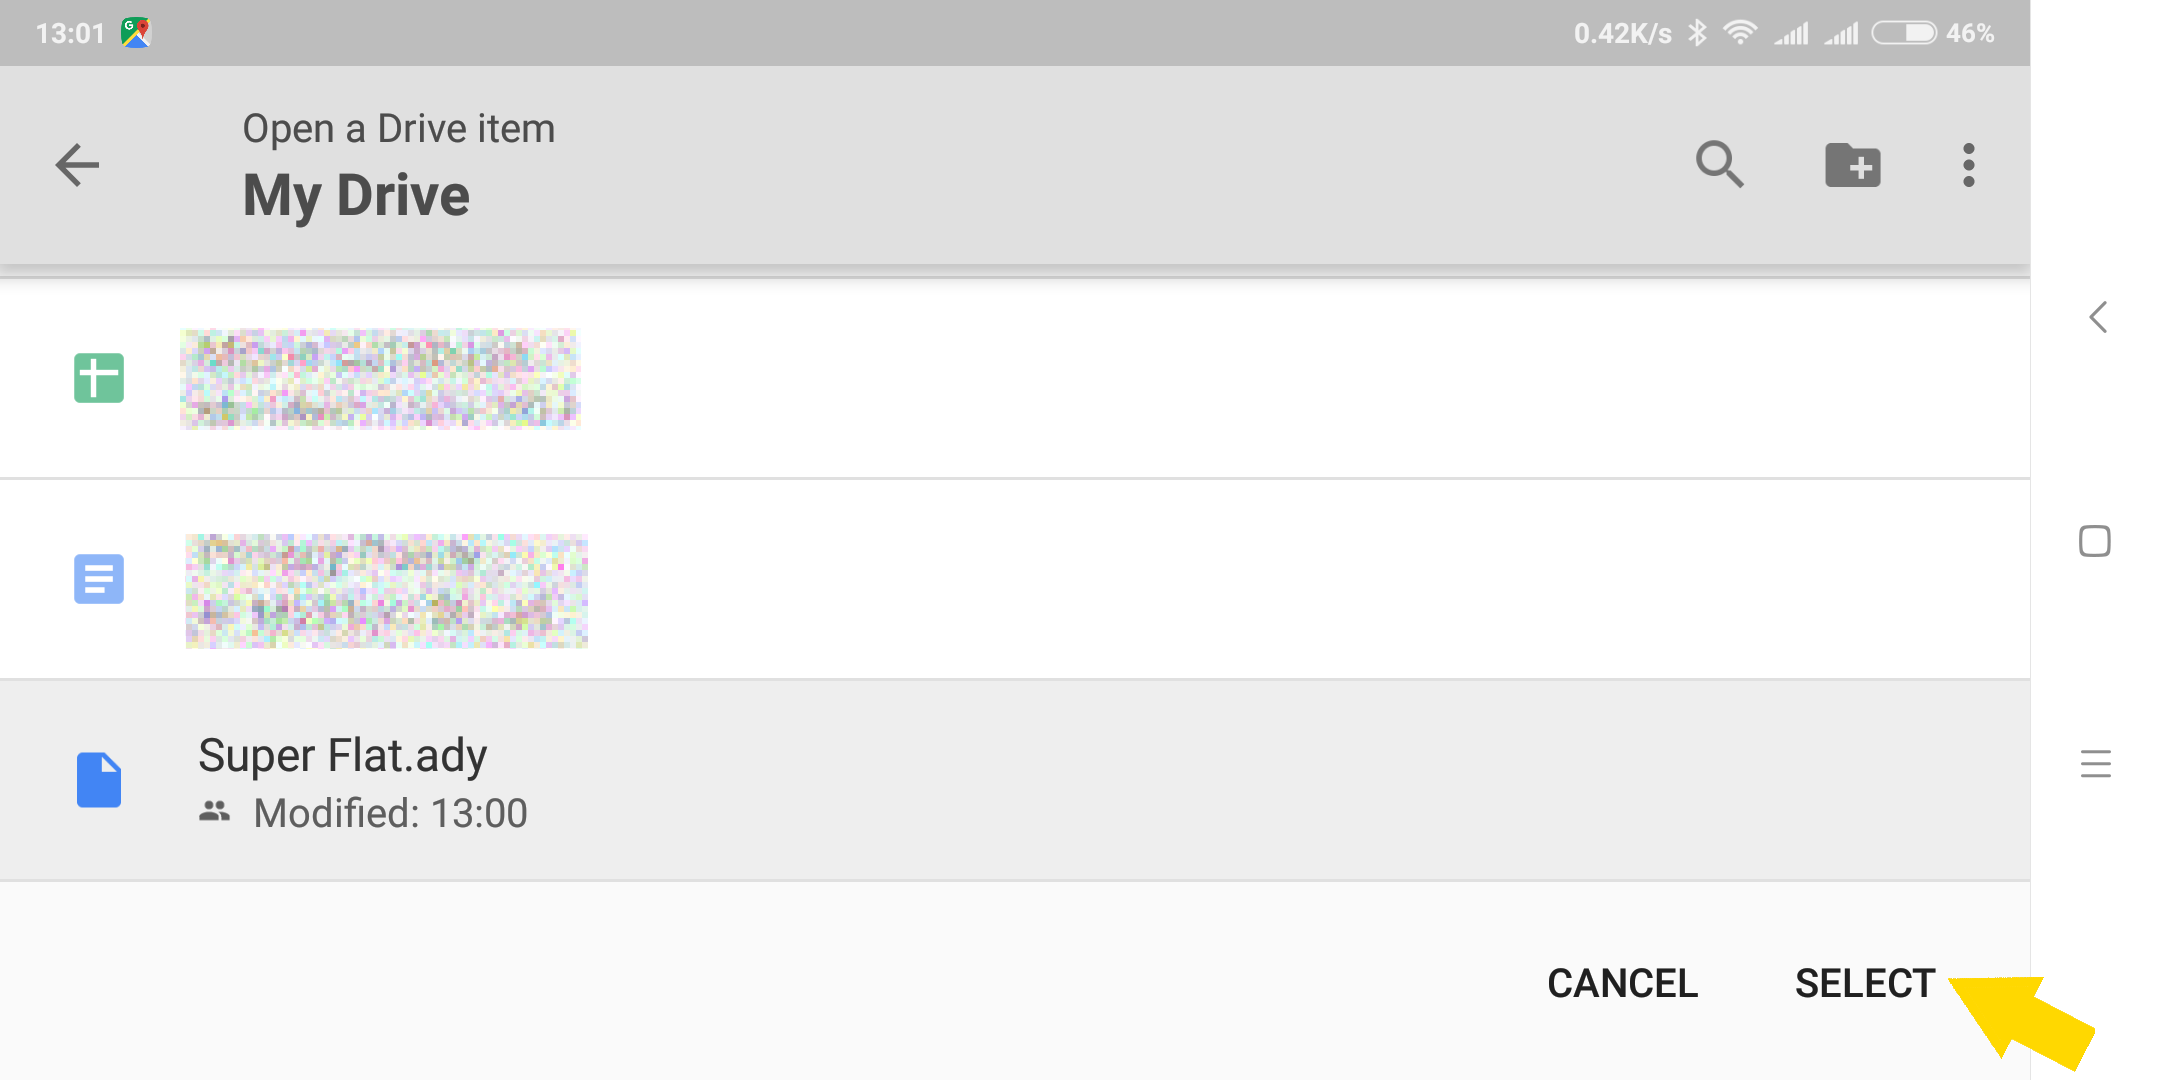
Highlight the file to upload. MultEQ editor files have an extension of 'ady'. Hit the 'SELECT' button to transfer from the cloud down to your editor.
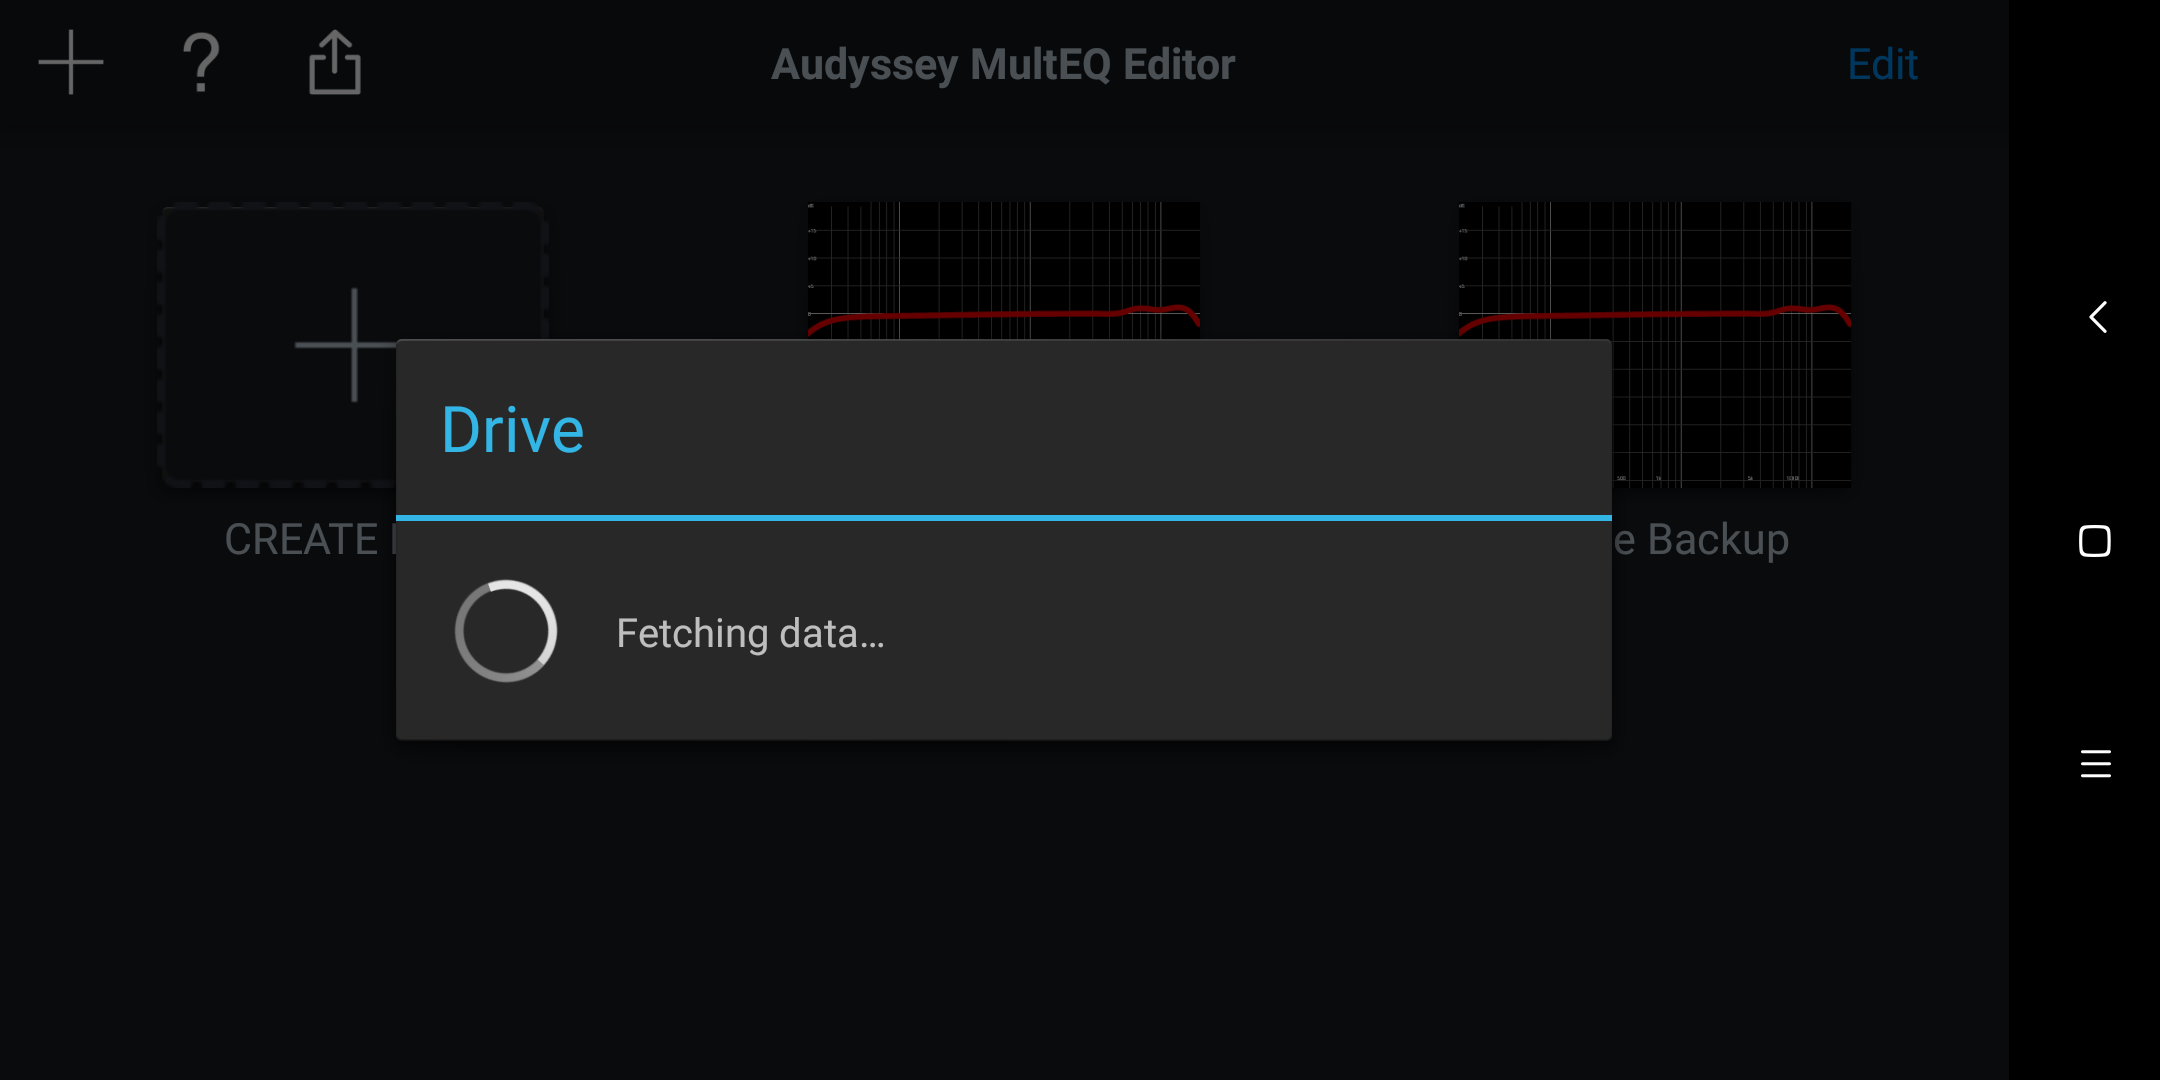
Wait a while for the transfer to complete. When it's done you are returned to the Drive selection again. here you can choose to transfer another dataset, or you can click the back arrow to return to the editor.
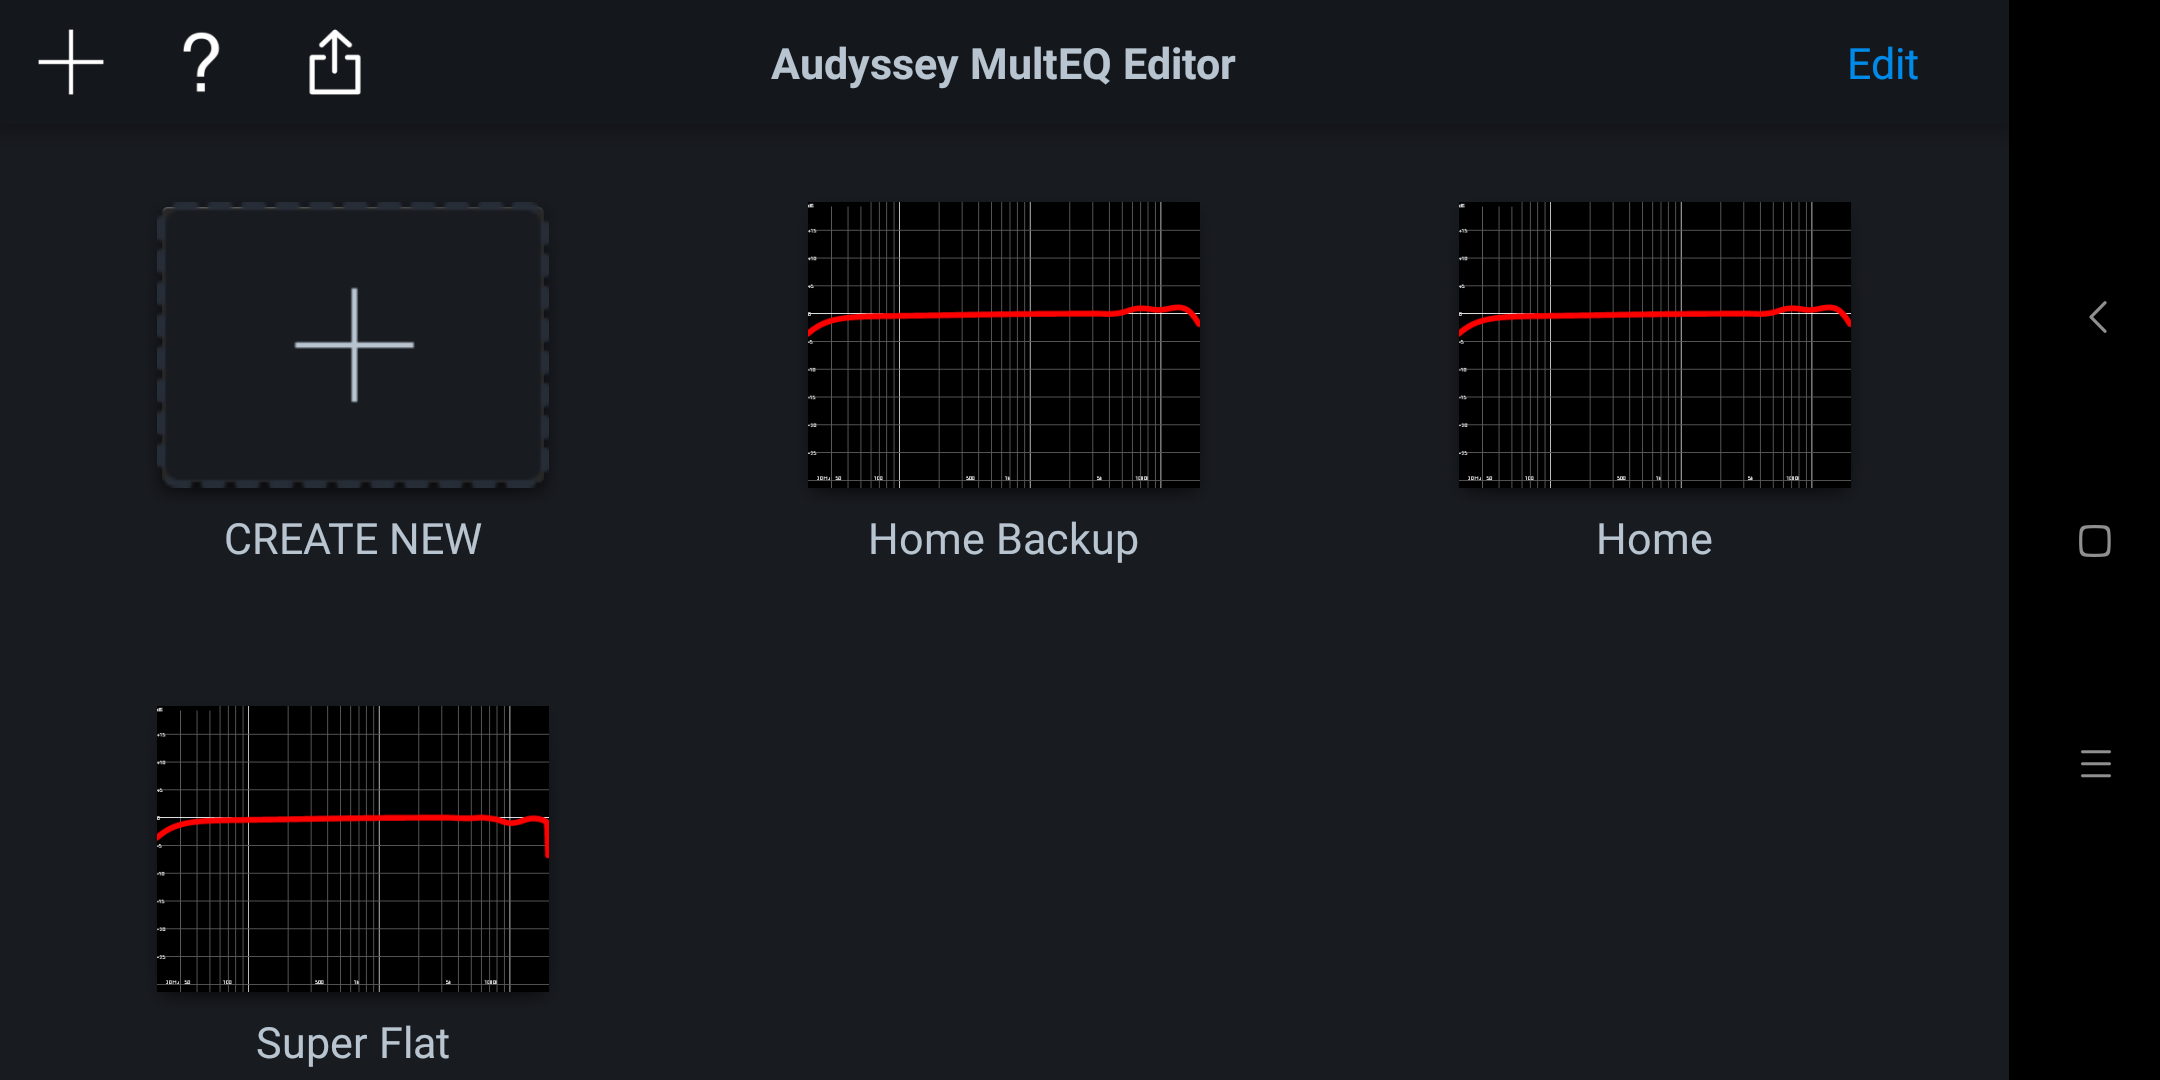
Once you're back in the editor, the datasets you have transferred previously will all show up here now.
Conclusion
Had I known earlier about the cost of this app I would have insisted on paying $31 less for my AV8805. While I am unhappy, I do not find myself regretting the purchase as the App works well with only 1 major bug (see point 3 in Cons)
Pros
- Easy to use
- Flexible and surprisingly powerful that will delight the inner tweaker in you
- Ability to have multiple curves on hand to upload to the receiver to find the best configuration
Cons
- Why is this not free?
- Very poor documentation
- Using the Android 'back' button at certain places will corrupt the file
I have absolutely no idea why this app has garnered so many negative reviews on Play. There's not even enough users on iOS to get a review.Perhaps I havn't used this app long enough to find out all it's bugs.
So far this APP is a pleasure to use and it provides a quick and easy way to dial things in. While there are not enough points you can add to adjust the curve, it's still good enough to get things done. Even without adjustments, the sound quality after a quick 8-point Audyssey calibration is already pretty impressive. This is before the HDAM are fully run in. The sound is only going to get better from now.
Better Than The Denon AVR-3808A
But to keep all this in perspective, note my assessment means nothing because I'm basing my observation from using a Denon AVR-3808A for more than a decade. The video processor on the AV8805 is so much more advanced than the Denon AVR-3808A there is no need for me to add a mandatory 200 ms delay. The move to the Marantz is a significant step up for me but it may not be so for your case. E.g. You may well feel impressed coming from the Denon AVP or the older brother AV8802.
If you're using a decade old amp and want to go the AV pre-processor route - add the Marantz AVR8805 to your short list. The AV8805 supports all the latest video and audio standards. You also gain the ability to use the MultEQ editor in tandem with the AV8805.
The two combined makes the AV8805 the better buy over the AV8802A long term wise in my opinion.
That being said, D+M may well update the MultEQ editor to support AV8802A. If you are on the fence, why not simply wait it out and see what D+M does to the MultEQ app? I do not see any technical limitation why this cannot be supported on it's older brother. If this eventuates the AV8802A becomes a very attractive option as you will get a good price.
MultEQ Editor Vs Audyssey Pro Kit
If you're tending towards the AV8802A because it has pro support. Don't! Although the pro kit uses a calibrated microphone that is better built. Know that the cheap Audyssey microphone ships with the AV8805 will suffice when taking multiple measurements The law of averages will even everything out and you will get the same degree of accuracy regardless.
The Pro kit is built with better quality for a reason - it is a work's tool designed to be used daily by professional audio installers. The pro kit has to be durable to perform it's duty.
With your AV8805, you really only need to take a good set of 8 measurements once. Most people only need to measure once, store the microphone away and spend the rest of your time to manipulate the curves and upload it to your receiver via the MultEQ editor. Given what the MultEQ offers, personally I see no value in the pro kit (although your experience will vary).
A good quality tripod is still a must though. Borrow one from a photography friend if you have no intention of changing your home theatre setup or layout often.
So thus ends my quick review of the Marantz AV8805 for now. I have nothing further to add till I upgrade to a 4K TV, power amps and a 4K source. And besides, I have 'Blind Testing' to finish.
Comments
The hints how to copy and…
The hints how to copy and rename curves helped me a lot. Unfortunately the app is often not self-explanatory. Many thanks for your work.
A big THANK YOU for your…
A big THANK YOU for your article! This is what the user manual should have been! I followed it all the way through and successfully made the measurements, edit the curves, and uploaded to the receiver (Marantz AVR7012) , all in the First Try! However, the second try did not go so well. The app kept losing the receiver and I had to start over several times…… That’s probably is one of the reasons for low ratings. I finally noted your suggestion and use the IP address to "help" the app find the receiver. All my equipments are on a wired network, and the tablet was less than 5 feet away from the router. Never had any connection problem on wi-fi . Yes, the app is great , if it’s consistent. My cons are:
Many thanks again for a very helpful article.
Add new comment