How To Control Your Xiaomi Robot Vacuum With Google Home

Excited to turn your home into the Ultrahouse 3000?
Use Google Home and/or Google Home mini to control your Xiaomi Vacuum with your voice!
Here are the things you need:
- Software
- Hardware
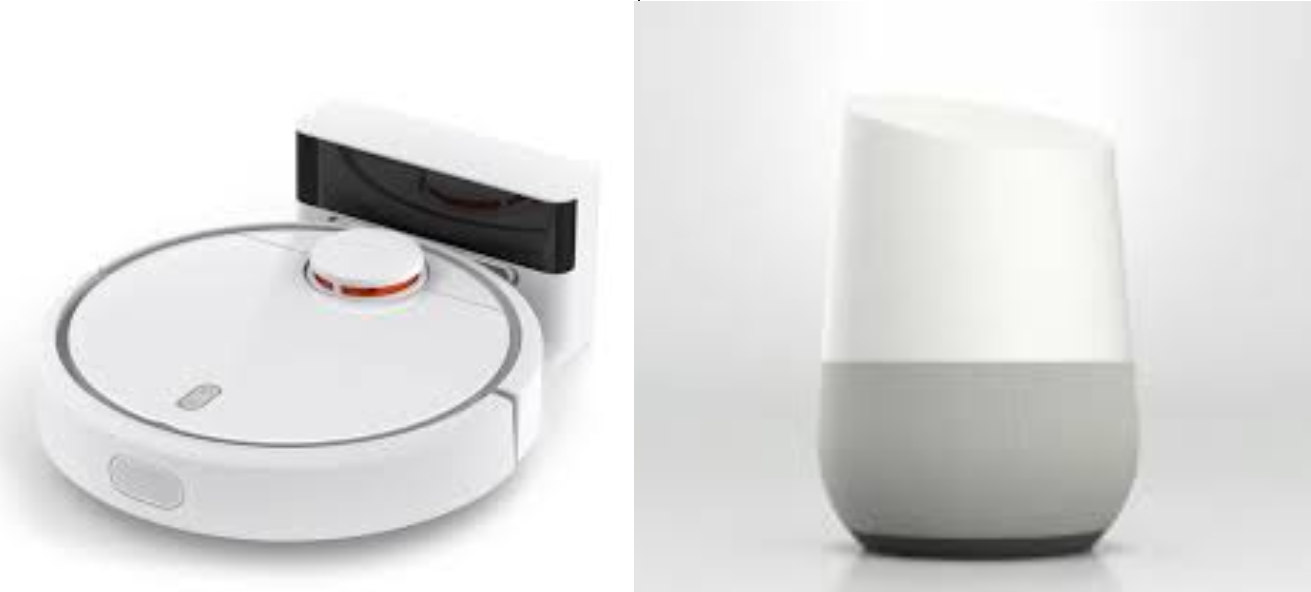
- Xiaomi Robot Vacuum
- Google Home Assistant (Original or mini)
- Android Phone
- Computer running Windows
This is a brief HOW-TO guide and some of the finer details may be omitted. If you hit any trouble just ask in the comments below. [2019-03-24: Updated walk-through to use the new access methods for Home Assistant]
How It Works
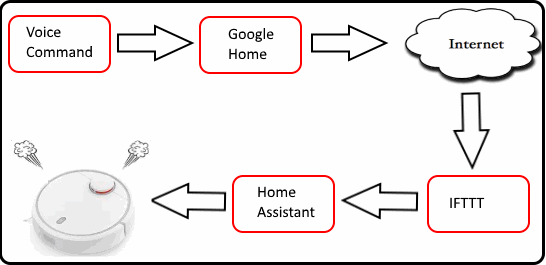
This is how I have mine configured at the moment. A quick overview on how how everything works:
- Create a WebApplet in IFTTT (Account required) with an activation phrase (e.g. Release The Hounds)
- Pair Google Home Assistant to IFTTT
- Now say 'Hey Google, release the hounds' within your Assistant's earshot
- Google assistant will forward it to IFTTT
- IFTTT will call a web hook (your Home Assistant server)
- The Home Assistant Webhook sends the command to your XiaoMi vacuum cleaner
- Your vacuum cleaner starts cleaning the house.
Down the road I'd try and see if it's possible to script everything from within Home Assistant.
Know Before You Start
This requires an Internet connection to work. Google Home needs to talk to the Internet to understand your voice commands, and the IFTTT service needs to get into your home network to activate the XiaoMi robot.
Configuring all this may be daunting to people who has never done this before. But by bouncing ideas off each other, you will get all this to work if you stay committed.

Extracting The Damn Token
Let's get the most difficult thing out of the way first - retrieving the XiaoMi token.
This token is an auto-generated password, a special code the XiaoMi robot Vacuum use to verify the person has the authority to control it. Supply the token to your vacuum the wrong token and it will not accept the commands.
New: miio (Added 21 Feb 2018)
This may be the easiest way to extract the token. You'd need a computer with Wifi (be it a computer laptop or a PC with a Wifi dongle).
- Find a computer or notebook with Wifi access
- Install nodejs (Download the LTS version): Link
- Start a new command window (or console or terminal)
-
run the following command:
npm install -g miio
- Reset the wifi on your robot vacuum (if you have previously registered your vacuum to MiHome you have to delete the device and re-register again)
- The XiaoMi wifi should be enabled. Connect your laptop/PC's wifi to this new Wifi LAN. No password is required.
-
Once connected to the Vacuum Wifi, run the following command:
miio discover
- You should see the token.
- Note that the token will no longer be visible once the Vacuum is registered. So if you forget the details you'd have to reset the wifi connection agian.
If you get the token now, skip to the next page. Otherwise continue below to find other ways to extract the token.
Apple iPhone
There are a lot of information out there on how to extract this token from your iPhone. I have spent a day trying and just failed to work it out.
Perhaps it's because my iPhone isn't jail broken. If you want a sure-proof way to get the token with an iPhone, don't!
Use an android phone or tablet instead! Hey you are using Google Home, there are bound to be a Windows computer and Android device lying around somewhere. Because MiHome is cloud based, all you need to do is to install MiHome to an Android device, log in to your XiaoMi account and everything you need will be transferred over. Here's how to do it:
- Find an android phone.
- Install MiHome from the Play Store.
- Sign in to MiHome with your XiaoMi account.
- Your robot vacuum will show up if you have already paired the Robot Vacuum earlier. If not just setup it up now.
- And that's it! The XiaoMi token is now stored on your Android phone and is now ready for extraction.
Android Phone
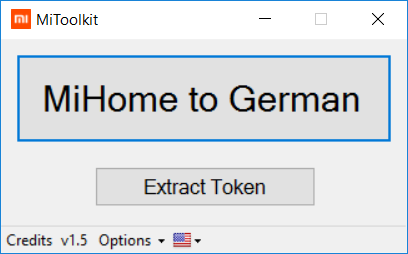
The quickest way to do perform the token extraction is from an Android device, and using a tool call the MiTookkit:
- Turn on USB debugging (If you havn't done this before you need to activate Developer Settings menu).
- Your Windows computer should already have Java installed. If not, download and install the Java Runtime Environment (JRE).
- Connect your Android device to your Windows computer.
- Your Android device will prompt you for authorisation. Click Allow or Accept.
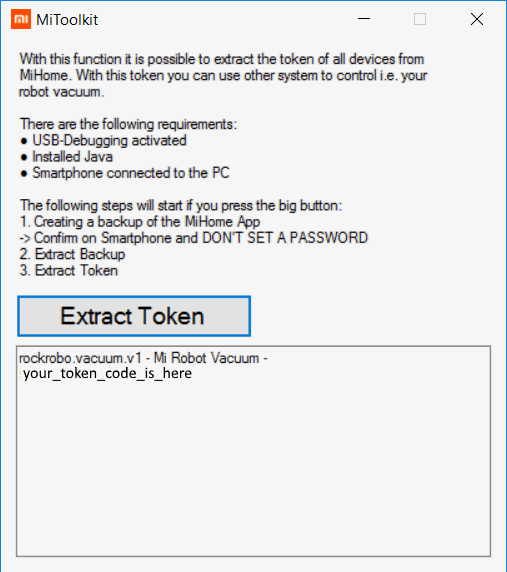
- Download the latest version of MiToolkit in a Windows computer. Extract the archive and run the MiToolKit program.
- Click the button that says 'Extract Token'.
- Read the instructions, and click the 'Extract Token' again to begin extraction.
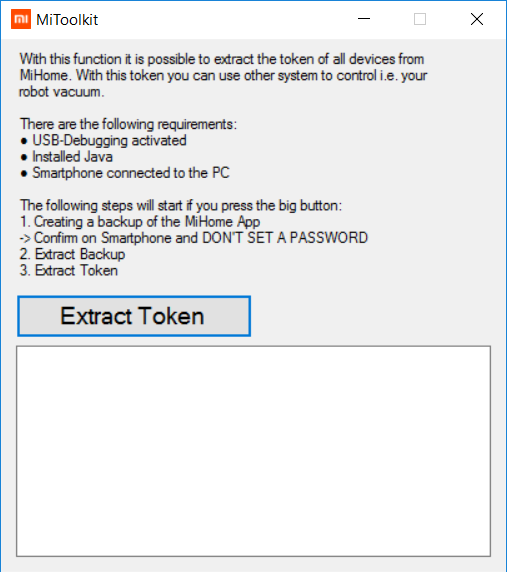
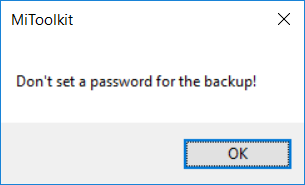
- A prompt will remind you not to set a password. Click the 'OK' button to continue.
- Now your Android Device will have a prompt about performing a full backup. Click the 'Back Up My Data' button (Note this prompt will be different across the Android platform).
- If you succeed, the token will be displayed in the text box like so:
- This token is re-generated every time you pair the XiaoMi robot vacuum to your MiHome. So if you delete this device from MiHome and repair, you have to do this token extraction all over again.
You are one step closer with this token. We now move on to Home Assistant.
Home Assistant
Installation
There are several ways to run Home Assistant - e.g. on a Raspberry Pi, or on a normal computer. Since I already have a home lab running at home, I'm using the PC method (running in a virtual computer). Once you have a Linux machine setup, you can install Home Assistant easily by following these simple instructions: Installation in virtualenv.
A better solution for most people would be to run Home Assistant on a Raspberry Pi. I have created a HOWTO detailing the steps of installing Hassbian. If you don't have a Home Assistant setup, buy a Pi and install Hassbian now.
Basic HTTP Server configuration
This section already assumes you're using HTTPS to secure your web page. Newer versions of Home Assistant forces you to use an account now. If you're still using an older version that requires API_PASSWORD, update to the latest version now.
Login to your Home Assistant computer, and edit the configuration.yaml file (Usually located in /home/homeassistant/.homeassistant). If you are new to Linux, use the nano editor when editing files.
In the file, go to the section that says http: and set it to the following
# Uncomment this if you are using SSL/TLS, running in Docker container, etc.
http:
#api_password: !secret http_password
base_url: https://<your_ip_or_domain_name_here
Save the file and restart HomeAssistant.
Home Assistant
Adding XiaoMi
Edit configuration.yaml again and now add in the XiaoMi robot Vacuum:

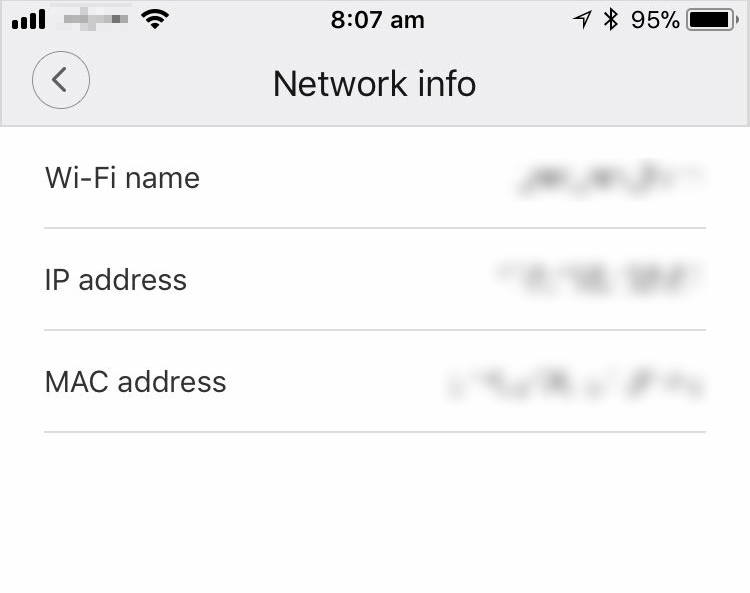
Replace ip_address_of_robot with the IP address of your XiaoMi robot. You can find this information from the MiHome app (Go to your Vacuum, the network information is under General Settings → Network Info). Because the Vacuum is never powered off, the IP address is unlikely to change. But if you want to be safe you can always configure your router or DHCP server to always allocate a specific IP address for your XiaoMi.
Replace super_secret_password_token with the token you have extracted earlier.
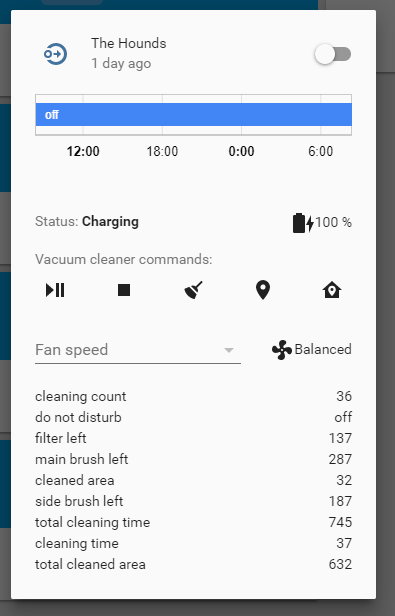
Replace name_of_robot with a unique name (this is used to identify different components in the Home Assistant Web App). Now Restart Home Assistant again, and you should see this appear in the dashboard. I'm calling my vac 'The Hounds':
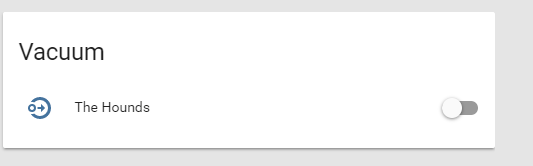
Click the vacuum icon (picture to the left of the name) and you will see all the stats. Flick the switch in the lower right hand corner, and hear your Vacuum roar (or in my case - bark).
If everything works, well done. You'll need to enable IFFFT In Home Assistant.
Integrate IFTTT Into your Home Assistant
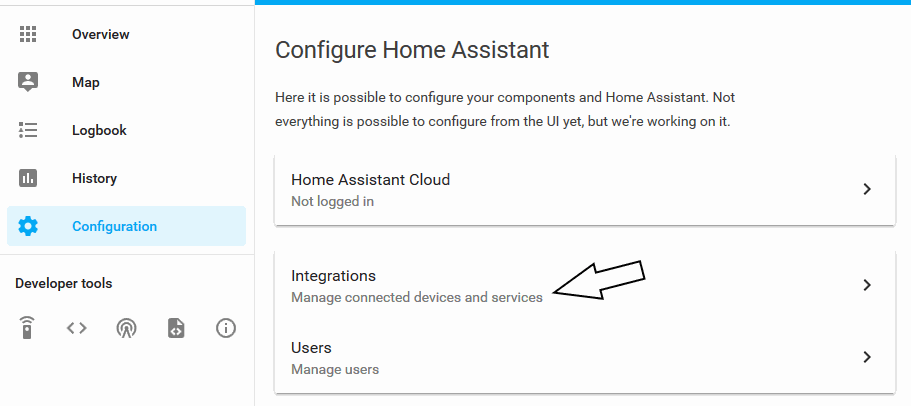
In your Home Assistant portal. Click on Configurations, followed by Integrations:
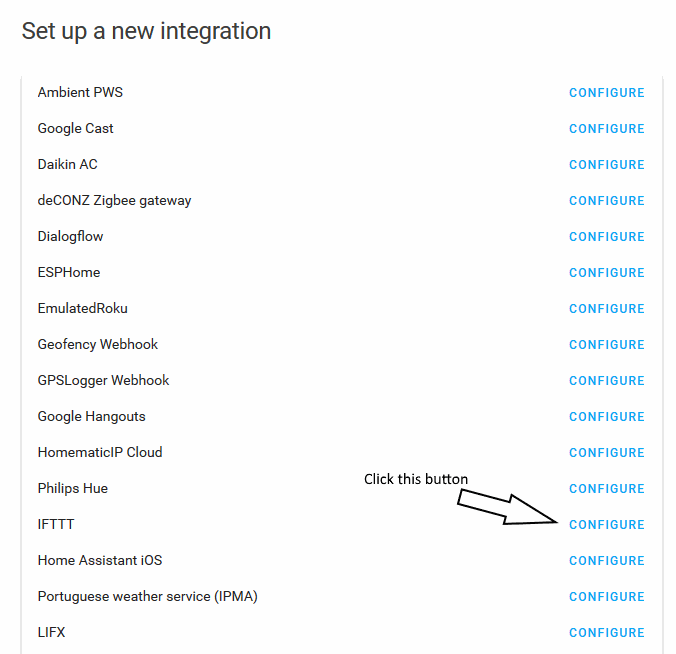
Scroll down the list of items until you see the entry IFTTT. Click it's configure command.
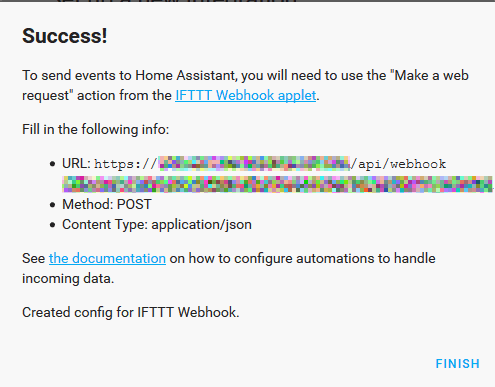
Copy down the URL on this screen, you'll going to need this later when configuring your IFTTT Web Applets.
Over the next few steps we'll need to jump back and forth between the two IFTT and your Home Assistant Portals.
IFTTT
IFTTT stands for IF This Then That. Refer to this wikipedia article if you are unfamiliar with this protocol. Start your web browser and go to https://ifttt.com. Login to your IFTTT account (or sign up if you don't have one).
IFTTT - Integration with Google Assistant
Register your Google Home/Mini device to your Google Home app. You'll need to do this so your google voice searches will look into the IFTTT ecosystem.
Skip this if you already have already added the Google Assistant IFTTT service.
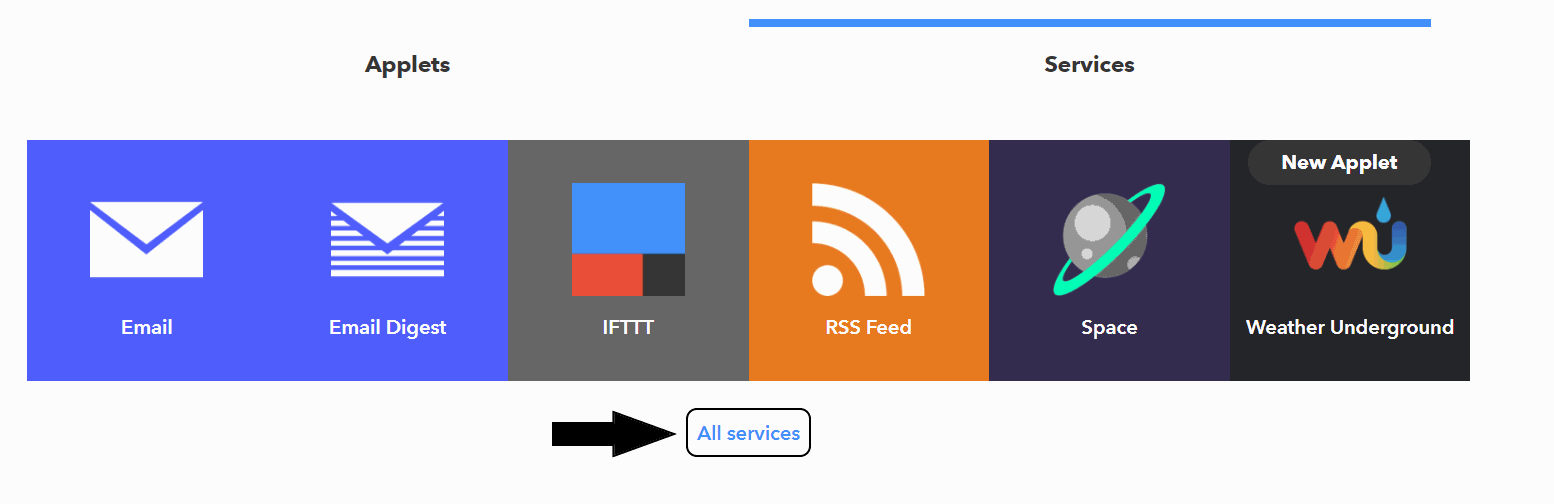
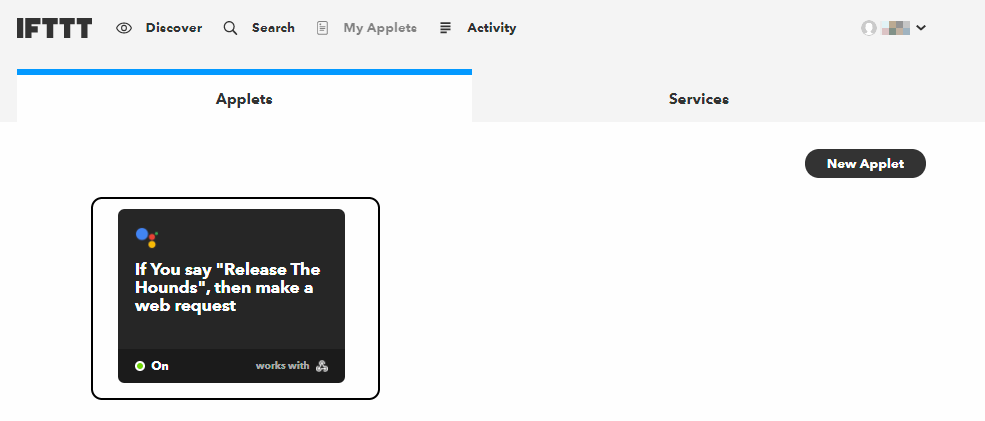
- From your IFTTT portal, click the My Applets (marked in illustration below):

- Now click 'Services':

- Select All Services:
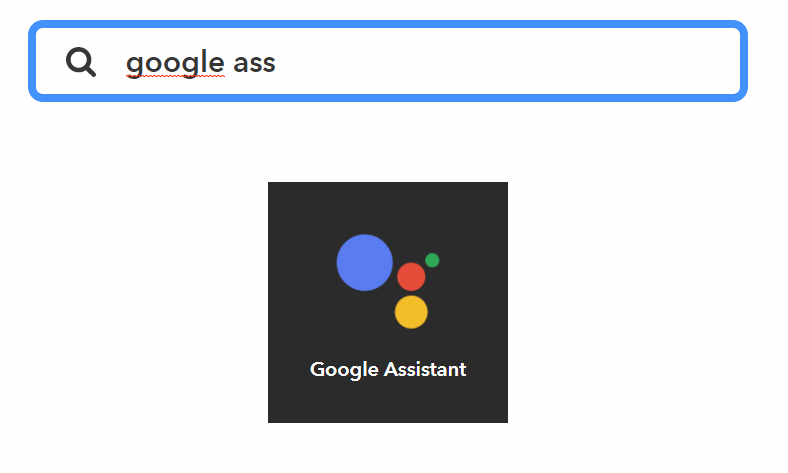
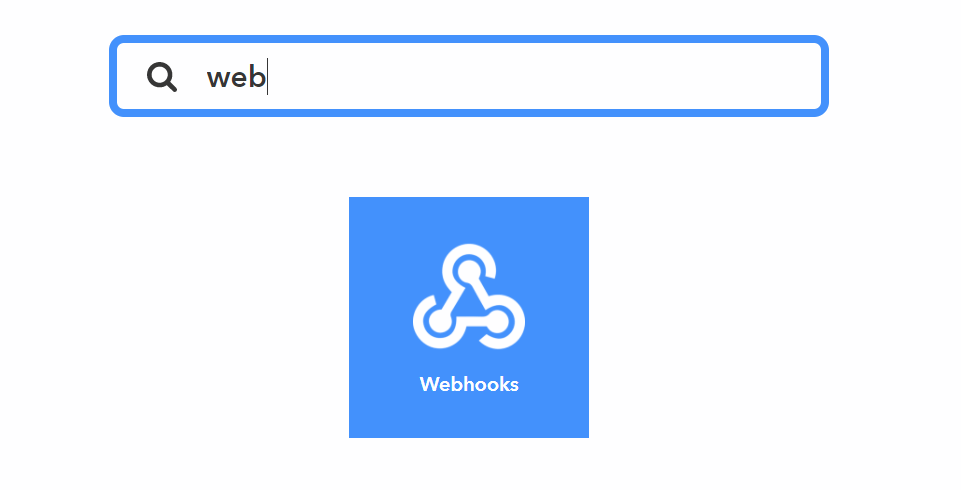
- Enter Google Assistant in the search box, and click the Google Assistant tile:
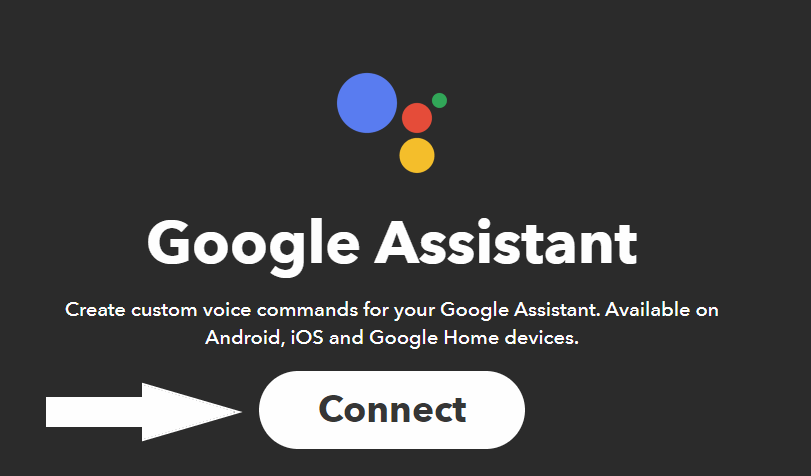
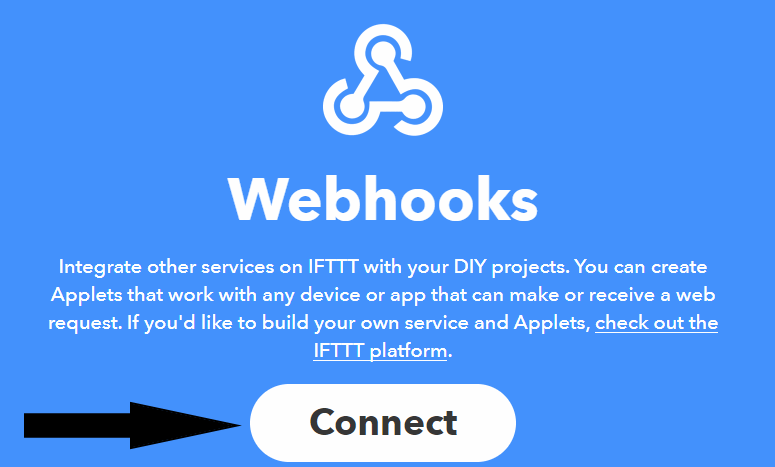
- Click the Connect button:
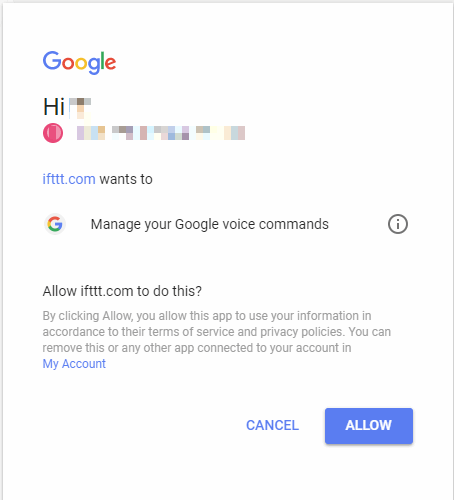
- Follow the prompts and login with your Google Account (Remember to use the same account for Google Home).
- When prompted, allow ifttt.com to manage your Google voice commands:
IFTTT - Add Service Webhooks
Skip this if you are already connected to the WebHooks service:
- Select All Services:
- Find the WebHook service and click the Webhooks picture:
- Click the Connect button:
IFTTT - Find Your Secret code for Home Assistant
Home Assistant and IFTTT needs to share the same password. To get this password, follow these instructions:
- Login to your IFTTT web page
- Click on My Applets → Services.
- Find the WebHooks tile and click it.
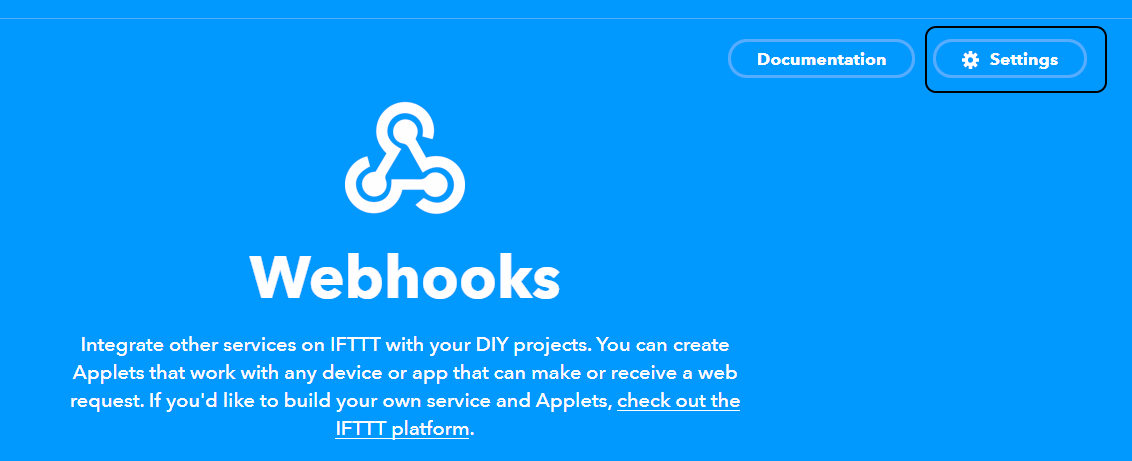
- Click the Settings button located in the top right corner:
- You should see this settings page next, copy your special ifttt password (Copy only the password, not the entire URL):
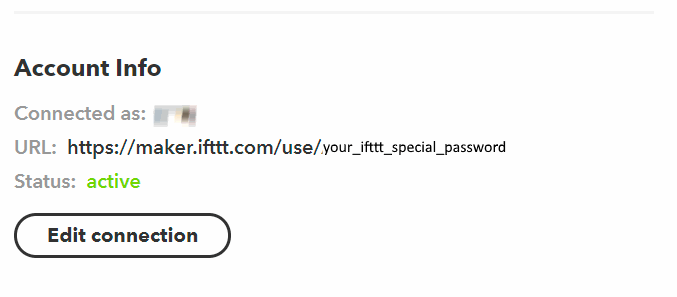
- Return to your Home Assistant computer. Edit the configuration.yaml file.
- Add a new section for IFTTT like so, replace your_ifttt_special_password with your unique code:

-
Setup a new Automation to handle IFTTT webhookes, edit your automations.yaml and add the following block:
- trigger:
  platform: event
  event_type: ifttt_webhook_received
  event_data:
    action: call_service
  action:
    service_template: '{{ trigger.event.data.service }}'
    data_template:
entity_id: '{{ trigger.event.data.entity_id }}' - Restart Home Assistant. If you get no errors your Home Assistant setup should now be complete!
If you think that was hard, you may not like the next section :).
Linking Everything Together
IFTTT Needs To Find You From The Internet
IFTTT needs to know your IP address because it needs to talk back to your Home Assistant. Unfortunately for most people your Internet IP changes all the time.e.g. Here in Australia most people will get a different IP address when they re-connect to their ISP.
To work around this problem, you need to subscribe to a dynamic hostname service. With a dynamic host name setup, your hostname remains the same regardless what your Internet IP address is.
DuckDNS is a service that came up while I was researching this subject. Have not tried this service myself but will do so eventually. Setting up a dynamic hostname is beyond the scope of this article, there are already a lot of resources on the Internet on how to get this working.
IFTTT Firewall Permissions
Your Internet router's firewall will typically stop IFTTT from talking to your IP directly. Therefore you need allow this permission on your router.
In computer speak - this means forwarding port 8123 into your home assistant computer's IP. Every router does this differently, look for anything that says NAT, Port Forwarding or Virtual Host. Here's an example of mine (called Port Forwarding):
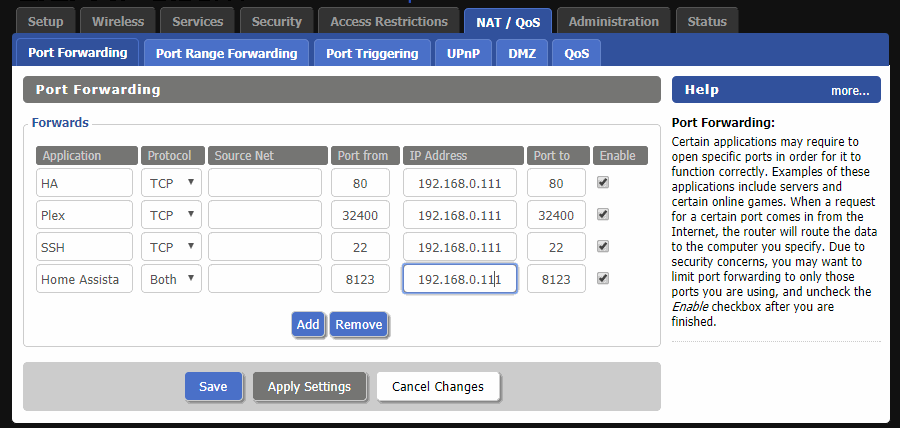
Both these sections are beyond the scope of this article. However feel free to comment below if you want me to help you out on these.
Check your dynamic hostname and firewall rule is working by using an online port checker tool. Enter your personal hostname and port 8123 in the field and click the Check button.
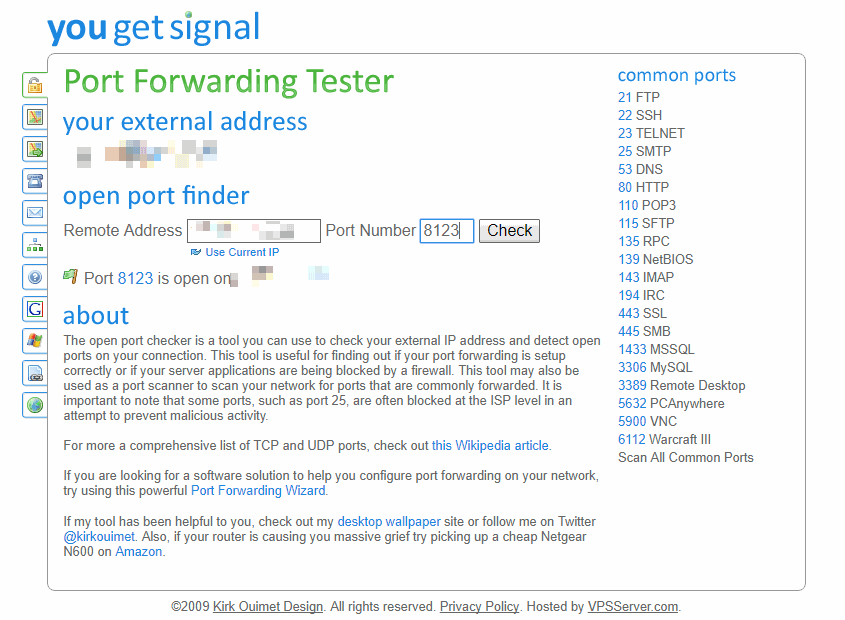
If all goes well you should see the text 'Port 8123 is open'. If you have gone this far, well done!
Now let's start creating some IFTTT statements!
IFTTT
Now start your Web browser and login to your IFTTT account again.
Go into My Applets → Services and double check you have the following three services installed.

You are ready to create your very first Web Applet!
IFTTT - This Component
Here's your first Web Applet. How to use voice command to start vacuuming.
- In My Applets → Services, click the New Applet button:

- This took me a long time to work it out. Maybe obvious to people who are used to tablet devices, but not to me. Begin by clicking the word text:

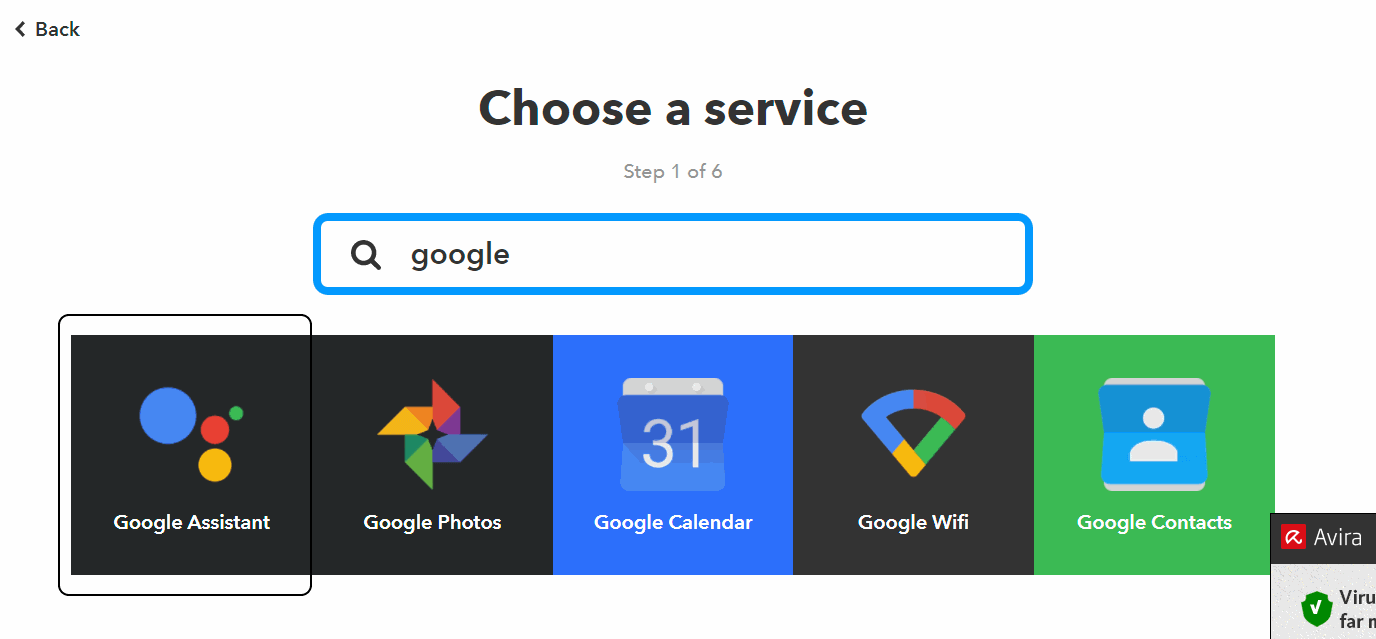
- Enter Google in the search file, and click the Google Assistant tile:
- Click the 'Say a simple phrase' tile:
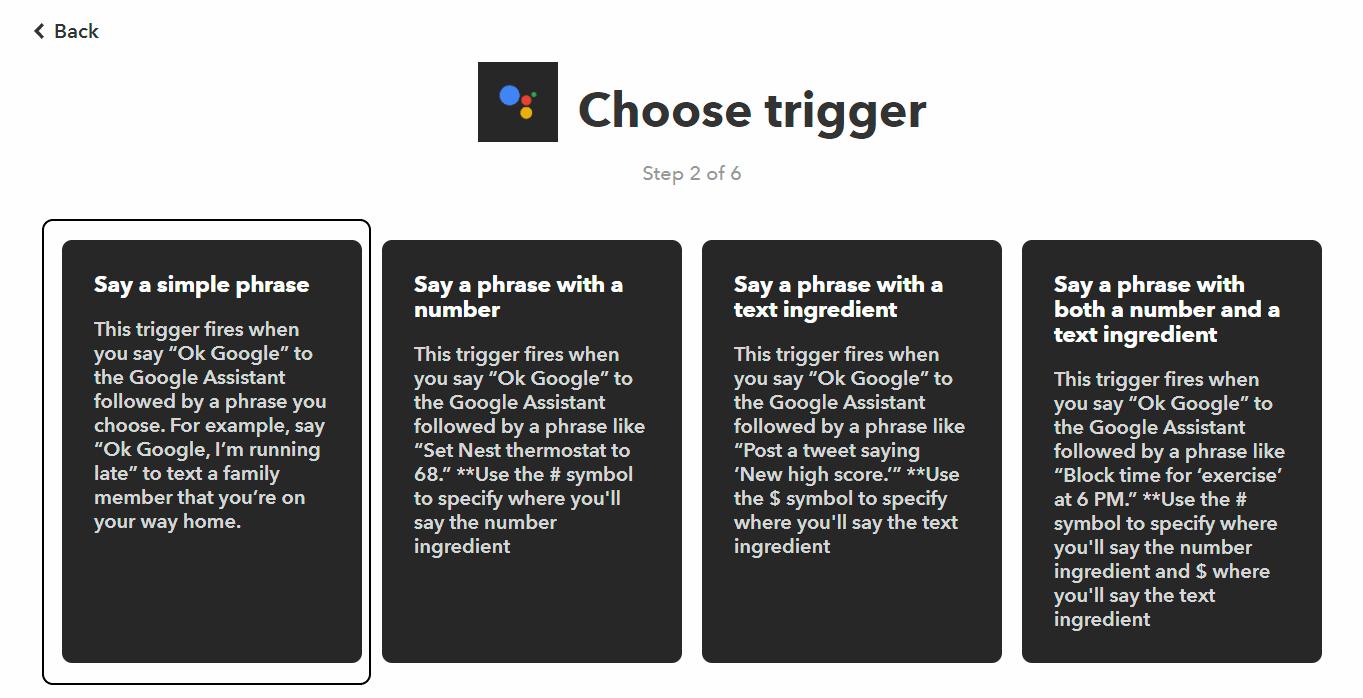
- In the 'What Do You Want To Say' field, type in the voice command you want to use. e.g. I want to start vacuuming when I say these words - 'Release The Hounds'. You can leave the two optional say fields blank for now (more on this later in trouble shooting).
- The last response box is Google home's response to your voice command. In the following example, when I say 'Release the Hounds', Google home will respond with 'Releasing The Hounds'.
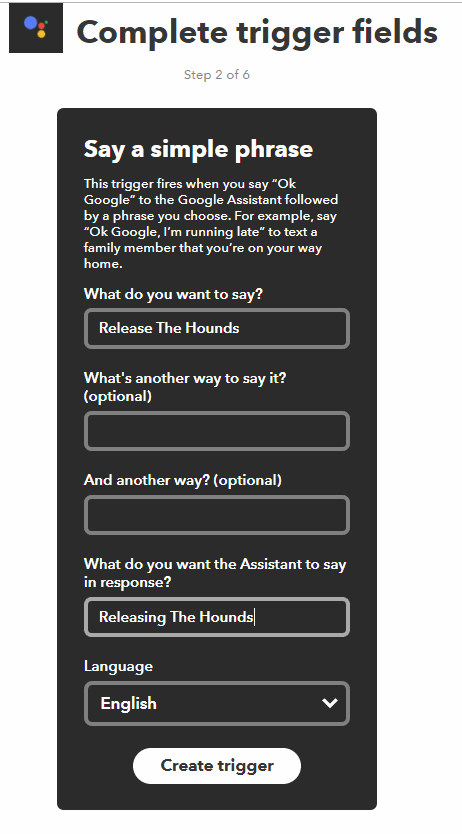
- Click the Create Trigger button to create the Trigger. You should see the this bit is now replaced with the Google Assistant tile:

- This completes the this part of the IFTTT.
In the next page, we will finish the that component.
IFTTT - That Component
In the previous page we have configured the this component of IFTTT. When that condition is true (i.e. when somebody says 'Hey Google, release the hounds!'), an action will be triggered. This action is defined in the that component of the IFTTT Web Applet. To define what happens, continue the configuration:
- Click on the text that:
- Enter Webhooks in the search field, and click the Webhooks tile:
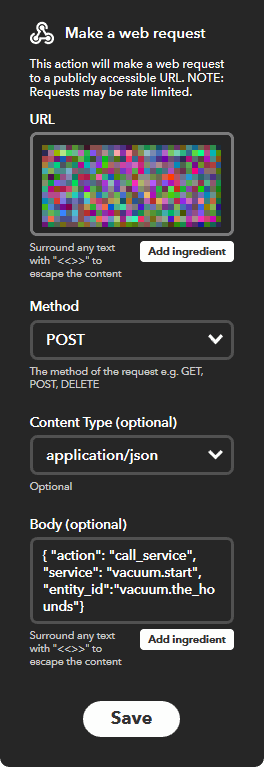
- Click the tile that says 'Make a web request'
-
Paste the URL given to you by Home Assistant during the IFTTT integration steps. Use this same URL when creating future Web Applets for your Home Assistant. The URL should look like so:
https://<your_ip_or_domain>/api/webhook/<random_magic_sequence>
- The Method should be POST.
- The Content Type should be Application/JSON.
-
The body is where all the magic is at. Enter the following (replacing name_of_robot with the actual name of your robot, specified in your configuration.yaml mentioned here):
{ "action": "call_service", "service": "vacuum.start", "entity_id":"vacuum.name_of_robot"} -
Your panel should look something like this (Make sure you fill in your own URL):
- Click Create Action to complete.
- Click Finish.
You are ready to Rock And/Or Roll. Say the voice command (e.g. Release The Hounds) and see what happens. If the XiaoMi Vacuum starts cleaning, that's it. You've done it!
If nothing happens, or if Google responded with a phrase that's different from what you specified in the this component, go to the next page for troubleshooting.
Trouble Shooting
You can refer to the Home Assistant log file and hopefully it will tell you what the problem is:
Here are some issues I have discovered along the way. If you have a different problem please comment below and I'd address them:
Google Home/Mini responded with the correct phrase, but nothing happens to the Xiaomi Vacuum
Most likely to be a network or communications issues. Follow the checklist and make sure everything is working:
- IFTTT password is correct in Home Assistant configuration.yaml file
- Home Assistant password is correct in IFTTT actions
- Dynamic hostname has the correct Internet IP
- Port 8123 is open on the Internet
- Incoming port 8123 is forwarding to the correct IP of your Home Assistant computer
Google Mini/Home responded with an incorrect phrase.
This happens when Google 'speech to text' technology can't work out what you're saying. e.g. .When I say 'release the hounds', Google always return me a google search instead. This means your speech is interpreted incorrectly.
To diagnose this problem, go to MyActivity (either viaGoogle Home app or the https://myactivity.google.com website). Look through your search history until you find the card with your voice activity.
This is the card when I said the phrase 'release the hounds':
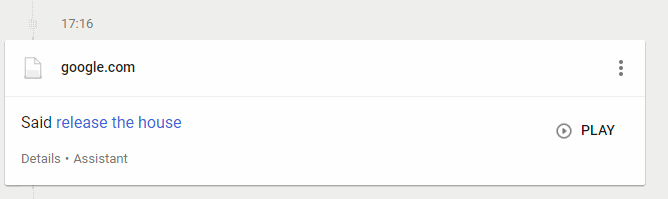
So Google thinks I'm saying 'house' instead of 'hounds'. You can click the play button to hear a recording of your voice. The easiest way to fix this problem is to add 'release the house' as the secondary phrase.
To fix:
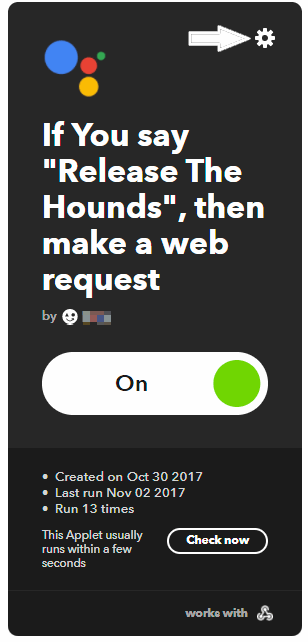
- Go to your IFTTT, click on My Applets, and find the IFTTT tile:
- Click the cog icon (marked with white arrow):
- Add the new phrase in the optional field
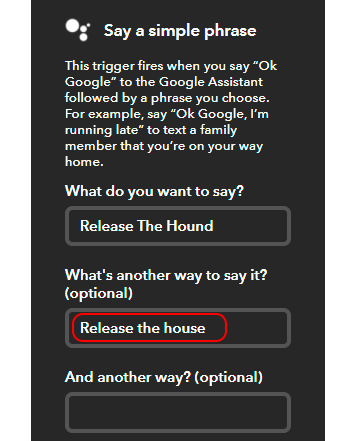
- Click Save
- Now say the voice command again. It should work now :)
Other Commands
In your JSON body, the entry
"service": "vacuum.start"
is the command to start the cleaning. You can change the service command to something else for other things. Here's the list (as of 0.90.1):
| Command | Description |
|---|---|
| vacuum.clean_spot | Tell the vacuum cleaner to do a spot clean-up. |
| vacuum.locate | Locate the vacuum cleaner robot. |
| vacuum.pause | Pause the cleaning task. |
| vacuum.return_to_base | Tell the vacuum cleaner to return to its dock. |
| vacuum.send_command | Send a raw command to the vacuum cleaner. Parameters for the command. { "key": "value" } |
| vacuum.set_fan_speed | vacuum.set_fan_speed |
| vacuum.start | Start or resume the cleaning task. |
| vacuum.start_pause | Start, pause, or resume the cleaning task. |
| vacuum.stop | Stop the current cleaning task. |
| vacuum.toggle | No idea what this is doing |
| vacuum.turn_off | Stop the current cleaning task and return to home. |
| vacuum.turn_on | Start a new cleaning task. |
| vacuum.xiaomi_clean_zone | Start the cleaning operation in the selected areas for the number of repeats indicated. |
| xiaomi_remote_control_move | Remote control the vacuum cleaner, make sure you first set it in remote control mode with `remote_control_start`. |
| xiaomi_remote_control_move_step | Remote control the vacuum cleaner, only makes one move and then stops. |
| xiaomi_remote_control_start | Start remote control of the vacuum cleaner. You can then move it with `remote_control_move`, when done call `remote_control_stop`. |
| xiaomi_remote_control_stop | Stop remote control mode of the vacuum cleaner. |
Some of these services require additional key value/pairs in the JSON body. You can refer to the Home Assistant API for more information.
Questions?
Please comment below if you have any questions or suggestions. Check out the Home Automation section for more articles like these.
I'm trying new things on the social media. If you are an audiophile, or am interested in Home Automation/Systems Integration, please join the following community:
That's it for now. Still finding new ideas for home automation. Be on the lookout for more in the future.
Related News

Linking Google Assistant To Home Assistant 0.80 and above
Every new Home Assistant release brings breaking changes.
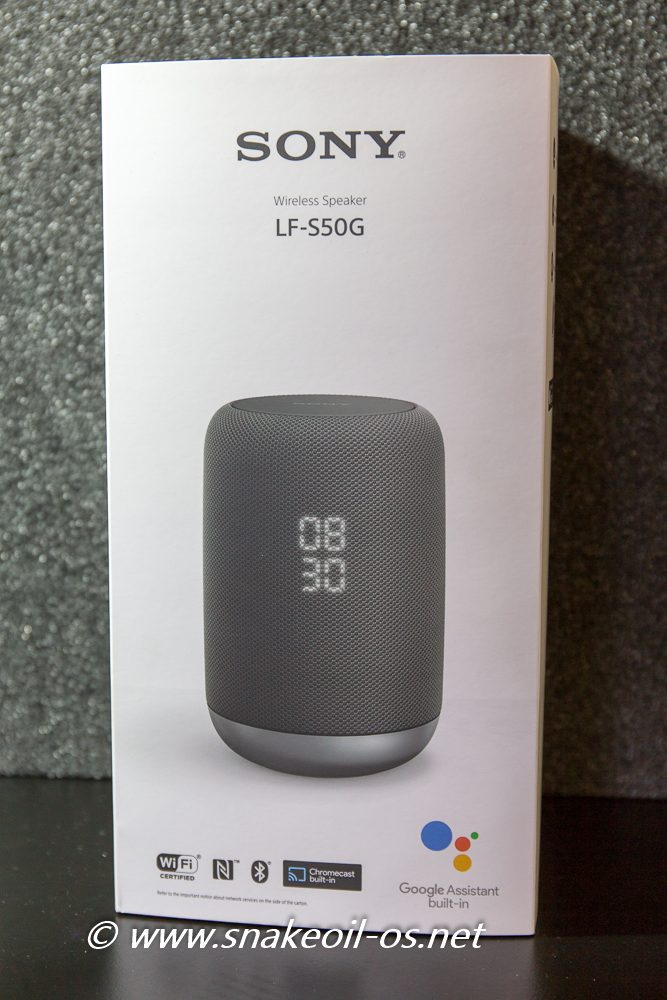
Sony LS-F50G Google Assistant
My company held a lucky draw recently and I am lucky enough to win this, a Sony LS-F50G Goog
Link Your Home Assistant To Google Assistant Home Control
Article removed as content is meant for older version of HASS and will no longer work in 0.8 and
Comments
Hi - i’m trying to get token…
Hi - i’m trying to get token by MiToolkit but still i have error "There seems to be an error with the backup, it is way to small" ;(
That would suggest the…
In reply to Hi - i’m trying to get token… by Radek (not verified)
That would suggest the backup failed. Somethings you can check:
Yes i have ADB debugging On…
In reply to That would suggest the… by agent_kith
Yes i have ADB debugging On and Java (JRE) installed ;/ phone asked me about permission and password for backup after he opened Mi app but i still got error "way too small". It looks like backup was made but didnt transfer do computer. Is it possible to find it by android file manager app??
If your device is rooted yes…
In reply to Yes i have ADB debugging On… by Radek (not verified)
If your device is rooted yes, you can just download the database and use sqlite3 to retrieve the token. The Internet already have instructions on how to do that.
When you start your MiHome app do you see youself logged in to the XiaoMi cloud, and also see your Robot Vaacuum in the list?
Do you have another Android device you can from?
can you help me with this …
can you help me with this
2017-11-27 21:32:26 ERROR (SyncWorker_0) [homeassistant.util.yaml] while scanning a simple key in "C:\Users\marci\AppData\Roaming.homeassistant\secrets.yaml", line 6, column 1 could not find expected ‘:’ in "C:\Users\marci\AppData\Roaming.homeassistant\secrets.yaml", line 7, column 1 2017-11-27 21:32:26 ERROR (MainThread) [homeassistant.config] Invalid config for [http]: string value is None for dictionary value @ data[’http’][’api_password’]. Got None. (See C:\Users\marci\AppData\Roaming.homeassistant\configuration.yaml, line 26). Please check the docs at https://home-assistant.io/components/http/ 2017-11-27 21:32:26 ERROR (MainThread) [homeassistant.setup] Setup failed for http: Invalid config. 2017-11-27 21:32:26 ERROR (MainThread) [homeassistant.setup] Unable to setup dependencies of websocket_api. Setup failed for dependencies: http 2017-11-27 21:32:26 ERROR (MainThread) [homeassistant.setup] Setup failed for websocket_api: 2017-11-27 21:32:26 ERROR (MainThread) [homeassistant.components] Testing configuration at C:\Users\marci\AppData\Roaming.homeassistant 2017-11-27 21:32:26 ERROR (SyncWorker_0) [homeassistant.util.yaml] while scanning a simple key in "C:\Users\marci\AppData\Roaming.homeassistant\secrets.yaml", line 6, column 1 could not find expected ‘:’ in "C:\Users\marci\AppData\Roaming.homeassistant\secrets.yaml", line 7, column 1 2017-11-27 21:32:26 INFO (MainThread) [homeassistant.setup] Setting up introduction 2017-11-27 21:32:26 INFO (MainThread) [homeassistant.setup] Setting up recorder 2017-11-27 21:32:26 ERROR (MainThread) [homeassistant.config] Invalid config for [http]: string value is None for dictionary value @ data[’http’][’api_password’]. Got None. (See C:\Users\marci\AppData\Roaming.homeassistant\configuration.yaml, line 26). Please check the docs at https://home-assistant.io/components/http/
Hi, it appears you have a…
In reply to can you help me with this … by Marcin (not verified)
Hi, it appears you have a mistake in your secrets.yaml file. Check out the home assistant document here
Congrats ! Great Tuto ! Next…
Congrats ! Great Tuto ! Next step is to bypass Home Server :) It will be so cool.
I was following the…
I was following the instructions : Use this file to store secrets like usernames and passwords. Learn more at https://home-assistant.io/docs/configuration/secrets/ http_password: Password vacuum: platform:xiaomi_miio host:192.168.0.107 token:634secret523756token656f70 name:MiMi
Waste of time
Waste of time
Thanks for sharing the setup…
Thanks for sharing the setup.
I was able to setup everything, except one.
When i ask my Google home to Start the vacuum. It just responds "Starting the cleaner", but it just does not start.
When i go to Applet activities in IFTTT website, it says "Applet Skipped".
However I am able to control the vacuum directly from Home Assistant. Just the integration from IFTTT to Home Assistant is broken i guess.
Can you please guide?
Looks like you’re router…
In reply to Thanks for sharing the setup… by R (not verified)
Looks like you’re router/firewall isn’t setup properly yet for the Webhook to connect back to your Home Assistant. So the good news is you’re halfway there.
I touched on this in page 9 of the tutorial with an example. Refer to your router manual and see how to setup a NAT/PortForwarding rule to map the webhook request back to your HomeAssistant in your LAN.
If you have problems just tell me the model number of your router and I’d see if I can guide you through it.
I solved the problem,…
I solved the problem, everything worked, goggle home mini responded to my command but did not operate the vacuum, I followed the guide word by word …. I solved eliminating in the "make a web request" the words written under the box "body "and now work fine.Thanks a lot.
Hi ghizmo82, How did you…
In reply to I solved the problem,… by ghizmo82 (not verified)
Hi ghizmo82,
How did you configured google home mini to work with this?
From the guide I understood that you need to have a dedicated google home server.
Best regards
You’d need to run a computer…
In reply to Hi ghizmo82, How did you… by Bluerider (not verified)
You’d need to run a computer inside your network for IFTTT. Something small like a Raspberry Pi can do it. Have a HOWTO on how to get Home Assistant up and running on a Pi here.
I tried with Sony Z5 compact…
I tried with Sony Z5 compact, newest Version of MiHome and MiToolkit Version 1.6 Usb debugging on phone MiToolktin connects to the phone, backup witout password can be creted, But afterwords in the Text field Only one line is displayed: rockrobo.vacuum.v1 - Mi Robot Vacuum - 192.xxxxxxx there is no line with the token, I tried also MiToolkit Version 1.5 with the same result.
Any help?
Same issue here. Rooted…
In reply to I tried with Sony Z5 compact… by Yaro (not verified)
Same issue here. Rooted phone, tried via Mi Toolkit and got no token line. Tried via SQLite, ran query "select token from devicerecord where localIP is ‘XXX.XXX.X.XXX’" and got nothing, also tried the device record but I can’t find anything related to the token.
Apologies for the late reply…
In reply to I tried with Sony Z5 compact… by Yaro (not verified)
Apologies for the late reply.
Recent versions of MiHome no longer store the token in the APP. You’d need to install a early version of MiHome to get the token now. For details refer to this link.
So far extracting the token from MiHome still works best - I can’t even use ‘miio –discover’ to get the Vacuum token now.
Hi, thanks for writing this…
Hi,
thanks for writing this tutorial. I was able to get most of the commands to work except set_fan_speed. How do i set this from the webhooks?
The REST API is now set_fan…
In reply to Hi, thanks for writing this… by Kien (not verified)
The REST API is now set_fan_speed, e.g.:
https://server/api/services/VACUUM/SET_FAN_SPEED?api_password=your_api_…
And the payload, is { "entity_id" : "your_vac_entity", "speed": "100" }
Speed can be a number from 0 to 100. Or high, medium, low.
Have amended the table with the new call.
Hi, everithing woks really…
In reply to The REST API is now set_fan… by agent_kith
Hi, everithing woks really fine but I still can’t get fan_speed_control to work. Can you please help me?
Here is how I did set Webhooks in IFTTT:
URL: https://*********.duckdns.org:8123/api/services/VACUUM/SET_FAN_SPEED?api_password=**********Method: POST
Content Type (optional): Application/json
Body (optional): { "entity_id" : "vacuum.xiaomi_vacuum_cleaner", "speed": "30" }
Is there anithing wrong?
Can you try and use this…
In reply to Hi, everithing woks really… by NewRaiden (not verified)
Can you try and use this payload and see what happens? (Assuming you got the name right)
{ "entity_id" : "xiaomi_vacuum_cleaner", "speed": "30" }
I followed all the steps,…
I followed all the steps, ports have been forwarded and showing as open, I can see the robot of the assistant software and I can stop/start it from there but when I try to use voice control my Google home will respond but the vacuum itself does not respond :( Have checked all passwords and codes and they are all correct any ideas ??
I followed all the steps,…
In reply to I followed all the steps,… by Simon (not verified)
That suggests the ‘that’ part of IFTTT (Page 11) is not working. Check:
Use an app like Postman and manually call the webhook with the JSON payload. did that work? What response did you get?
stupid question but how do i…
In reply to I followed all the steps,… by Simon (not verified)
stupid question but how do i connect to it from outside my network do i just type in my ddns address ?
not sure what im doing wrong…
not sure what im doing wrong but im not able to ping my ddns address, the port 8123 is open when i check but when i try to ping it if drops all packets. have also tried using the DLINK ddns service and it too fails to respond to a ping. have tried turning off the firewall on the modem, adding the pie to the dmz but it still fails. using a DLINK DSL-2890AL
ok i checked over every…
ok i checked over every thing and found a typo corrected the typo and its working thanks heaps :)
ok i checked over every…
In reply to ok i checked over every… by Simon (not verified)
Sorry for the late reply. Glad you have it sorted. You already have the API password setup if you followed this tutorial. Also make sure you have enabled SSL (See my LetsEncrypt tutorial) to encrypt your sessions, and also protect your API password from the public eye.
Does this also work with the…
Does this also work with the new version of the vacuum, I ordered the new model for my office and would be handy to have voice control of that too.
Hi Simon, can’t answer that…
In reply to Does this also work with the… by Simon (not verified)
Hi Simon,
can’t answer that as I don’t own the newer model. I assume it will still work but my answer is really a guess.
So i got the new model…
In reply to Does this also work with the… by Simon (not verified)
So i got the new model vacuum about 15min ago and can confirm this still works with the new model, now i can vac and mop my house using my voice.
Thanks for finding out the…
In reply to Does this also work with the… by Simon (not verified)
Thanks for finding out the new model (Roborock) still works 😃.
Hi, Im trying to run…
Hi,
Im trying to run everything, but on the step where homeassistant should see the device, I get stuck :( home assistant does not recognise the device? I’ve managed to get the token from my phone using an older version of the android app, so im fine there. The IP address is also easy to get. the xiaomi_mii shouldnt be changed and the name does not matter right? Any suggestions? maybe run ahead to check if the ports are open?
Roborock and homeassistant are in the same network, i’ve got no clue what’s going wrong :(
thanks for anyone who could help ;D;D
Hi Casper, Click on the …
In reply to Hi, Im trying to run… by Casper (not verified)
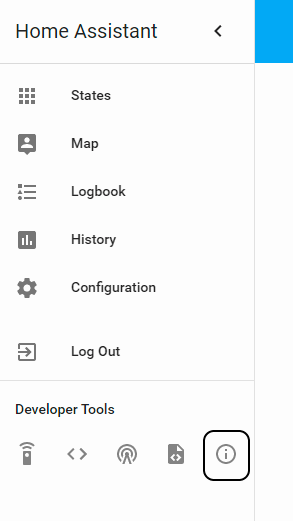
Hi Casper,
Click on the "circled i" button in developer tools (left hand side). It should show you a log of errors, an entry can probably tell you why it’s not working.
The xiaomi_miio library in HASS has been unstable of late and there are a few releases that broke the Vac robot. I’m on 0.66 right now and it’s working. If you havn’t yet perhaps also upgrade your HASS to this version and see how it goes? (Obviously look at the logs first before doing this).
I’ve figured out what is…
In reply to Hi, Im trying to run… by Casper (not verified)
I’ve figured out what is going wrong in my setup. On top of page 5 the manual tells you to add the vacuum to secrets.yaml while it should be added to configuration.yaml I think. I’ve googled around a bit, changed this and now I’m one step further. Vacuum is now recognised but still unavailable :/
Any suggestions for that? I did update to the latest version of home assistant. I own the second edition (roborock s50), maybe that changes something in the set-up?
Couldn’t edit anymore. This…
In reply to Hi, Im trying to run… by Casper (not verified)
Couldn’t edit anymore.
This is the info from the log, it keeps repeating this error every minute:
Got exception while fetching the state: No response from the device 12:16 components/vacuum/xiaomi_miio.py (WARNING) Got error when receiving: timed out 12:16 components/vacuum/xiaomi_miio.py (ERROR) Update of vacuum.the_kraken is taking over 10 seconds 12:16 core.py (WARNING)
Hi Casper, The secrets file…
In reply to Hi, Im trying to run… by Casper (not verified)
Hi Casper,
The secrets file is a place to put all your passwords. So your vac configuration is in configuration.yaml, but the token is stored in secrets.yaml.
I’d send you a email and we’d work from there privately.
I have the same issue like R…
I have the same issue like R and Simon.
I can control my robot from Home Assistant. Google Assistant responds to my command but nothing happens to the robot. I can access HA from external. I’m using HTTP. Using Postman, I get Access Error: 401 – Unauthorized. Authentication Error: Access Denied! Authorization required. I can login to HA from both internal and external using the same password that is defined in secrets.yaml.
Can you please assist?
Thanks.
Hi PJ, Did you add the api…
In reply to I have the same issue like R… by PJ (not verified)
Hi PJ,
Did you add the api_password at the end of your URL, where XXXXX is your API password?
?api_password=XXXXX
Hi Kith, Yes, this is my url…
In reply to I have the same issue like R… by PJ (not verified)
Hi Kith,
Yes, this is my url, http://xxxxxxx.ddns.net/api/services/VACUUM/TURN_ON?api_password=xxxxxxx
Hmm, that’s a weird one…
In reply to I have the same issue like R… by PJ (not verified)
Hmm, that’s a weird one. From your browser, try the following URL:
https://xxx.dyndns.net/api/services?api_password=xxxxxxxChange xxx where necessary, do you get anything or a invalid response?
From IE, I get "Can’t reach…
From IE, I get "Can’t reach this page." If I change to http, I get a Windows Security pop up box for username and password.
"The server xxx.ddns.net is asking for your username and password. The server reports that it is from GENETEC."
From Postman, "no respond’ when I use https and unauthorized when I use http.
From IE, I get "Can’t reach…
In reply to From IE, I get "Can’t reach… by PJ (not verified)
Ah, of course . I’m using port 80 for my setup, but the default is 8123 for almost everybody else.
Seems you already mapped port 80 to some video camera system in your network. Add a new NAT for 8123 and forward it to your internal HASS port (8123 by default). Once done, try it again, you should hit the right server, and then it will all work.
Port 8123 has already been…
Port 8123 has already been opened. I can access home assistant externally by xxx.ddns.net:8123.
"http://xxxxx.ddns.net:8123/api/services?api_password=xxxx" gives me a full page of all texts.
"…., "example": "vacuum.xiaomi_vacuum_cleaner"}}}, "locate": {"description": "Locate the vacuum cleaner robot.", "fields": {"entity_id": {"description": "Name of the botvac entity.", "example": "vacuum.xiaomi_vacuum_cleaner"}}}, "return_to_base": {"description": "Tell the vacuum cleaner to return to its dock.", "fields": {"entity_id": {"description": "Name of the botvac entity.", "example": "vacuum.xiaomi_vacuum_cleaner"}}}, "send_command": {"description": "Send a raw command to the vacuum cleaner.", "fields": {"command": {"description": …"
"http://xxxxx.ddns.net:8123/api/services/vacuum/turn_on?api_password=xxx…" returns 405: Method Not Allowed.
In my router and under NAT Virtual Server, I have set all external port start, external port end, internal port start and internal port end with 8123. Server IP address is of the computer running HA.
Looks like need to…
In reply to Port 8123 has already been… by PJ (not verified)
Looks like need to investigate futher, I’d take it up with you via email.
Will also create a ‘Home Automation’ section in the forums. Folks with the harder problems can create an account and post in the forums instead (https://www.snakeoil-os.net/forums/Forum-Home-Automation), as it’d be easier to communicate.
Yes because the link is…
In reply to Port 8123 has already been… by PJ (not verified)
Yes because the link is IFTTT and no Http, you try a say the phrase on your Assistant or maybe you don’t have a IP public. Sorry for my English…
Hi, How did you resolve the…
In reply to Port 8123 has already been… by PJ (not verified)
Hi,
How did you resolve the issue with the :
"returns 405: Method Not Allowed. "
Thanks
:?: I tried this and it…
:?:
I tried this and it wouldn’t show the vacuum in the HomeAssistant page. I soon learned that the vacuum settings need to go in the configuration.yaml, not the secrets file!
hi, i always do a zone…
hi, i always do a zone cleanup;, even if a do a full full house cleaning, otherwise the map is always gone so i have rooms configured for kitchen/living but after some vacumm cleans, the zone is shifted up , like 2-3 meters, then i need to a clean vacuum again to make coordnates right again, … its not the issue that the map is rotated, just everything , all zones are shifted on the X as
any ideas? i am still on stock firmware, best to update to 001412
This sounds like a firmware…
In reply to hi, i always do a zone… by fabio (not verified)
This sounds like a firmware bug. Best way is to update to the latest firmware and see if it still have this problem.
Hi there, Can you please…
Hi there,
Can you please change the instructions to use Join/Tasker on android and not raspberry?
I can confirm that I had to downgrade the MiHome app to 5.0.19 to get the token AND choose mainland China, not Europe etc…
Best regards
Add new comment